
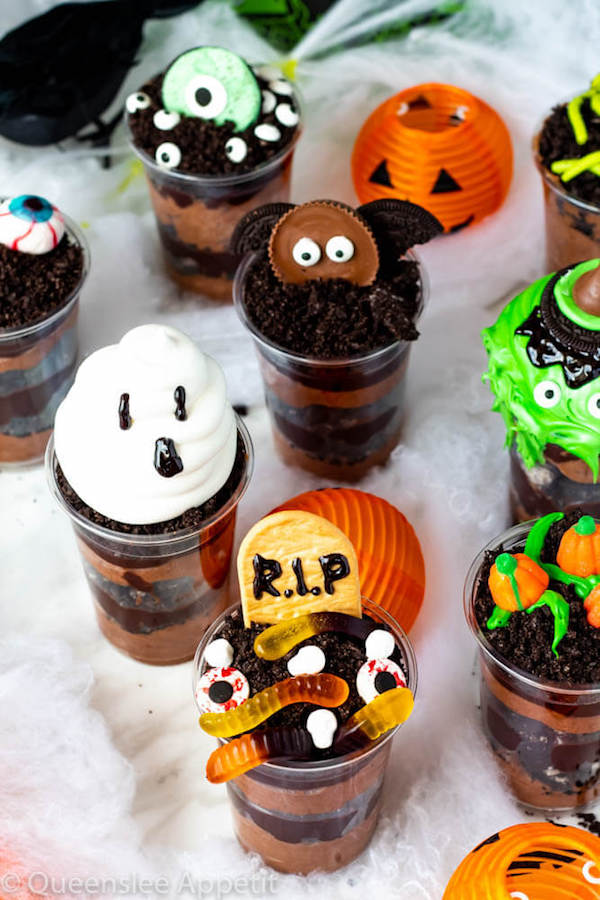
These Halloween Dirt Cups are simple and perfect treats to serve at a Halloween party. They’re super fun and easy enough to make with kids!
This post may contain affiliate links. As an Amazon Associate I earn from qualifying purchases. Please see my full disclosure policy for details.
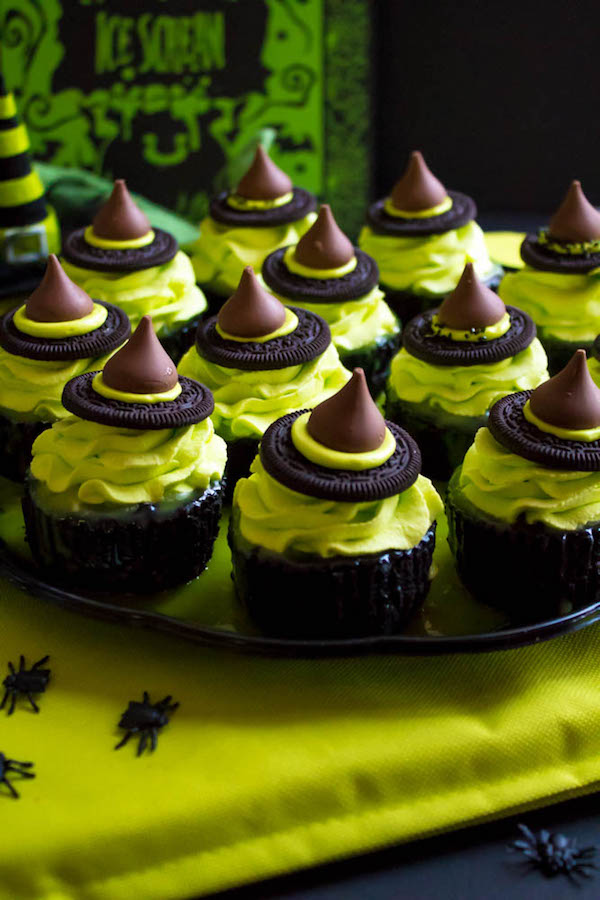
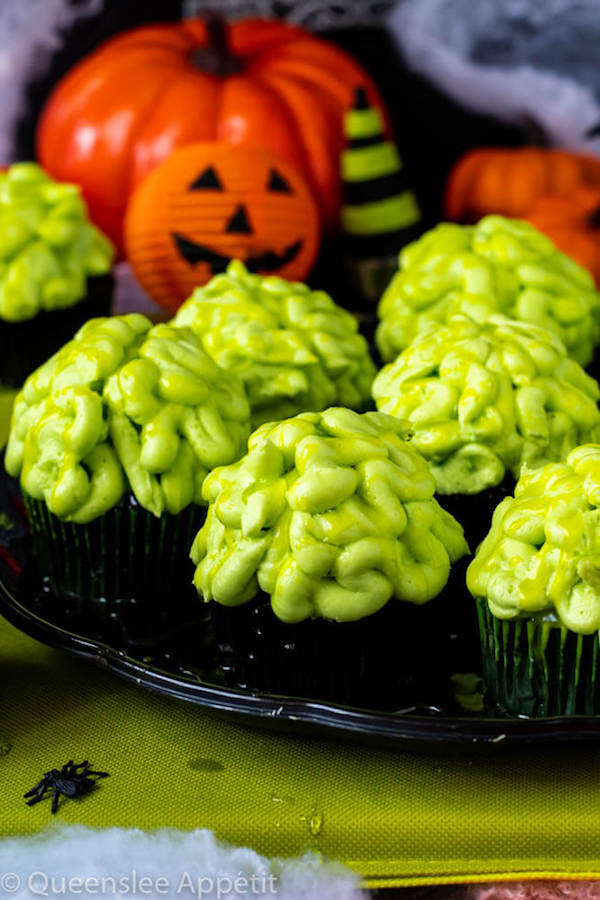
Hello friends! Yep, I have yet another Halloween themed recipe for you all! It’s basically Halloween week here on Queenslee Appétit because on Monday, I shared these Easy Halloween Brownies, then on Wednesday I shared these spooky Zombie Brain Cupcakes.
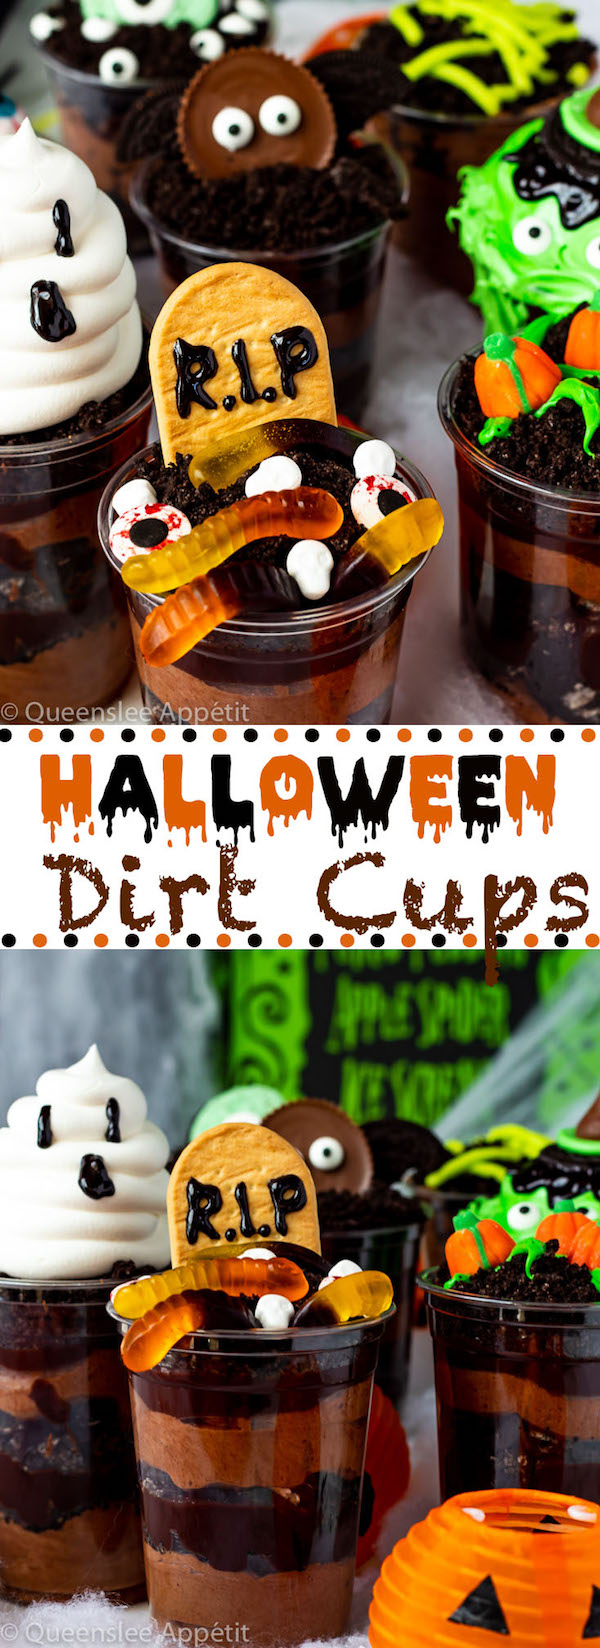
Today, I present to you goblins and ghouls: Halloween Dirt Cups!

Halloween Dirt Cups
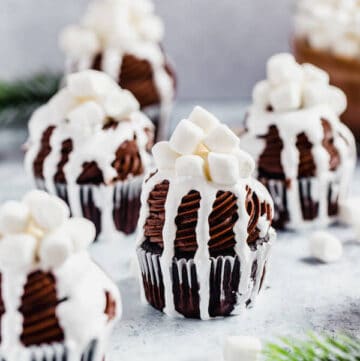
Every great Halloween party needs a quirky Halloween dessert table filled with spooktacular treats that both kids and adults will enjoy. These Halloween Dirt Cups are just that!
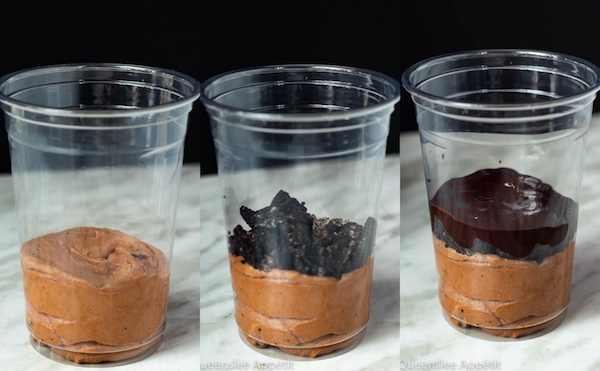
These scary good treats are so simple and fun to make. A simple chocolate mousse filling with chopped Oreos and rich ganache in between and crushed Oreos on top to act as the “dirt”.
Each cup has its own unique and terrifying Halloween themed decoration that’s super easy to make and require very few ingredients.
Simple Chocolate Mousse
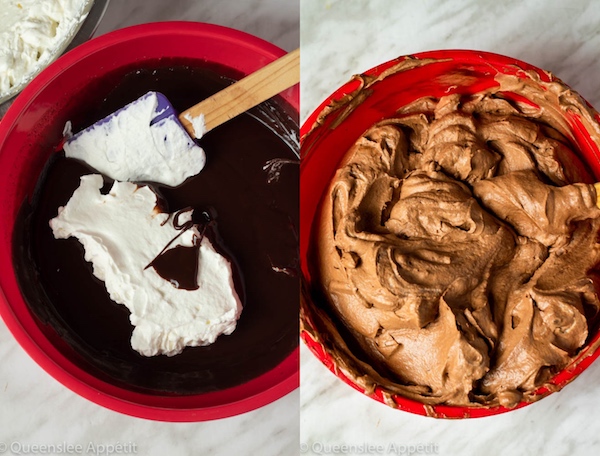
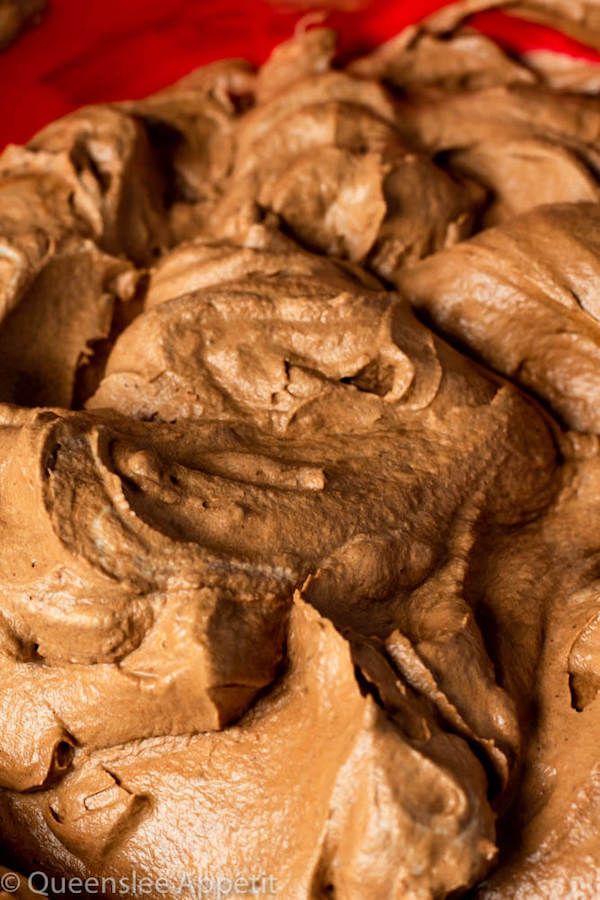
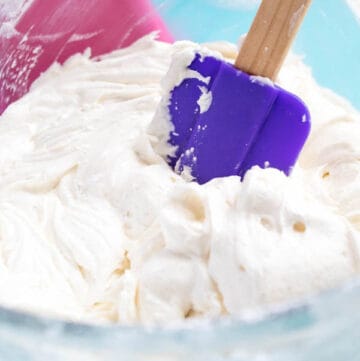
This recipe starts off with a simple chocolate mousse filling. This mousse is so light, airy, creamy and delicious and best of all, it only requires 3 ingredients: chocolate, heavy cream and powdered (icing) sugar.
The mousse comes together in just a few steps, and none of them are difficult in any way. Simply melt the chocolate with some heavy cream to make a ganache. Then whip the rest of the heavy cream with the sugar until it forms stiff peaks.
Fold the whipped cream into the ganache and boom! Easy chocolate mousse. No eggs, no gelatin, no headache.
Chocolatey Ganache “Mud”
I came up with the last minute decision to add a few layers of “mud” to these dirt cups. I wanted to use chocolate pudding for this, but I didn’t have any on hand, so I made a simple 2-ingredient ganache.
If you would prefer to use chocolate pudding, by all means buy a tub or make one batch of my Homemade Chocolate Pudding and layer it in these parfaits.
Chocolate pudding or chocolate ganache, this extra layer of dark brown “mud” contrasts beautifully with the mousse and Oreo layers. And it adds an even deeper chocolate flavour, which absolutely no one can complain about.

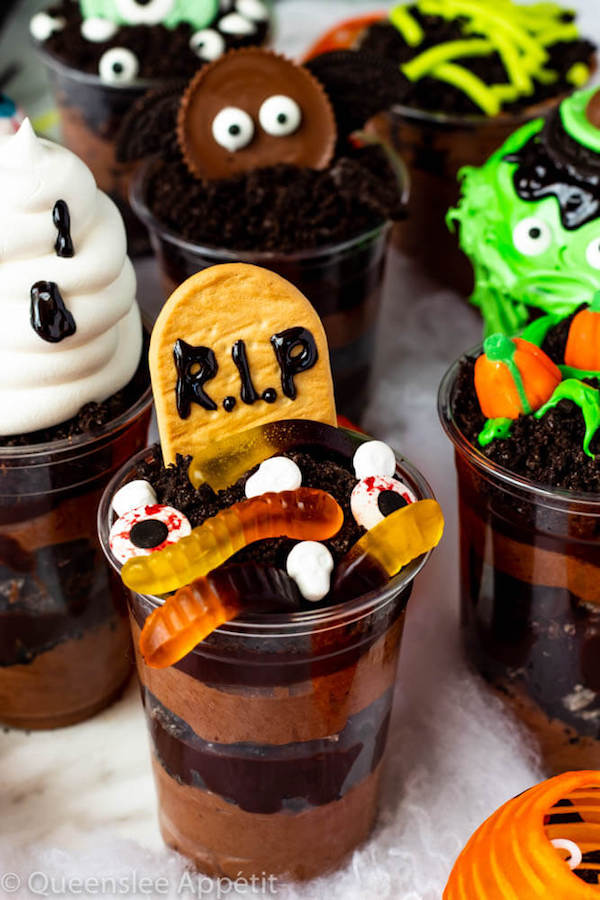
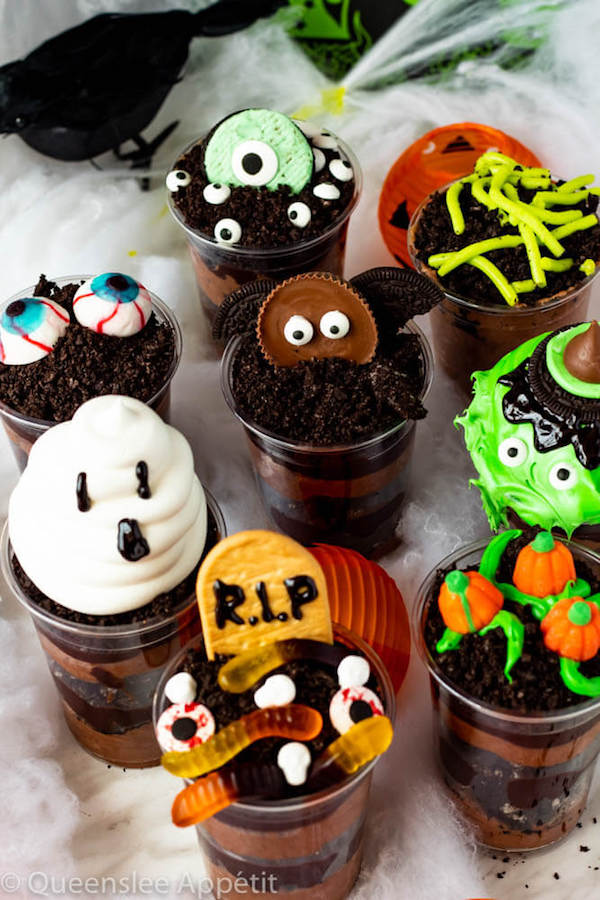
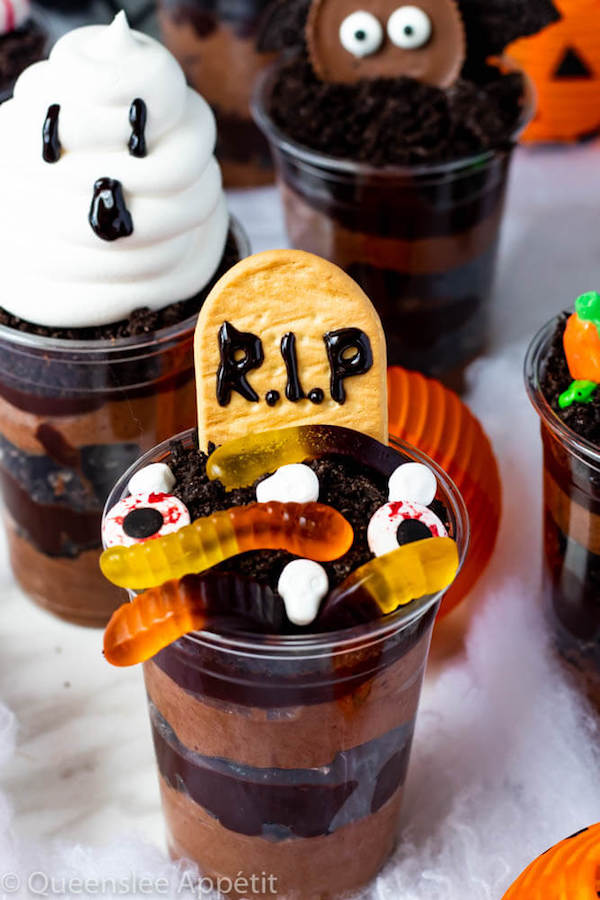
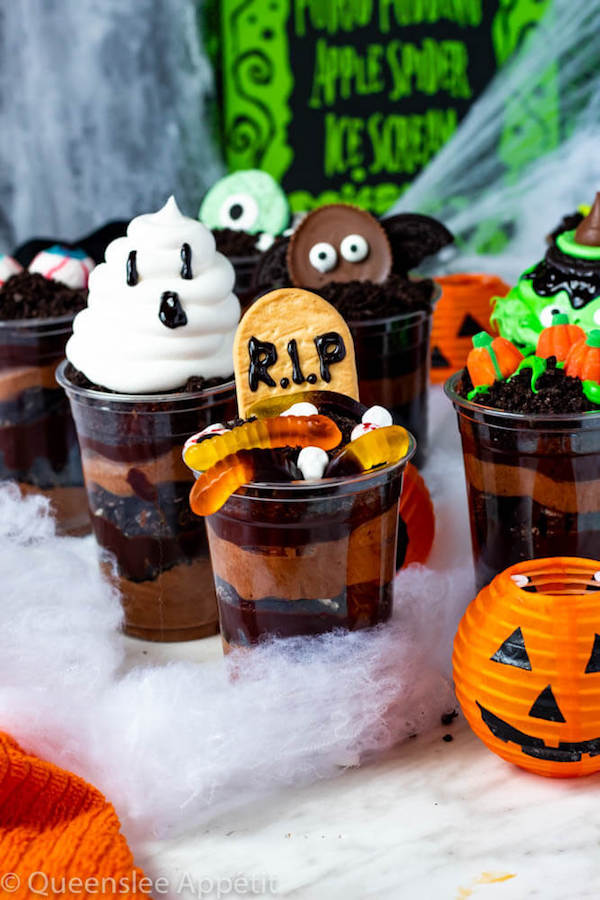
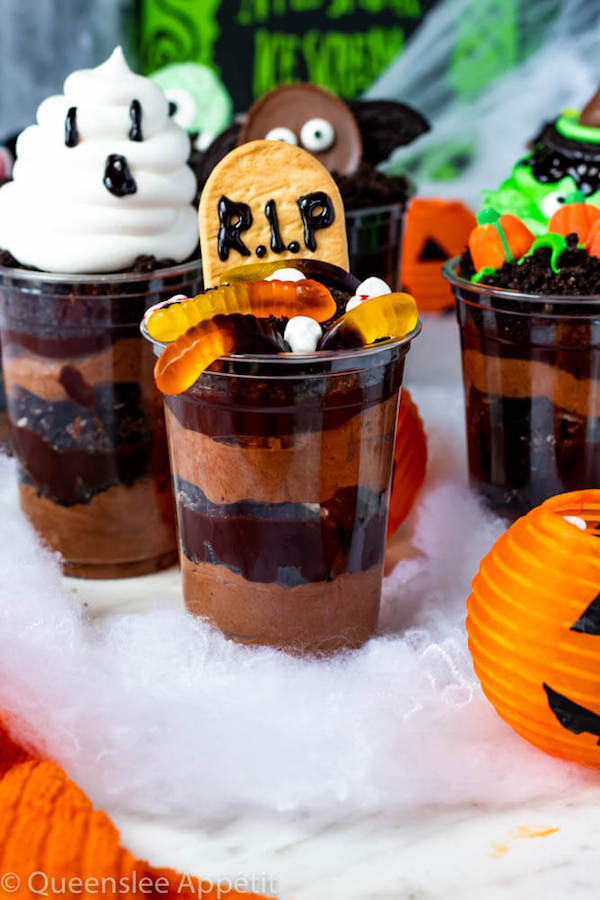
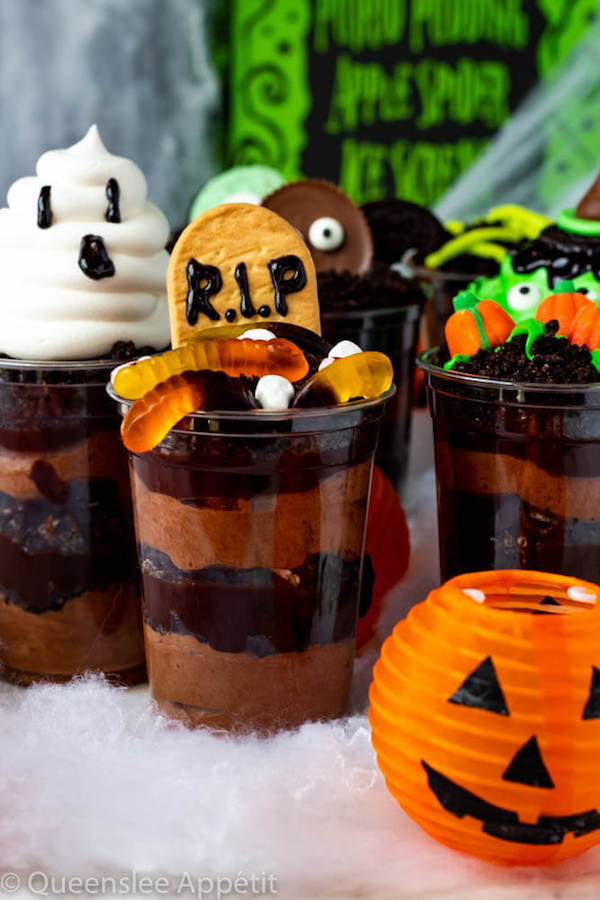
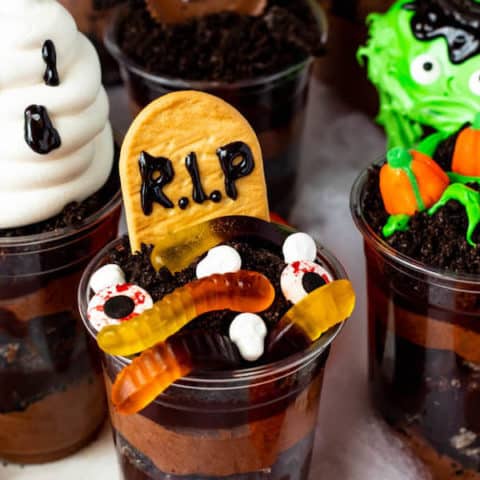
Graveyard Dirt Cups
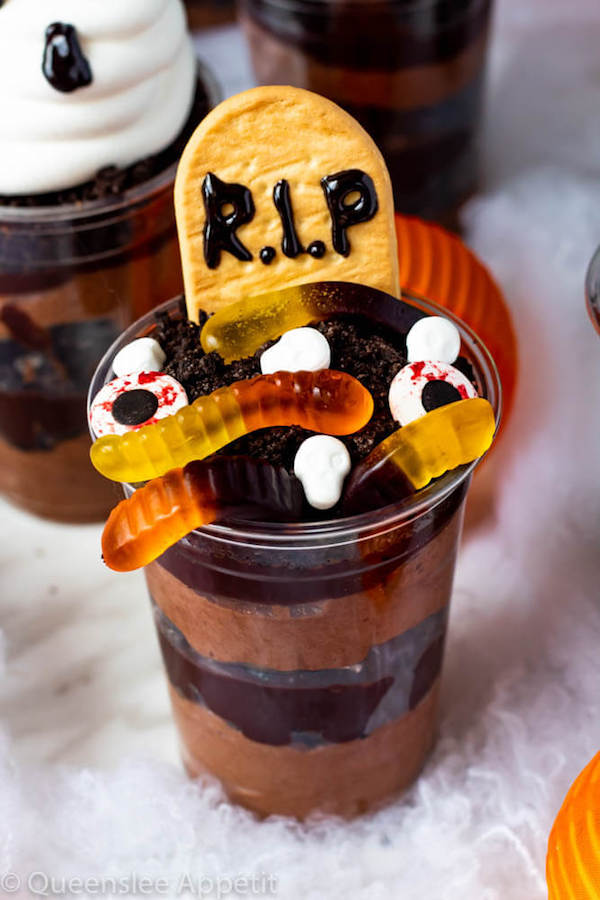
The first decoration is a simple little graveyard. For the gravestone, I used these arrowroot cookies, but you can use any oval (or rectangle) shaped cookie you can find. To write the R.I.P, I used this small black frosting tube which has the perfect sized tip for writing!
A little gravestone was just too plain, so I had to spook it up a bit. I got some Halloween gummy worms and shoved them into the Oreo dirt. I then placed some skull candies and bloodshot candy eyeballs on top. These are without a doubt my favourite of them all!
Monster Eye Dirt Cups
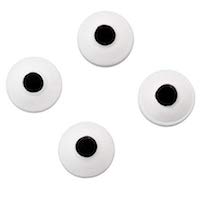
This is the easiest one of them all. All you need to do is place a large candy eye in the middle of a mint Oreo, then garnish the dirt with more mini candy eyes.
I used mint Oreos for the green colour, of course, but you could use regular oreos to make a normal eyeball. Maybe even pipe some red frosting veins around the eyeball to give it a bloodshot effect!
And if you want the Monster eye to look more like a monster, you could chop up some slivered almonds and line them below the eye to act as sharp teeth!

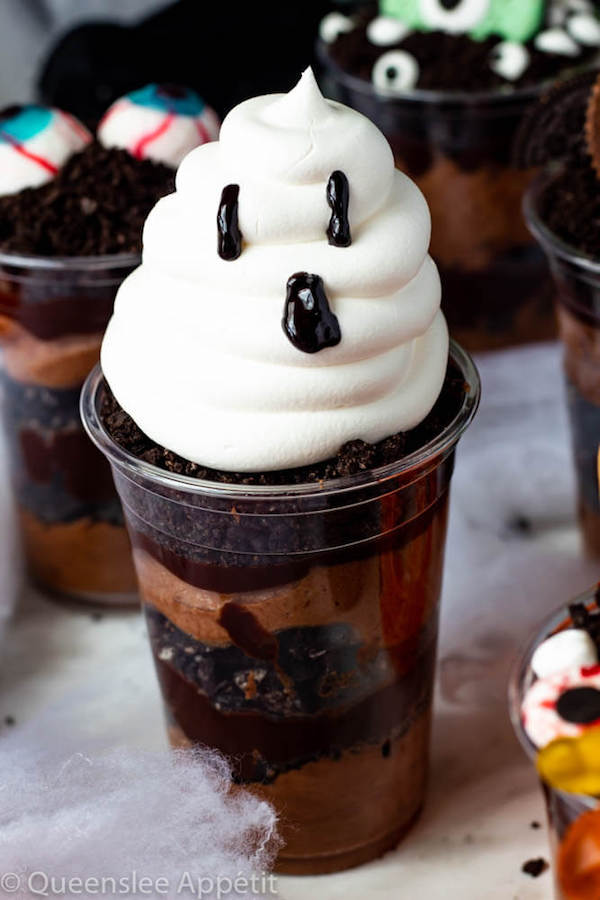
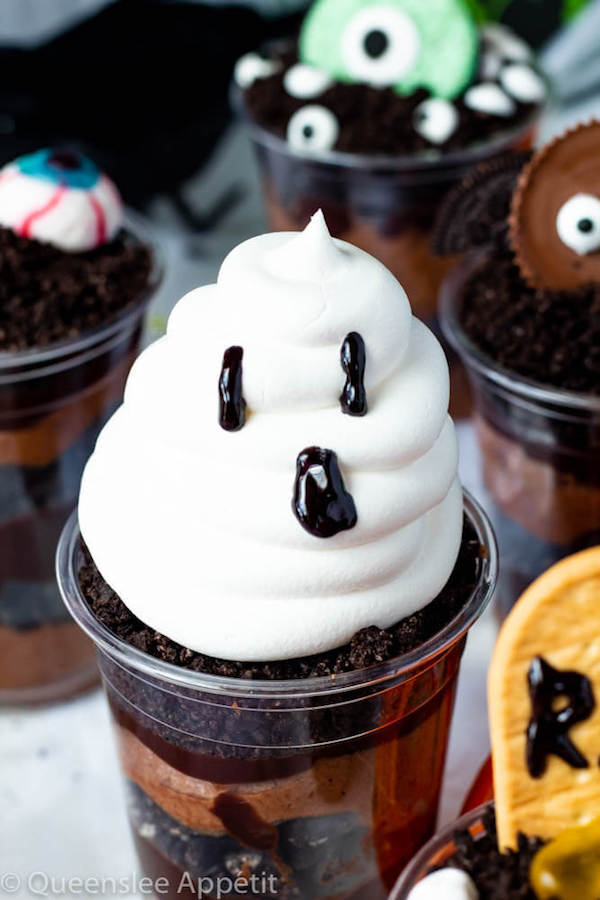
Ghost Dirt Cups
These are also unbelievably easy. I just scooped some cool whip into a piping bag fitted with a large round tip and piped a large swirl to act as the ghost head. I then used the black frosting tube to draw on the eyes and mouth.
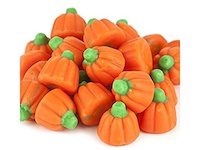
Pumpkin Patch Dirt Cups
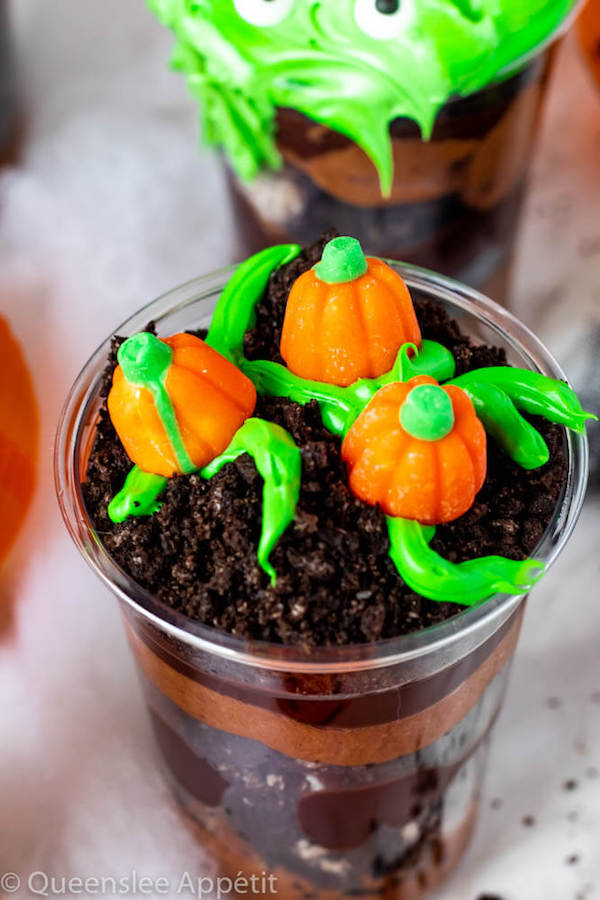
My Pumpkin Patch Poke Cake in cup form! We already have the dirt, so all we need is the vines and the pumpkins.
For the vines, I tinted some canned vanilla frosting with green food colouring, put it into a small ziploc bag and piped random squiggly lines. As for the pumpkins, I just used mellowcreme pumpkin candies.
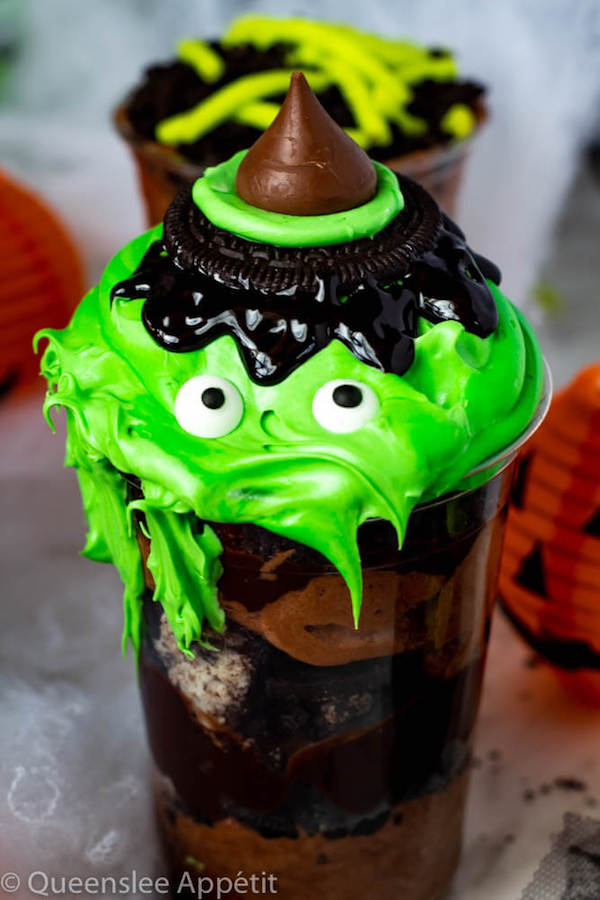
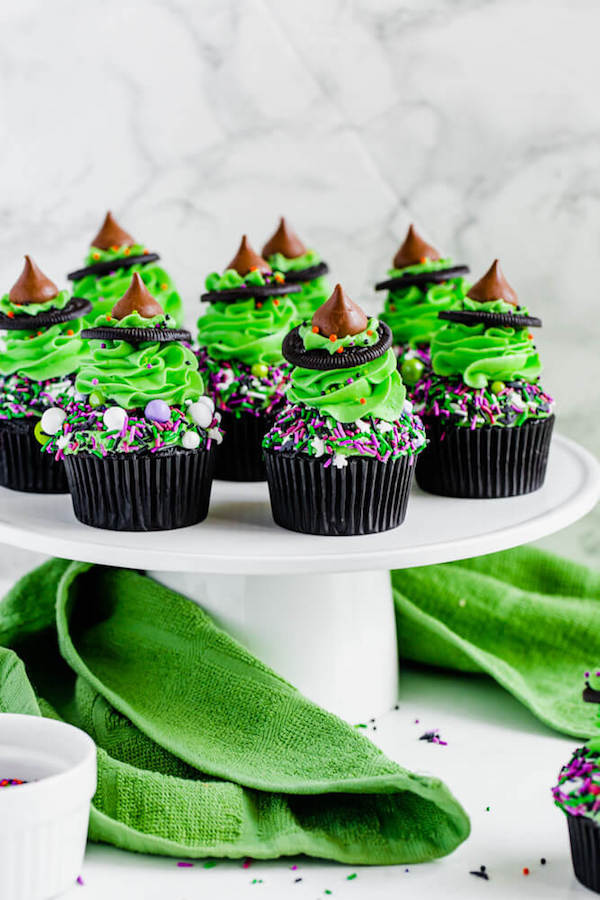
Melting Witch Dirt Cups
These didn’t turn out exactly the way I wanted but they’re still really cute. I started by tinting some canned vanilla frosting with green food colouring, then piped a swirl on top of the dirt cup.
I then made a simple witch hat with an Oreo wafer, green frosting and a Hershey’s kiss. To make it look more like a witch, I used my trusty black frosting tube to draw on some “hair” and stuck on some candy eyes.
See, these were supposed to be normal witch dirt cups, but the frosting was so soft that I decided to call it “Melting Witch Dirt Cups”. Thankfully melting witch is a popular Halloween theme, so it all worked out in the end!

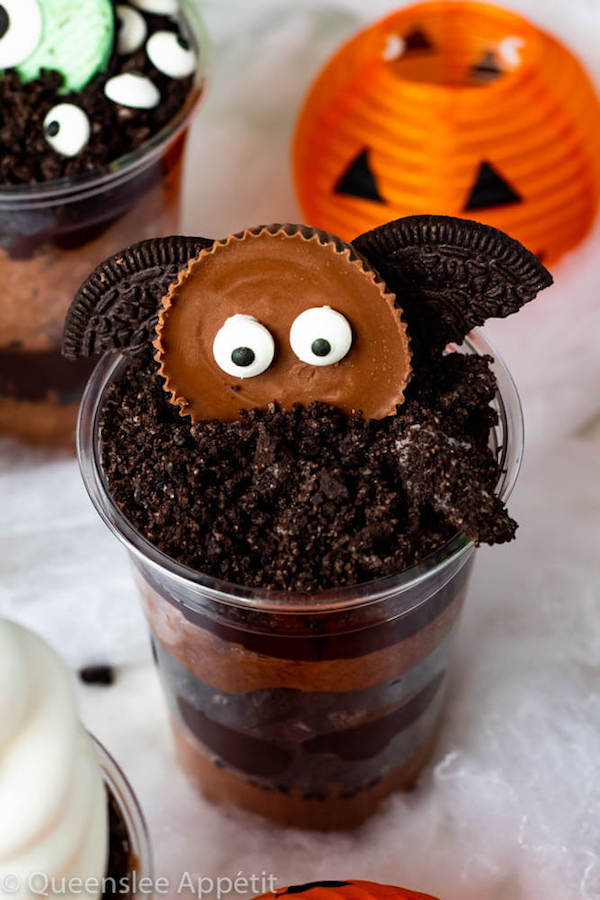
Bat Dirt Cups
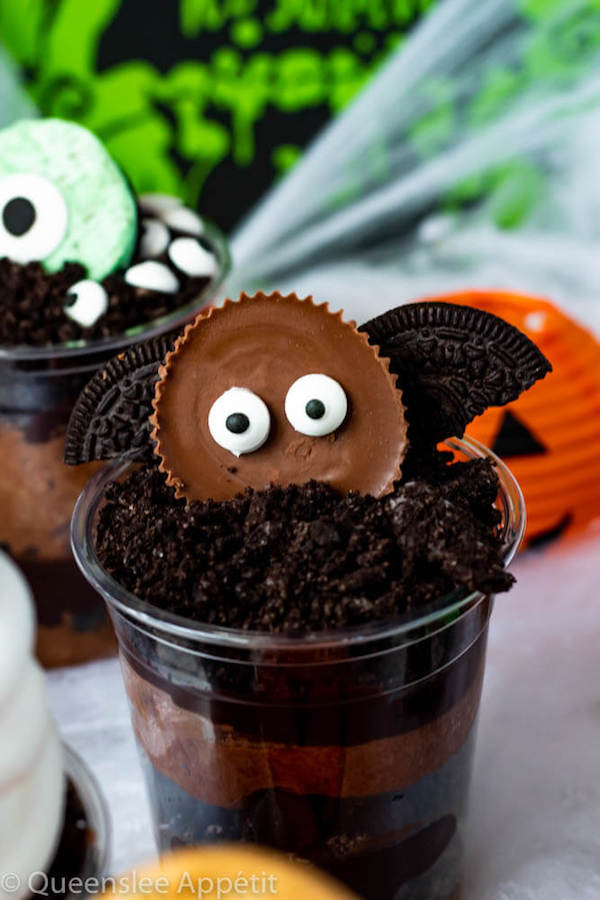
Another easy one! To create the bats, I unwrapped a large Reese’s cup. I was going to leave the wrapping on because it’s black like a bat, but in the end I wanted to be able to throw these in my mouth without any barriers. I recommend chilling the Reese’s before unwrapping so it’s easier to work with.
For the wings, I cut an Oreo wafer in half and used some canned vanilla frosting to attach them to the back for the Reese’s cup. I also used a small dab of frosting to attach some small candy eyes to the front.
You could use whole Oreos as the body instead of Reese’s cups, or you could use mini Reese’s cups to create adorable baby bats!
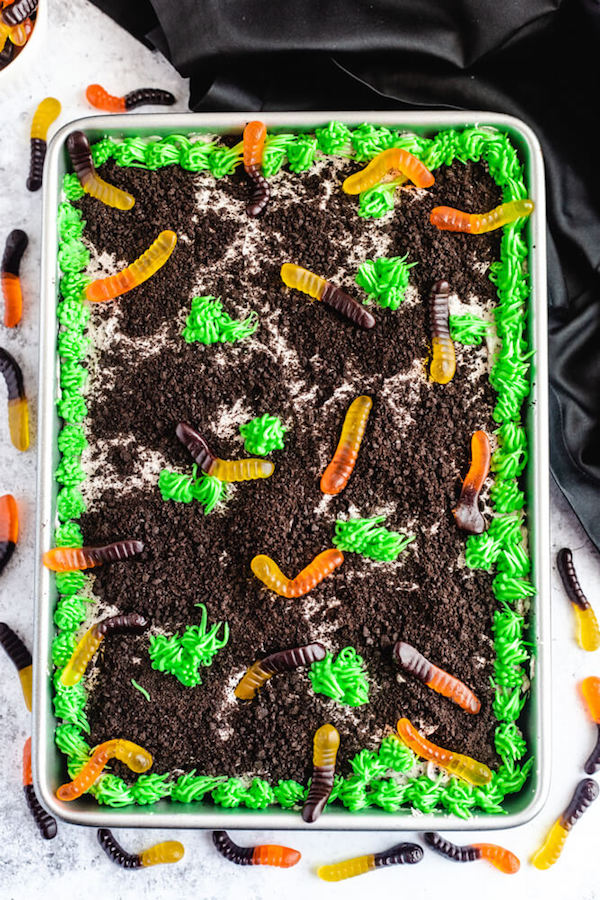
Slimy Worms Dirt Cups
These definitely didn’t turn out the way I wanted. I’ve been seeing these slimy jell-o worms all over the internet and thought I should give it a try.
There isn’t anything wrong with the recipe or anything, the problem is that my straws were too thin so they didn’t fill up properly and most of the jell-o ended up outside of the straws. So when I went to squeeze the worms out, they were too small and broken up to look realistic.
The recipe for these worms were slightly adapted from here. I included the instructions below, but they’ve made a video demonstrating how to make these so I recommend checking that out so you can be more successful than I was in the worm making field.
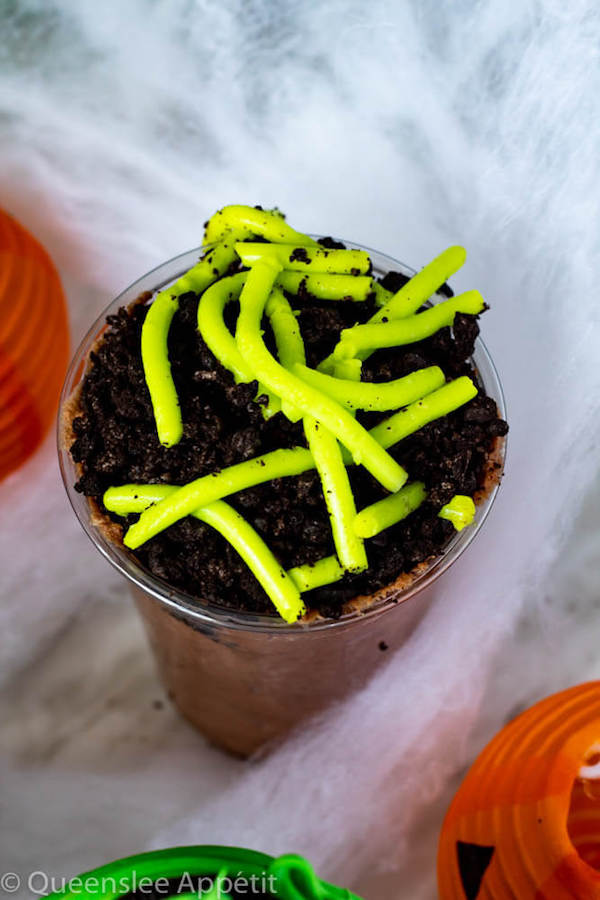
Aren’t these so adorable? They’re pretty messy to eat, so I suggest either only filling your cups halfway, or have a plate or bowl under you while digging in.
I only got 8 (10 oz.) sized cups out of this recipe, so you can double or triple the recipe if you want to serve these to a crowd. Or you could use smaller cups and get more servings out of the recipe.
Enjoy!
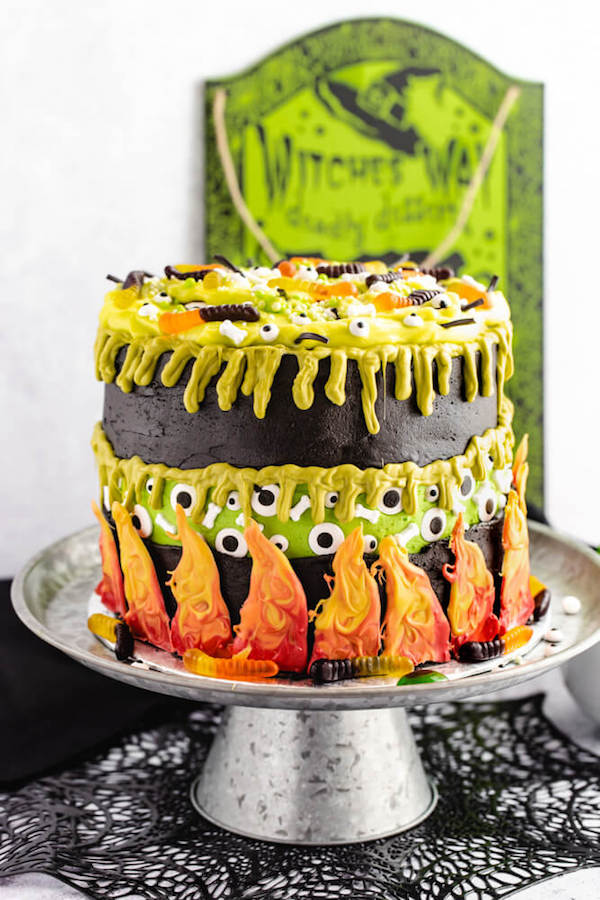
If you like Halloween Treats, You’ll love these
Witch's Cauldron Faultline Cake
Mini Melting Witch Cheesecakes
>>PIN ME FOR LATER<<
FOLLOW QUEENSLEE APPÉTIT
Like what you see? Make sure you‘re following Queenslee Appétit for more tasty recipes!
Pinterest | Instagram | Facebook | Twitter |
Have any questions about the recipe? Contact me here, and I’ll be happy to help!
Let’s get baking!
Halloween Dirt Cups
These Halloween Dirt Cups are simple and perfect treats to serve at a Halloween party. They’re super fun and easy enough to make with kids!
Ingredients
Chocolate Mousse:
- 12 oz. semisweet chocolate, chopped
- 3 cups heavy cream, divided
- ½ cup powdered sugar
Ganache (see notes):
- 2 cups dark chocolate chips
- 1 cup heavy cream
Oreo Dirt:
- 40 Oreos, divided
Slimy Worms:
- 2 cups boiling water
- 1 packet green lime jell-o
- 30g unflavoured gelatin
- ½ cup heavy cream
- Few drops neon green food colouring (optional)
- Bendy straws (that extend)
- Rubber band
Graveyard:
- Oval or Rectangle shaped cookies (I used Arrowroot Cookies)
- Black frosting tube
- Bloodshot eyeball candies
- Gummy worms
- Skull Candies
Ghost:
- 1 tub of cool whip
- Black frosting tube
Pumpkin Patch:
- ½ cup canned vanilla frosting
- Leaf green gel food colouring
- Mellowcreme Pumpkin Candies
Melting Witch:
- 1 (340g) tub canned vanilla frosting
- Few drops of neon green food colouring
- 1 Oreo, filling scraped off
- 1 Hershey's Kiss
- Black frosting tube
- Small Candy eyes
Bats:
- 1 Reese’s Cup, chilled
- 1 Oreo, halved and filling removed
- Small candy eyes
- canned vanilla frosting
Monster Eye:
- Mint Oreos
- Large candy eye
- Small Candy Eyes
Instructions
- If you plan to serve these the day of making, I recommend making the jello worms a day ahead of time so they can set up overnight.
For the Chocolate Mousse:
- Place chopped chocolate in a medium bowl. Set aside.
- Heat 1 cup of heavy cream in a small saucepan until it just begins to simmer.
- Remove hot cream from heat then pour it over the chocolate, then stir until smooth. Cover the bowl and transfer to the refrigerator to cool down, about 15-30 minutes.
- Add 2 cups of heavy cream and the powdered sugar to a stand mixer bowl fitted with a whisk attachment, or in a large stainless steel mixing bowl using a hand mixer. Whip on high speed until it reaches stiff peaks, about 4-5 minutes.
- Remove the chocolate/cream mixture from the refrigerator and stir to loosen. Use a rubber spatula to gently fold the whipped cream into the chocolate, about ⅓ at a time until fully incorporated. Cover and refrigerate until ready to use.
For the Ganache:
- Place chocolate chips in a medium bowl. Set aside.
- Heat heavy cream in a small saucepan until it just begins to simmer.
- Remove hot cream from heat then pour it over the chocolate, then stir until smooth. Set aside.
For the Oreo Dirt:
- In a food processor, or in a large ziploc bag using a rolling pin, crush 24 Oreos until large chunks remain. Pour into a bowl and set aside.
- Crush the remaining 16 Oreos until fine crumbs form. Pour into a separate bowl and set aside.
Assembly of the Dirt Cups:
- For neater layers, transfer the mousse to a large disposable piping bag or a large ziploc bag and snip off the tip.
- Pipe a layer of mousse on the bottom of each plastic cup (this recipe makes enough for 8 (10 ounce) plastic cups).
- Add a spoonful of the Oreo chunks on top, followed by a spoonful of ganache.
- Repeat with another layer of mousse, Oreo chunks and ganache. Sprinkle on a final layer of the fine Oreo crumb “dirt”. Set cups aside.
For the Slimy Worms Dirt Cups:
- Add the boiling water to a medium bowl.
- Pour in the lime jell-o and the gelatin. Using a rubber spatula, stir until jell-o and gelatin are dissolved. Allow to cool to room temperature for 30 minutes.
- Once cooled, add the heavy cream. If you want the worms to be greener, you can add a few drops of the neon green food colouring. Stir until just combined.
- Take a package of bendy straws and stretch them out so the ridges are extended. Use a rubber band to hold them all together. Place into a tall narrow cup to hold the straws up.
- Pour half of the jello mixture into a liquid measuring cup and pour into the straws. Transfer straws to freezer for 20 minutes.
- Once frozen, pour the remaining half of the jello mixture into the straws. Refrigerate for 3 hours or up to 2 days.
- Remove straws from cup and rubber band. Run them under hot water for about 2-3 seconds.
- Use your nails to squeeze the worms out of the straw. Start from the top, pinch down, then slide your nails down until the worm slips out the other end. Place on top of the oreo dirt.
- This recipe makes a lot of worms, but you can squeeze the rest into a bowl and serve as a creepy little snack to the kids or your party guests!
For the Graveyard Dirt Cups:
- Using a black frosting tube, pipe R.I.P onto the smooth side of your oval or rectangle shaped cookie. Push it into one of the dirt cups.
- Place some bloodshot eyeball candies on top of the oreo crumbs, followed by skull candies and gummy worms. I recommend pushing the worms halfway into the crumbs so it looks like they’re coming out of the dirt!
For the Ghost Dirt Cups:
- Transfer some cool whip into a piping bag fitted with a large round tip. Pipe a large swirl of whipped cream on top of the cup.
- Use the black frosting tube to draw on the eyes and mouth.
For the Pumpkin Patch Dirt Cups:
- Tint the canned vanilla frosting with some green food colouring. Transfer frosting to a small ziploc bag and snip off a small corner.
- Pipe squiggly lines on top of the dirt to represent the vines. Place a few mellowcreme pumpkin candies on top.
For the Melting Witch Dirt Cups:
- Tint the vanilla frosting with green food colouring. Transfer to a piping bag fitted with a large round tip. Pipe a swirl of frosting on top of the cup.
- Pipe a dollop of frosting on top of 1 Oreo wafer and place a Hershey’s kiss on top. Place witch hat on top of the frosting swirl.
- Using the black frosting tube, pipe hair under the hat, I just piped some triangle shapes to look like bangs.
- Place small candy eyes under the hair.
For the Bat Dirt Cups:
- Unwrap the chilled Reese’s cup. Set aside.
- Cut 1 Oreo in half and remove the filling. Take 2 halves and use a toothpick to dab some of the vanilla frosting on the corners of the wafers.
- Attach wafers to the back of the Reese’s cup to look like wings.
- Dab some more frosting on the back of the candy eyes and attach them to the front of the chocolate.
- Push the bat down into the dirt. You may need to move some of the crumbs around to hold the bat upright.
For the Monster Eye Dirt Cups:
- Split a mint Oreo in half. Place a large candy eye in the centre of the frosting filling. Press down into the dirt cup.
- Place some small candy eyes around the dirt.
- Serve and enjoy your halloween dirt cups!
Notes
- Store cups in the refrigerator for up to 2 days.
- Ganache: Instead of ganache, you can use store bought chocolate pudding or make my Homemade Chocolate Pudding.
- I only got 8 (10 oz.) sized cups out of this recipe, so you can double or triple the recipe if you want to serve these to a crowd. Or you could use smaller cups and get more servings out of the recipe.
Recommended Products
As an Amazon Associate and member of other affiliate programs, I earn from qualifying purchases.
-
 Elite Selection 10 Oz. Pack Of 100 Clear Hard Disposable Party Plastic Tumblers/Cups
 -
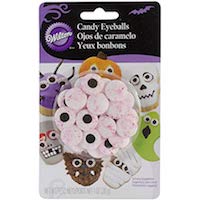
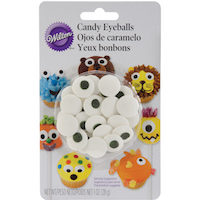
Wilton 710-0167 Red Vein Candy Eyeballs
-
Decorating Candy 1oz-Large Eyeball
-
Wilton Candy Eyeballs.88 oz.
-
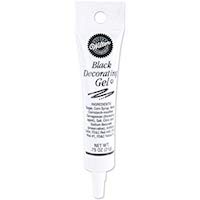
Wilton Black Gel Tube, 0.75 Oz.
-
Hamilton Beach 70740 8-Cup Food Processor, Black
-
KitchenAid KHM512ER 5-Speed Ultra Power Hand Mixer, Empire Red
-
Americolor Gel Paste Food Color, Electric Green
-
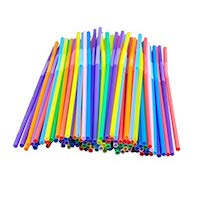
Colorful Extra Long Flexible Bendy Party Disposabl Drinking Straws, 100 Pieces
-
Fall Mellowcreme Pumpkins Candy, 1 lb - Approx. 84 Pcs

BON APPÉTIT!
Love, Dedra
DID YOU MAKE A RECIPE?
I’d love to see how it turned out! Follow me on Instagram and use the hashtag #queensleeappetit so I can see all of the Queenslee Appétit recipes you’ve made!
©QUEENSLEE APPÉTIT. All images & content are copyright protected. Please do not use my images without prior permission. If you want to republish this recipe, please re-write the recipe in your own words, or link back to this post for the recipe.

Stephanie
As I read the directions for the mousse, I dont see anything about when to put in the powdered sugar, but it mentioned mixing with the ganache, but then there is another set of direction for the ganache. Can you clarify the directions, they seemed to be mixed up a bit. This sounds deliscious with an extra layer of chocolate but sorting out the details for the steps of the recipe is a little tricky. Thank you
Dedra | QueensleeAppetit
Hi Stephanie, apologies for the confusion. I didn’t realize that I forgot to add the powdered sugar instructions, but it’s supposed to be added when whipping the cream. As for the ganache, when mixing the hot cream and chocolate together in the beginning of the recipe, we create a ganache which we later mix the whipped cream in for the mousse. The second ganache instructions was for the ganache we layer in the cups, though I see how this could be confusing so I changed the wording and updated the instructions and the post. Hopefully it’s easier to understand now!