Wanna learn how to start a food blog? Well, you've come to the right place!
If baking or cooking has become a passion of yours, a food blog is the best way to share your love of food with the world! A blog is a great place to share your recipe creations, favourite hobbies, grow your business, express yourself and connect with people all around the world who share your interests! On top of all that, if you work hard enough, a blog can become a great source of income!
Food blogs are huge on the internet. I mean, just go to Pinterest right now and you’ll see that a majority of the most popular pins are from food blogs!
I’ve loved baking since I was a child, and ever since I was 12-13, I relied on food blogs to provide me with the best recipes to impress my family with. I always looked up to food bloggers and would dream of having my own. In 2015, I created my business Queenslee Appétit and one of my main goals was to create a food blog. A year ago I finally achieved my goal and now I can proudly say I am a food blogger!
About a year or two before launching my blog, I did exactly what you’re doing right now: read a million and one posts about how to start your own food blog. I was extremely dedicated to learn about absolutely everything that goes into, not only starting, but running a food blog. I had pages and pages of notes each for a single step! I don’t even think I’ve studied this hard for an exam.
I was stressed and tearing my hair out trying to learn how to start and run a successful website! It even got to the point where I began to rethink if I should start one at all. However, as soon as I pushed all my fears and doubts aside and finally started my blog, I realized that it’s nowhere near as difficult as I thought it was. So finally, a year later, I’ve written down every step I took and every lesson I’ve learned about starting a food blog — and now I’m going to share it with you!
Disclaimer: some of the links below are affiliate links. This means, at no additional cost to you, I will earn a commission if you are to click and purchase any of these products. I have used all of the products and services listed below and trust them enough to recommend to you.
Since I didn’t want to make this post too long, I decided to split it up into 2 parts.
In part 1 of this guide, I’ll be detailing the following:
- Coming up with a Domain Name
- Finding a Hosting Company
- Installing WordPress
In Part 2, I’ll be discussing:
- Designing your Website
- Best Plugins
- Copyright
- Monetization (making $$$)
Step 1: Choose a Domain Name
Your domain name is the name of your site. This is what people are gonna know you as, so come up with something that’s easy to spell and remember. The name Queenslee Appétit comes from the word Bon Appétit, except the “Bon” is replaced with “Queenslee”. Queenslee is honestly just a random nickname I made up for myself, but it’s unique and it works! That’s very important when it comes to building your brand. You want your name to be simple and memorable, but you also want to be unique instead of being “just another food blog”. There’s lots of food blogs out here with similar names, try to come up with something creative!
Have a few domain name ideas? Check below to see if it’s available:
Step 2: Finding a Hosting Company and Registering your Domain
Once you’ve settled on your blogs name, you can do one of two things: sign up for a free website or register your domain. If you only want to share recipes for fun and have no interest in turning your blog into a full time career, I recommend signing up for a free website. Blogger, Wix and WordPress.com are great places to start a free site.
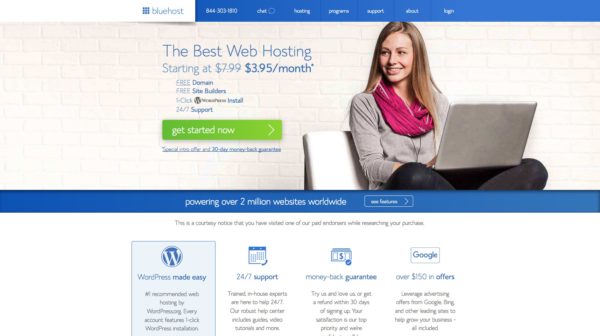
BlueHost — If you want to own your domain, I recommend finding a hosting company to purchase it from. There’s a lot of different hosting companies that sell domain names, but the most popular and the company I purchased my domain from is BlueHost. This is the absolute best option for beginners! At only $3.95/month, it’s super affordable, which is perfect if you’re on a limited budget. Another perk is that if you purchase one of their hosting plans, you get your first domain for free! They’ll also help get WordPress installed on your domain so you can have your website up and running in no time!
Let me show you how to get started with your own self-hosted site.
Are you on BlueHost? Great! Click on the “Get Started Now” button.
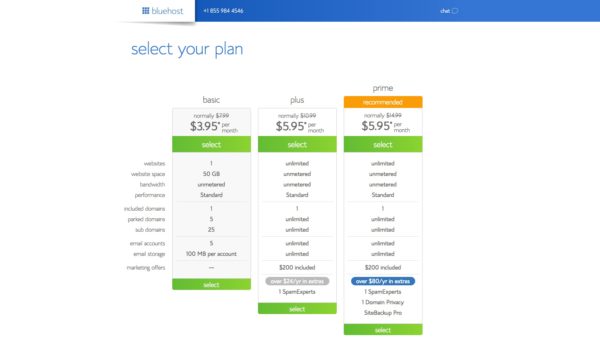
Select Your Plan
The basic plan usually starts out at $3.95/month, but the plus and prime plan are both at the same affordable price of $5.95/month with a ton of extra perks! How amazing is that?
Back to the basic pan, though. The basic plan does have some limits and I have long term plans for this blog so I ended up purchasing the PLUS plan when I started. If you’re only testing things out for now, you can start with the basic plan and upgrade at any time.
Press SELECT under the plan you decide to go with.
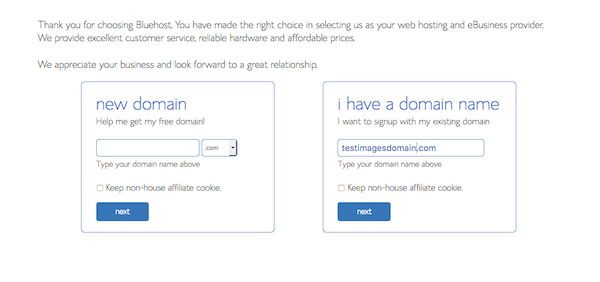
Choose Your Domain
We already talked about this above, so whatever name you’ve come up with, enter it on the left side. However, if you already have an existing domain, enter it on the right side to transfer your site hosting to BlueHost. I highly recommend leaving the extension as “.com” since that’s the most popular and trusted by consumers. See above for more tips on how to come up with a domain name.
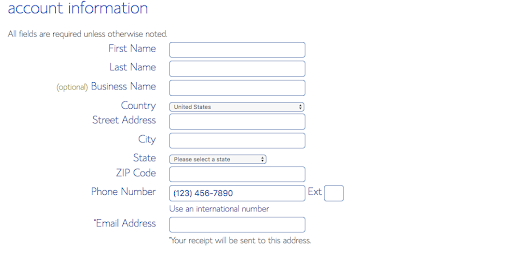
Enter Your Account Information
I recommend creating a separate email address specifically for your blog, because this is where you’ll be receiving very important information you’ll need to remember.
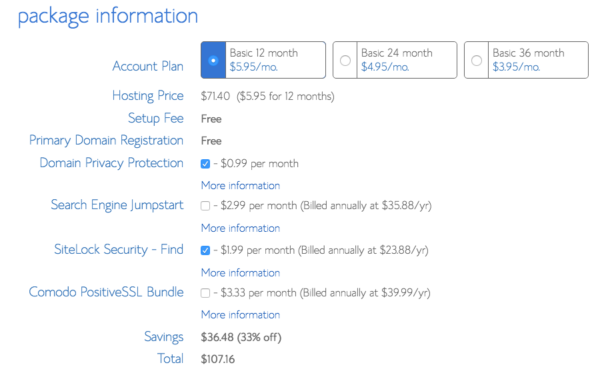
Choose Your Hosting Package
Choose an account plan that fits your budget and service needs. You should know that BlueHost charges for a year, so you can choose to pay for 1 year, 2 years or 3 years. So if you choose the 1 year package, you pay $71.40 usd. It still comes out to $3.49/month, but you pay annually. This is something I wasn’t aware of when I first started, so I want to make sure you guys aren’t surprised. Again, since my plans for my blog were long term, I went with the 36 month package. You can start off with the 12 month package and easily renew your plan before it expires.
For the add-ons, I mainly recommend the Domain Privacy Protection because it keeps your personal information private. If you’re not worried about that, then skip the add-ons and scroll down to enter your billing information.
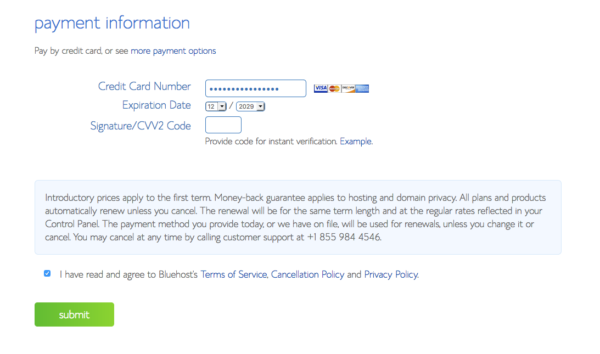
Enter Your Payment Information
Enter your payment information, then read through the terms of service, cancellation policy, and privacy notices if you’re the type of person who actually reads that (I’m not). Then check the confirm box and click SUBMIT.
Check Your Email
Once you’re purchase has been completed, BlueHost will automatically send you a welcome email. This email will include your Account Information and your FTP Information. This is very important info, so keep it safe, write it down, do whatever you need to do to make sure you don’t lose it.
Follow the instructions to create a password and your site hosting is complete!
Now it’s time to install WordPress!
Step 3: Install WordPress
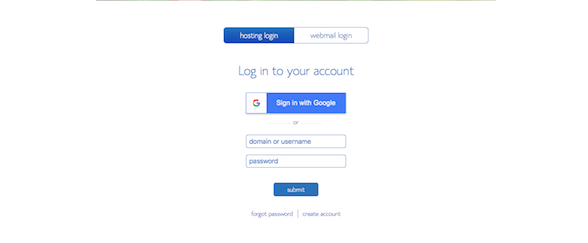
Once you’ve created a password for BlueHost, you should automatically be logged in and land on the cpanel. If not, return to the front page of BlueHost and click LOGIN. From there, enter the cpanel login info you received in the email into the hosting section.
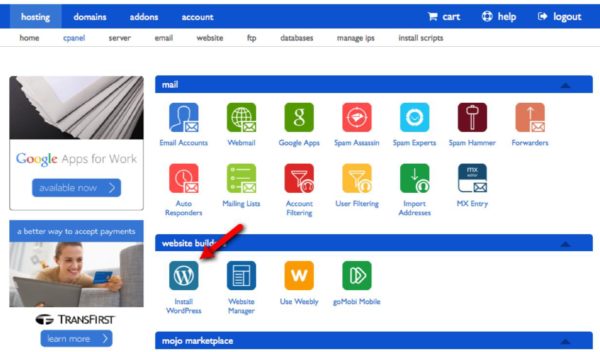
Once logged in, scroll down to the section labeled “Website” and click INSTALL WORDPRESS.
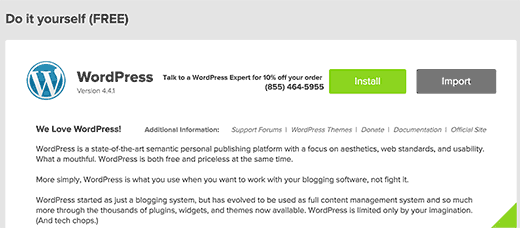
Click INSTALL.
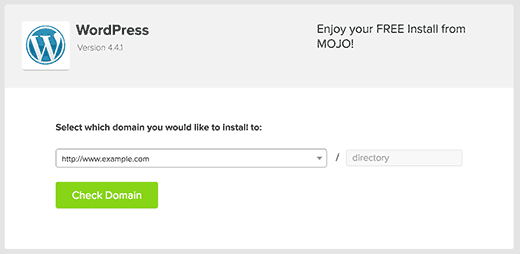
Select the domain name you want to install WordPress to, then click CHECK DOMAIN.
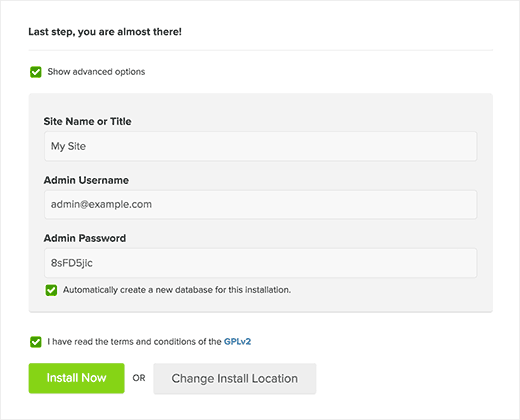
On the next screen, click “Show advanced options”. It will ask you for your Site Name, Administrative Username, password and email. You can make up a username and password. This is what you’ll use to log in to your WordPress dashboard once it’s installed, so make sure it’s not too obvious because a lot of people will attempt to log into your site. I’ll talk about that more in the next part, though.
Enter your email (again, it’s best to create a separate email address specifically for your blog). Check the box next to terms and conditions, then click INSTALL NOW.
Once it’s installed, you should receive a confirmation email with your login info. Just like your cpanel info, you should keep this in a secure place. It should also include your admin URL link which will lead you to your WordPress site control panel. I recommend bookmarking this page so you can easily access this page when you need to log in to your site.
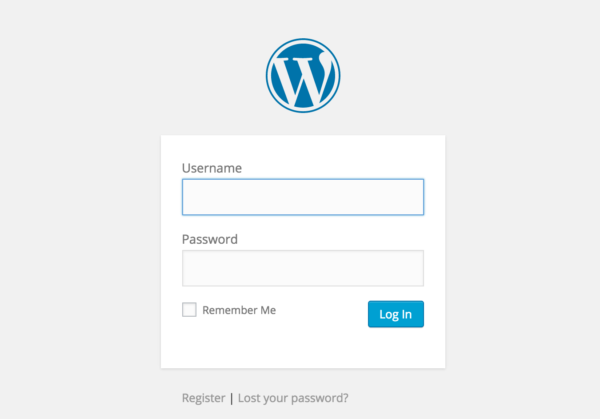
Enter your login information. Now you’re in your Dashboard! This is the behind the scenes of your website, where you can customize your entire site and write your posts!
CONGRATULATIONS, YOU NOW HAVE YOUR OWN SELF-HOSTED BLOG!!
Soon I’ll be posting PART 2 of this guide where I teach you about:
- Designing your website
- The best plugins for your site
- Copyright disclaimers
- And how to make money!





Leave a Reply