
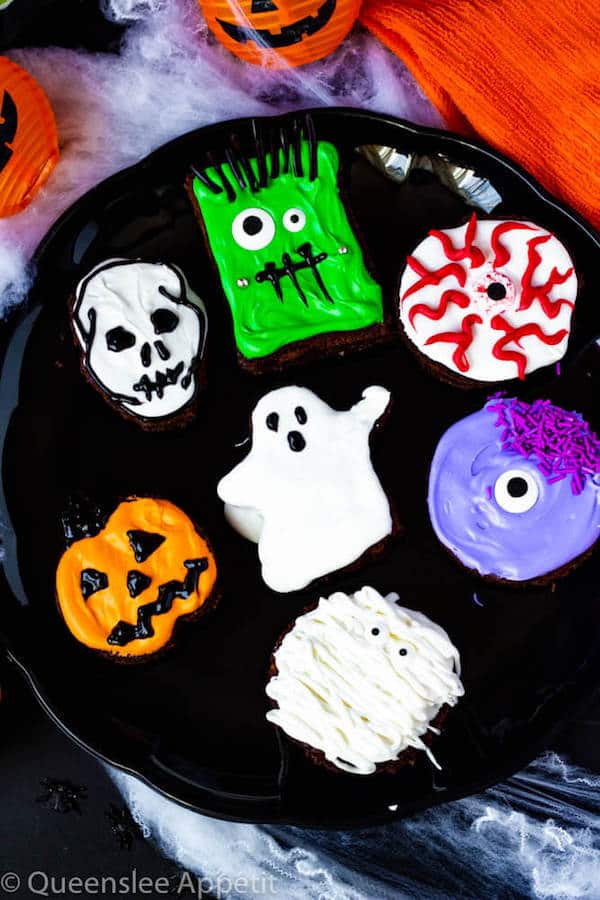
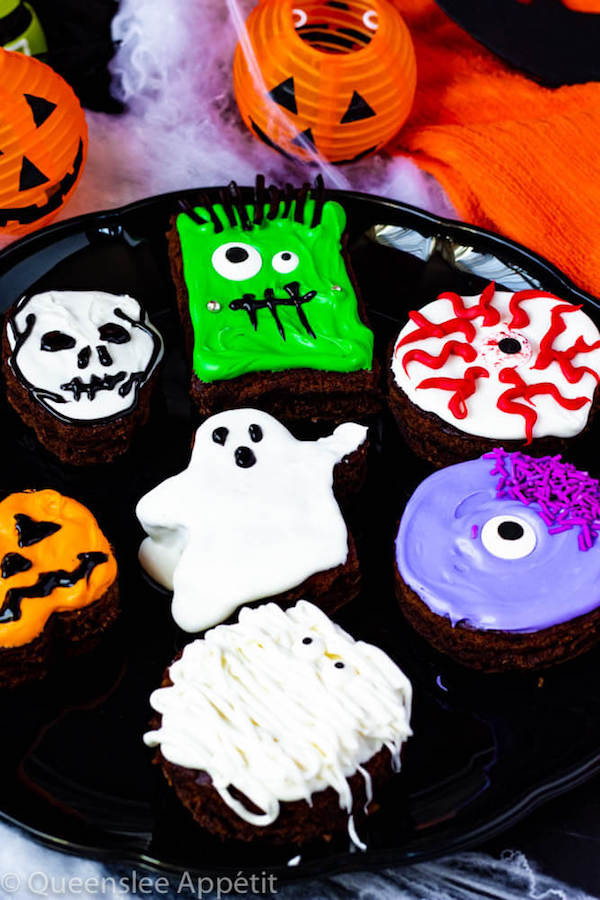
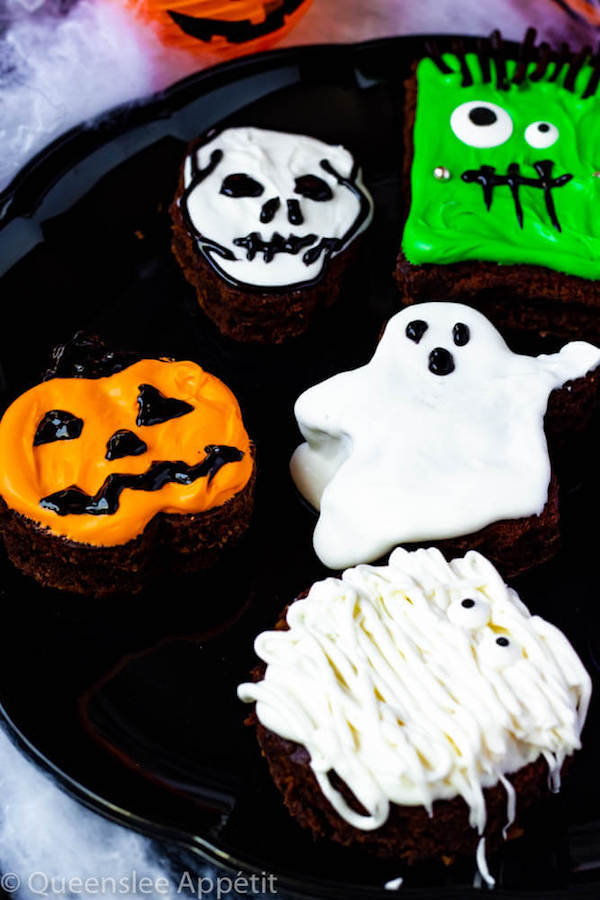
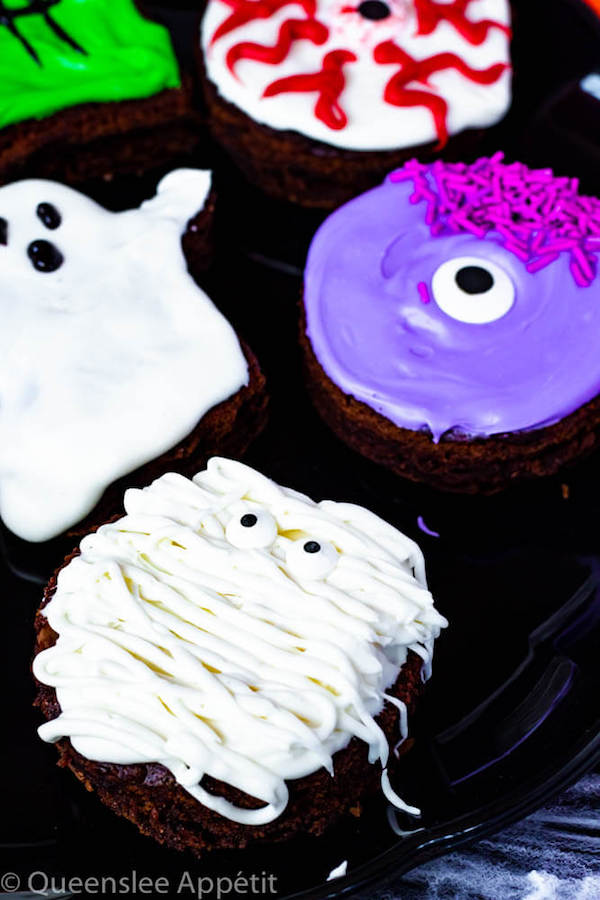
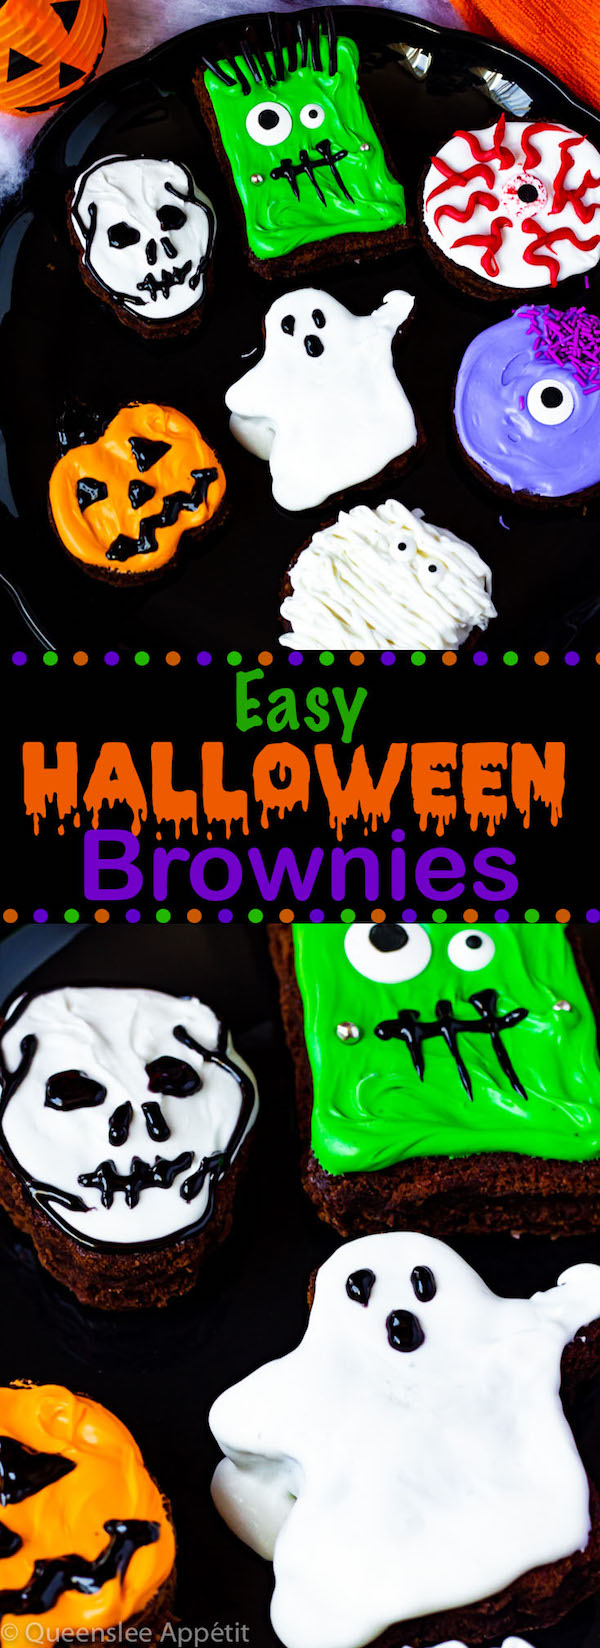
These Halloween Brownies are an easy, fun and festive treat. Serve these spooky sweets at a Halloween party, class party or wrap them up individually and hand out to friends and neighbours!
Easy Halloween Brownies
It’s time to get spooky. I have quite a few terrifyingly tasty treats to share that would make the perfect addition to your Halloween snacks table. Starting with these Halloween Brownies!
I just love themed desserts, especially ones that are simple enough to make with kids! These Halloween Brownies would make the perfect decorating activity for your kids and their friends to do on Halloween day.
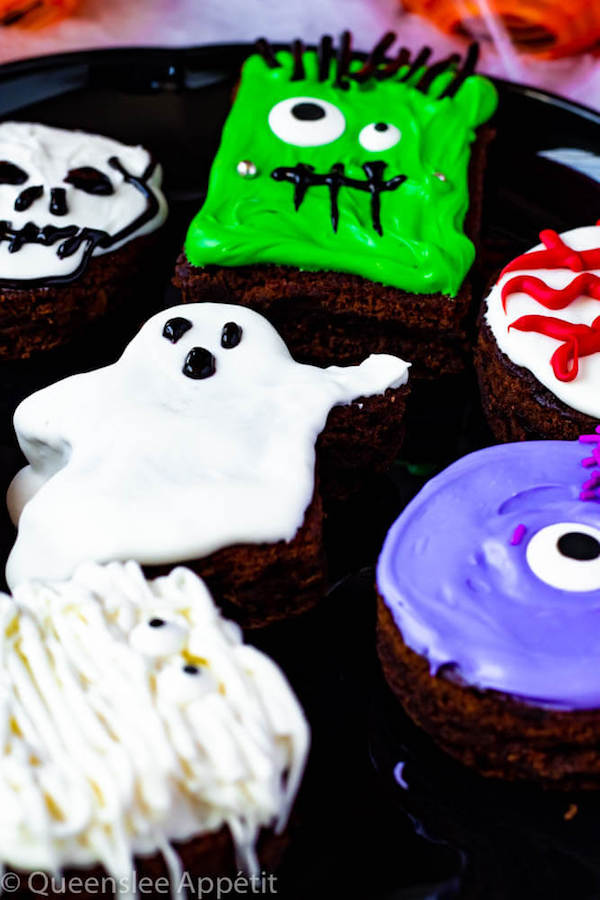
Remember, the brownies you see below are just my decoration ideas. You could totally customize them however you want with different colours, decorations and cookie cutters of your choice!
To make the brownies, I used a boxed mix because I wanted this recipe to be as easy as possible. You could use your favourite brownie recipe if you want, but that will require a lot more ingredients and effort.
NOTE: I’m gonna share a separate recipe for each brownie decoration, which will use 1 box of brownie mix.
The amount of brownies you get for each design depends entirely on the size of your cookie cutter and the size of your brownies. It took 2 boxes of brownies made in a 9x9-inch square pan to get one of each Halloween brownie, so you may need a few boxes if you want enough to serve to a crowd.
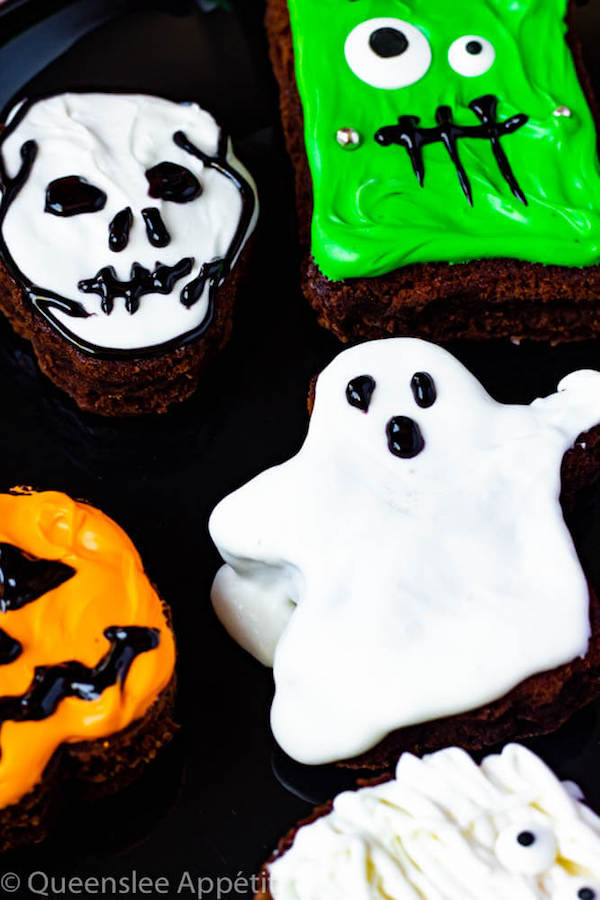
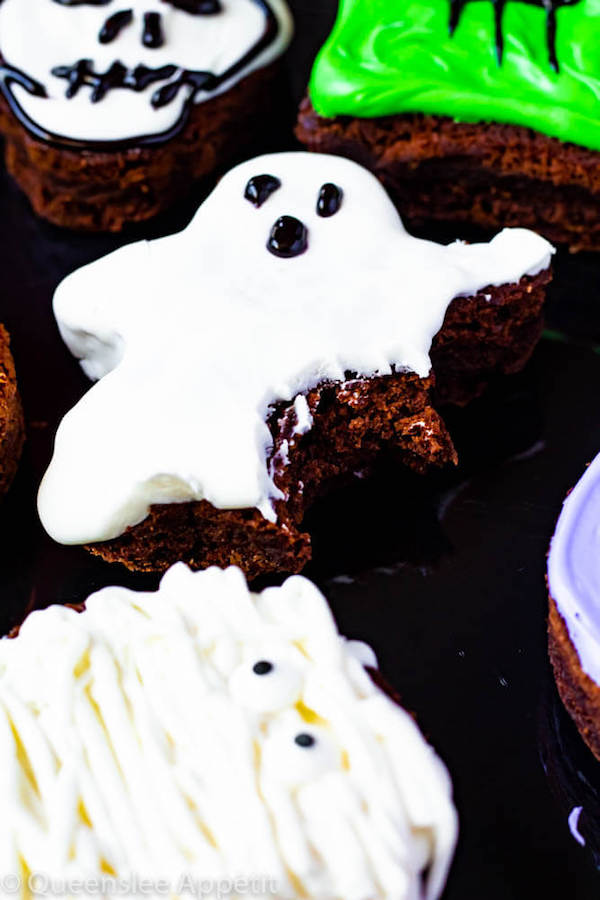
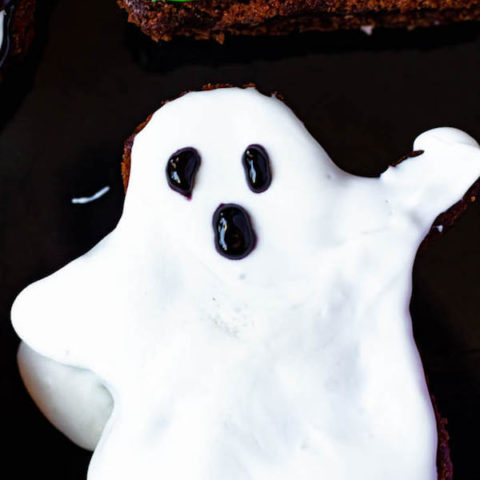
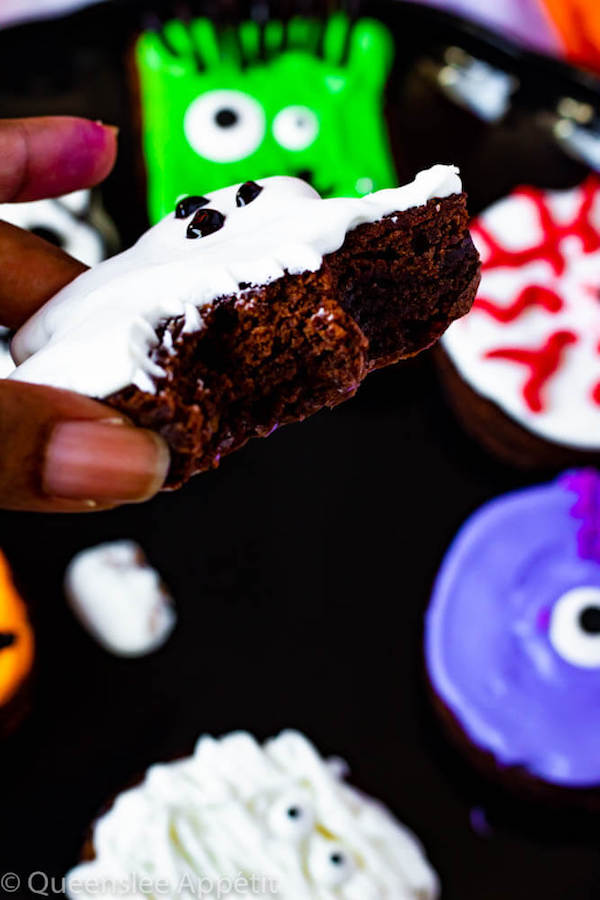
Ghost Brownies
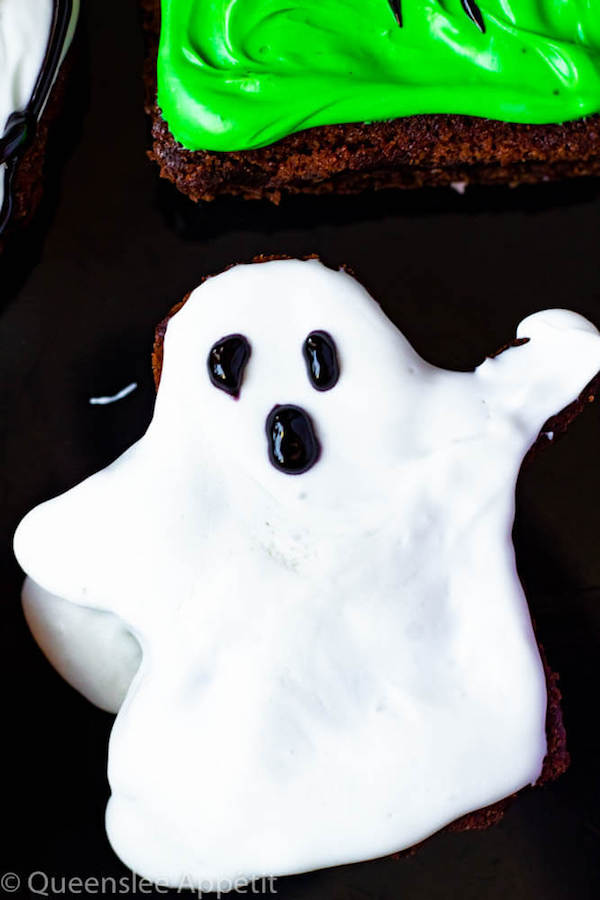
First up, the Ghost Brownies! These are the easiest brownies, so I decided to write about them first.
To make these ghoulish brownies, I used a ghost shaped cookie cutter and gently cut ghost shapes out of the cooled baked brownie.
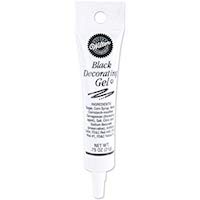
I then spread some softened canned white frosting on top and used a black tube of frosting to create a simple ghost face. It’s that easy!
If you can’t find any Ghost Cookie Cutters or Black Frosting Tubes in store, I’ve included amazon links at the bottom of the recipe if you’d like to purchase them.
Here’s the printable recipe:
Ghost Brownies
Easy Ghost Brownies
Ingredients
- 1 box of Brownie Mix + ingredients needed for preparation
- Ghost cookie cutter
- 1 - 2 cans of store bought white vanilla frosting
- Black frosting tube
Instructions
- Line your baking pan with a large sheet of aluminum foil, leaving about 2 inches hanging off the sides.
- Prepare and bake brownie mix according to package directions.
- Once baked, allow to cool for about 30 minutes before you cut out the shapes.
- Lift the brownies out of the pan, using the excess foil. Lightly spray your cookie cutter with non-stick cooking spray and gently press it down into the brownies.
- Lift out the cut out brownie and use your fingers to gently push it out onto a parchment lined baking sheet. You can flip the brownie around to the back if you want a smoother surface. Repeat with the entire batch.
- Also make sure you start from the edges of the brownies and make each cut close together so you get the most shapes out of one batch of brownies.
- Remove the lid and the foil topping from your can of white vanilla frosting and microwave for about 20-25 seconds to soften.
- Scoop a spoonful of frosting into the centre of the ghost brownie and gently spread it around until the entire brownie is covered. Repeat with remaining brownies. If you run out of 1 can of frosting, repeat step 8 with the second can. 1-2 cans should be enough for 1 batch of brownies.
- Snip off the end of the black frosting tube and pipe two eyes and an oval mouth on the head of the ghost. Serve and enjoy!
Notes
- Store in an airtight container at room temperature for up to 3 days.
- The amount of brownies you get depends on how large or small your cookie cutter is, and the size of your brownie batch. The box mix I bought was for a 9x9-inch pan, but if your brownie mix yields a 9x13-inch pan, you’ll end up with more brownies.
Recommended Products
As an Amazon Associate and member of other affiliate programs, I earn from qualifying purchases.
Jack-O-Lantern Brownies
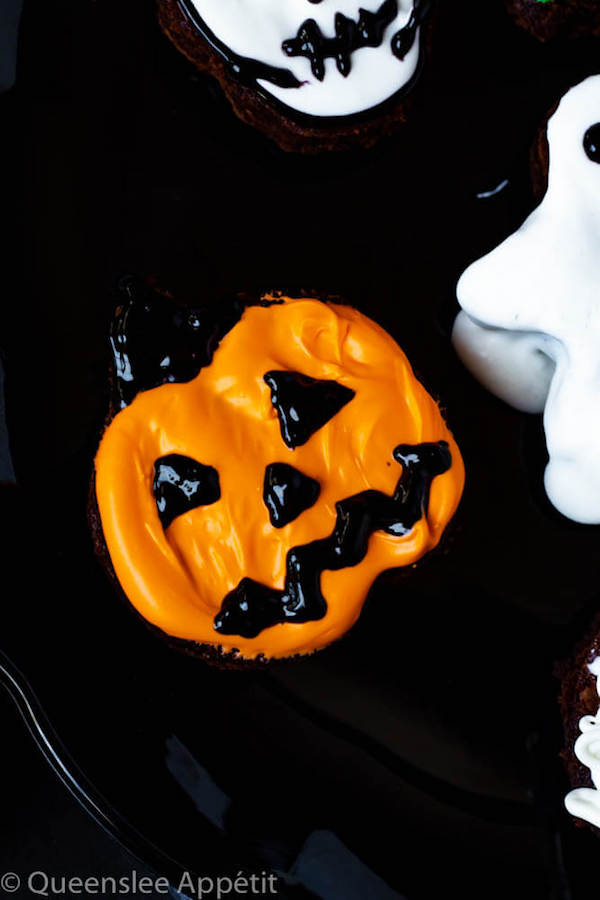
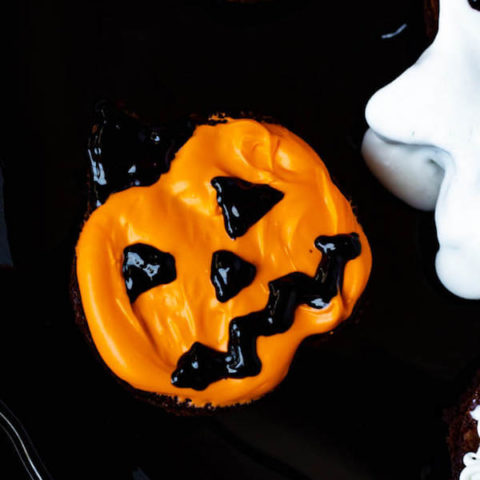
These were originally gonna be pumpkin brownies, but Jack-O-Lanterns are way spookier and Halloween themed so I went with that.
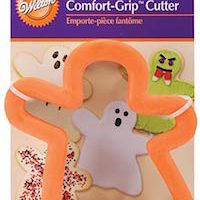
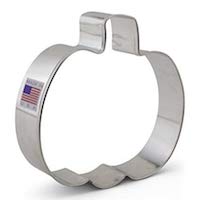
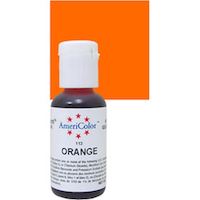
These are just as easy as the ghost brownies, except we use a pumpkin cookie cutter and orange gel food colouring.
With it being Halloween time, these Halloween themed cookie cutters should be pretty easy to find. If you can’t find any though, you can use a simple round cookie cutter or just cut the brownies into individual rectangles.
If you can’t find any Pumpkin Cookie Cutters or Black Frosting Tubes in store, I’ve included amazon links at the bottom of the recipe if you’d like to purchase them.
Here’s the printable recipe:
Jack-O-Lantern Brownies
Easy Halloween Jack-o-Lantern Brownies
Ingredients
- 1 box of Brownie Mix + ingredients needed for preparation
- Pumpkin cookie cutter
- 1 - 2 cans store bought vanilla frosting
- Orange gel food colouring
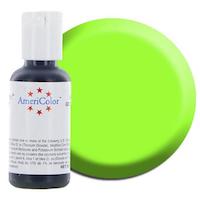
- Green gel food colouring (optional)
- Black frosting tube
Instructions
- Line your baking pan with a large sheet of aluminum foil, leaving about 2 inches hanging off the sides.
- Prepare and bake brownie mix according to package directions.
- Once baked, allow to cool for about 30 minutes before you cut out the shapes.
- Lift the brownies out of the pan, using the excess foil. Lightly spray your cookie cutter with non-stick cooking spray and gently press it down into the brownies.
- Lift out the cut out brownie and use your fingers to gently push it out onto a parchment lined baking sheet. You can flip the brownie around to the back if you want a smoother surface. Repeat with the entire batch.
- Also make sure you start from the edges of the brownies and make each cut close together so you get the most shapes out of one batch of brownies.
- Remove the lid and the foil topping from your can of white vanilla frosting and microwave for about 20-25 seconds to soften.
- Scoop out a large spoonful (or about ⅓ cup) and transfer it to a separate bowl and tint with green gel food colouring. Set aside.
- Tint the remaining frosting with orange gel food colouring. Scoop a spoonful of orange frosting into the centre of the pumpkin brownie and gently spread it around the pumpkin, but leave the stem uncovered. Repeat with remaining brownies.
- Transfer the green frosting to a small ziploc bag and snip off a tiny corner. Pipe onto the stem. I was originally going to do this, but I got lazy and just used the black frosting instead, but the green stem is more realistic.
- Snip off the end of the black frosting tube and pipe two triangle eyes and a jack-o-lantern mouth. Serve and enjoy!
Notes
- Store in an airtight container at room temperature for up to 3 days.
- The amount of brownies you get depends on how large or small your cookie cutter is, and the size of your brownie batch. The box mix I bought was for a 9x9-inch pan, but if your brownie mix yields a 9x13-inch pan, you’ll end up with more brownies.
- You can google photos of jack-o-lanterns for decoration ideas, so each brownie can have a unique face!
Recommended Products
As an Amazon Associate and member of other affiliate programs, I earn from qualifying purchases.
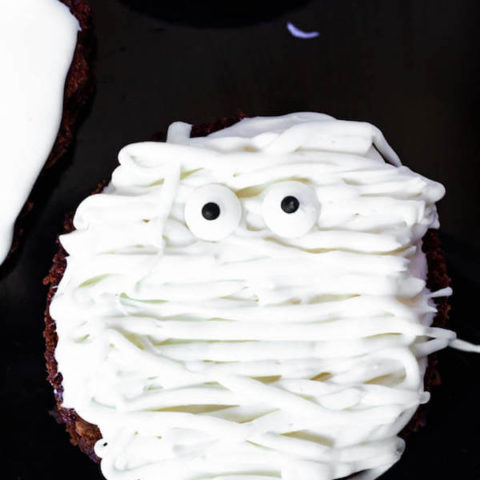
Mummy Brownies
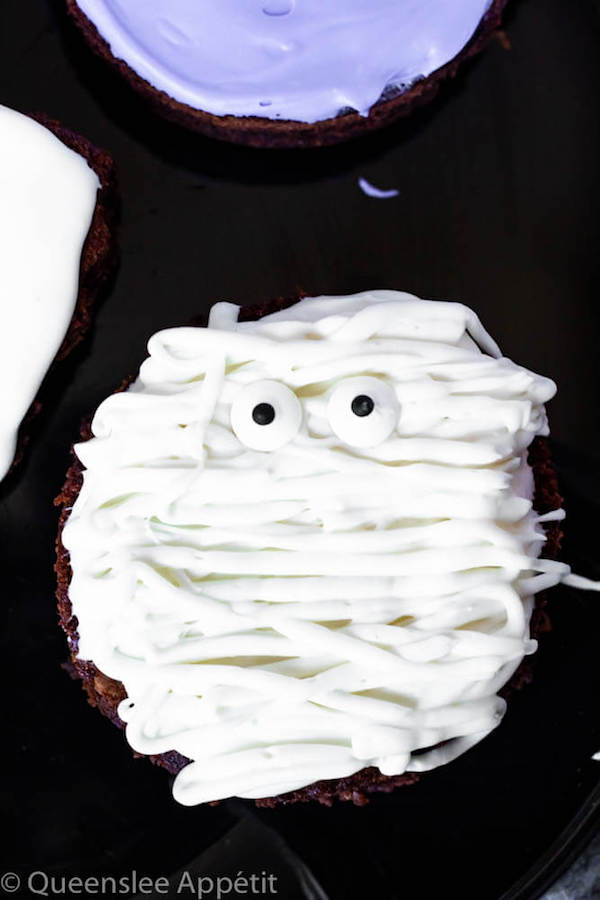
How could I not include the classic mummy dessert? They’re super easy to make because it’s literally just bandages and eyes.
For the mummy brownies, I originally planned on using a Gingerbread man cookie cutter to give them a full body, but I didn’t have enough brownie to cut it out so I had to settle for a simple circle.
Again, these can also be cut into simple rectangle bars instead of fancy shapes, they’ll still look like mummy’s when you’re done!
If you can’t find any edible candy eyes in store, I’ve included amazon links at the bottom of the recipe if you’d like to purchase them.
Here’s the printable recipe:
Mummy Brownies
Easy Mummy Brownies
Ingredients
- 1 box of Brownie Mix + ingredients needed for preparation
- Circle OR Gingerbread Man cookie cutter (you can also cut the brownies into rectangles)
- 2 cans of store bought white vanilla frosting
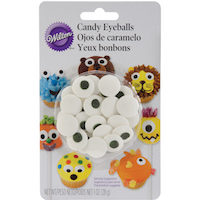
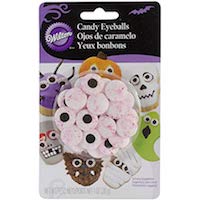
- 1 package small edible candy eyes
Instructions
- Line your baking pan with a large sheet of aluminum foil, leaving about 2 inches hanging off the sides.
- Prepare and bake brownie mix according to package directions.
- Once baked, allow to cool for about 30 minutes before you cut out the shapes.
- Lift the brownies out of the pan, using the excess foil. Lightly spray your cookie cutter with non-stick cooking spray and gently press it down into the brownies.
- Lift out the cut out brownie and use your fingers to gently push it out onto a parchment lined baking sheet. You can flip the brownie around to the back if you want a smoother surface. Repeat with the entire batch.
- Also make sure you start from the edges of the brownies and make each cut close together so you get the most shapes out of one batch of brownies.
- Remove the lid and the foil topping from your can of white vanilla frosting and microwave for about 20-25 seconds to soften.
- Scoop a spoonful of frosting into the centre of the brownie and gently spread it around until the entire brownie is covered. Repeat with remaining brownies.
- Repeat step 7 with the second can of frosting. Pour frosting into a ziploc bag and snip off a small corner.
- Pipe horizontal lines all over the brownies until it’s completely covered, leave some space between lines for the eyes.
- Place 2 candy eyes on top of the brownies. Serve and enjoy!
Notes
- The amount of brownies you get depends on how large or small your cookie cutter is, and the size of your brownie batch. The box mix I bought was for a 9x9-inch pan, but if your brownie mix yields a 9x13-inch pan, you’ll end up with more brownies.
- You can cut these brownies using a gingerbread man cookie cutter to create full-bodied mummies instead of just a head.
- These can also be cut into simple rectangle bars instead of fancy shapes, they’ll still look like mummy’s when you’re done!
Recommended Products
As an Amazon Associate and member of other affiliate programs, I earn from qualifying purchases.
Monster Brownies
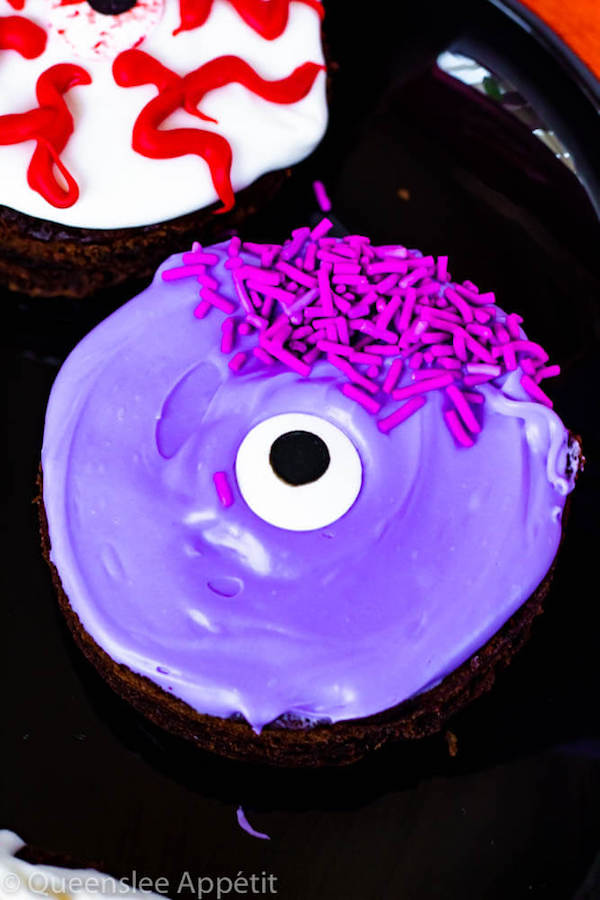
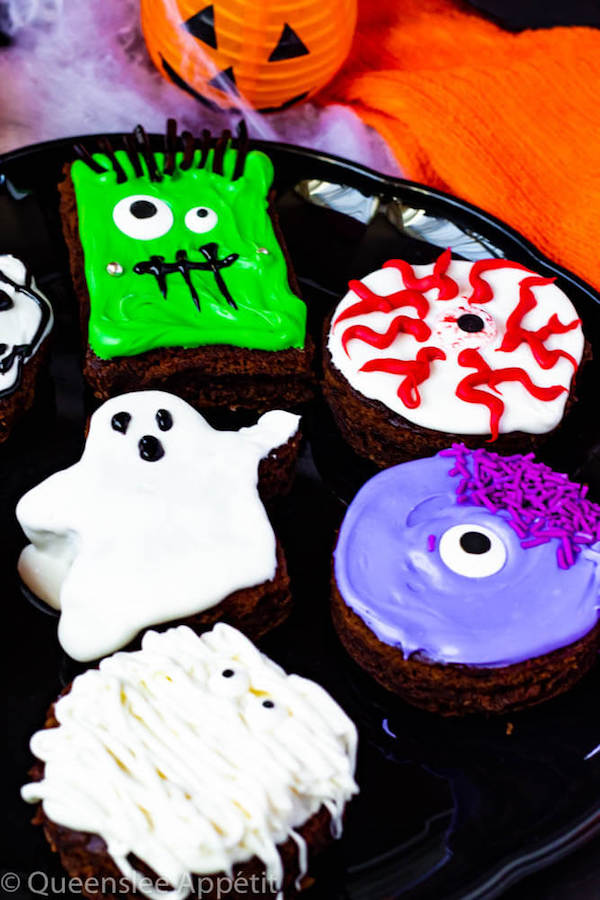
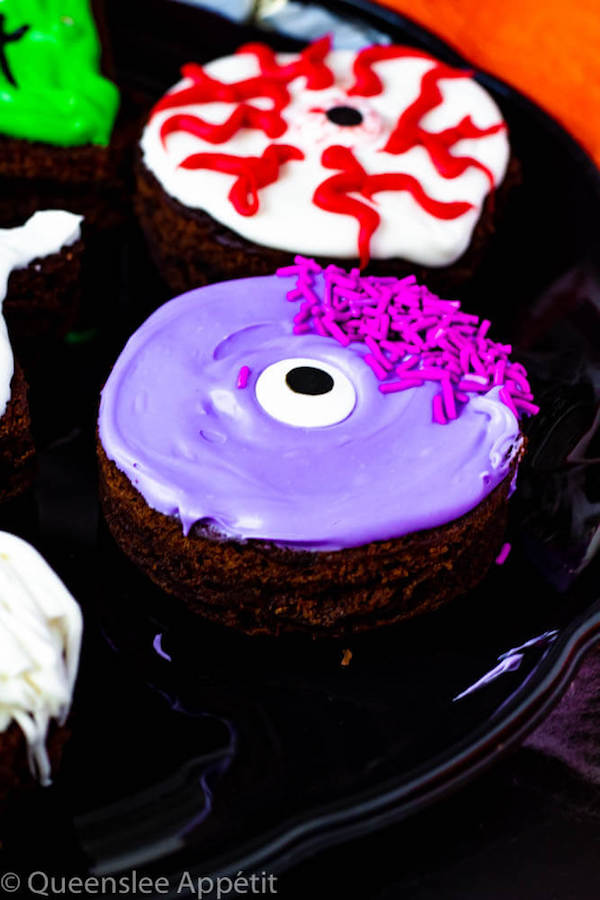
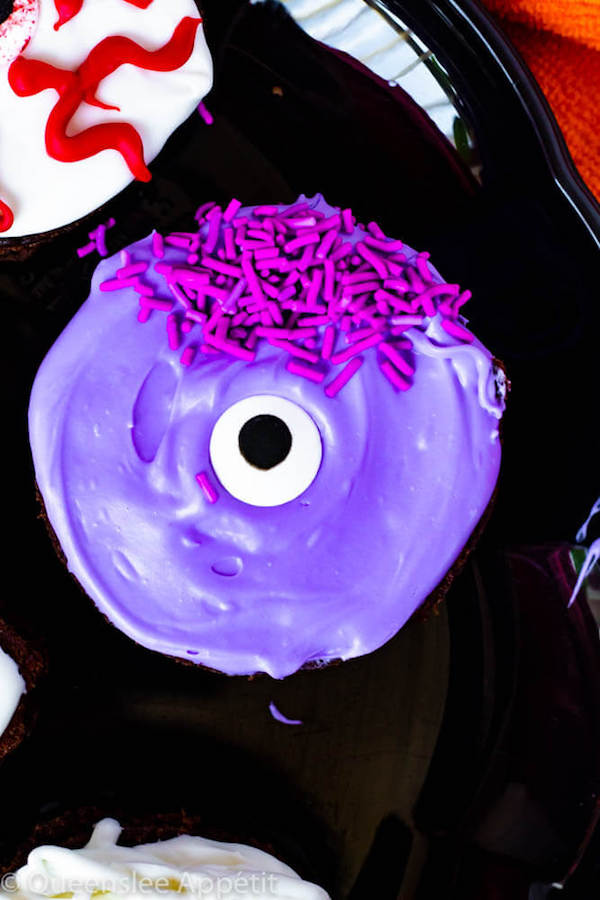
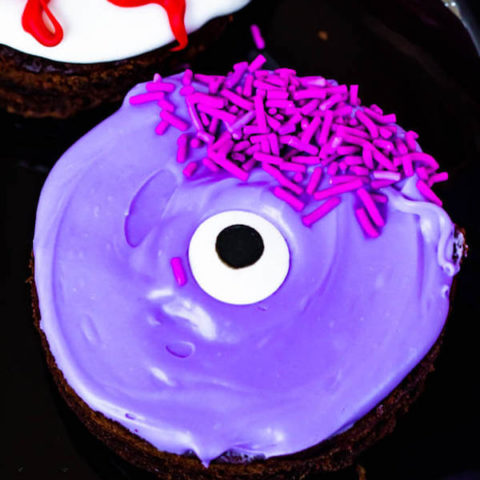
These Monster Brownies are definitely my favourite out of them all! They’re inspired by the character Celia Mae from Monsters Inc.
Celia Mae is Mike Wazowski’s girlfriend in the movie. She’s sort of a blend between an octopus, cyclops and Medusa because she has tentacle arms and legs, one eye and snake hair. Despite all of that, she’s pretty gorgeous, as is the brownie version of her.
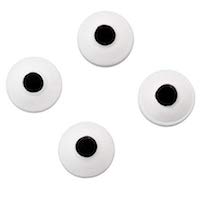
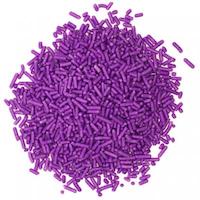
To create Celia, I simply tinted come canned vanilla frosting with violet gel food colouring and spread it over a circle brownie. Then I put a large candy eye in the centre and pushed it down slightly so it can push up the frosting a bit to create a lid. Then for her hair, I just used purple sprinkles because it was way easier than piping out snakes.
If you can’t find any edible candy eyes in store, I’ve included amazon links at the bottom of the recipe if you’d like to purchase them.
Here’s the printable recipe:
Monster Brownies
Easy Monster Brownies.
Ingredients
- 1 box of Brownie Mix + ingredients needed for preparation
- Large round cookie cutter
- 1-2 cans of store bought white vanilla frosting
- Violet gel food colouring
- 1 package large edible candy eyes
- Purple sprinkles
Instructions
- Line your baking pan with a large sheet of aluminum foil, leaving about 2 inches hanging off the sides.
- Prepare and bake brownie mix according to package directions.
- Once baked, allow to cool for about 30 minutes before you cut out the shapes.
- Lift the brownies out of the pan, using the excess foil. Lightly spray your cookie cutter with non-stick cooking spray and gently press it down into the brownies.
- Lift out the cut out brownie and use your fingers to gently push it out onto a parchment lined baking sheet. You can flip the brownie around to the back if you want a smoother surface. Repeat with the entire batch.
- Also make sure you start from the edges of the brownies and make each cut close together so you get the most shapes out of one batch of brownies.
- Remove the lid and the foil topping from your can of white vanilla frosting and microwave for about 20-25 seconds to soften. Tint with violet gel food colouring, mixing until frosting is completely coloured.
- Scoop a spoonful of frosting into the centre of the brownie and gently spread it around until the entire brownie is covered. Repeat with remaining brownies.
- Place a large edible candy eye into the centre and slightly push it down so the frosting lifts up at the top to look like an eyelid.
- Sprinkle some purple sprinkles on top to represent the hair. Serve and enjoy!
Notes
- Store in an airtight container at room temperature for up to 3 days.
- The amount of brownies you get depends on how large or small your cookie cutter is, and the size of your brownie batch. The box mix I bought was for a 9x9-inch pan, but if your brownie mix yields a 9x13-inch pan, you’ll end up with more brownies.
Recommended Products
As an Amazon Associate and member of other affiliate programs, I earn from qualifying purchases.

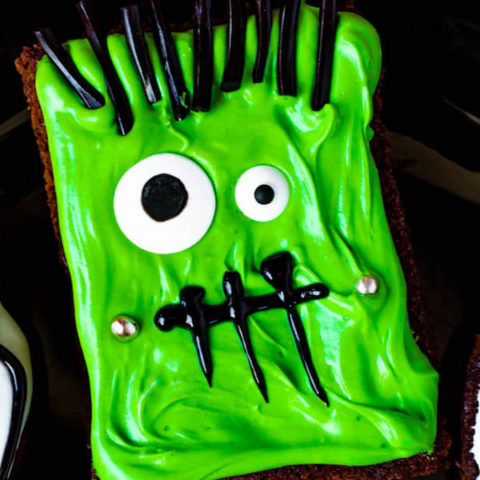
Frankenstein Brownies
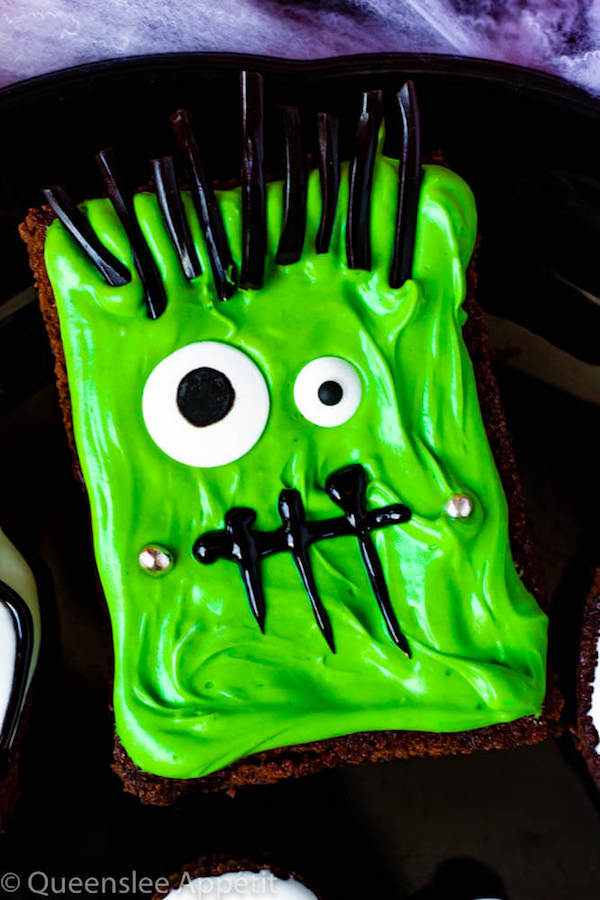
When I think of Halloween, one of the first things that comes to mind is Frankenstein. Or, you know, Frankenstein’s Monster. Frankenstein’s monster is definitely one of the most popular Halloween characters of all time, so I had to make a brownie version of him too.
The decoration for these Frankenstein Brownies were inspired by these adorable rice krispie treats. I love the idea of giving him two different sized eyes because it makes him look more monster-y. That’s the best way I could describe it.
You won’t need a cookie cutter for these brownies because Frankenstein’s (monsters) head is rectangular, so simply cut your brownies into rectangle bars using a sharp knife.
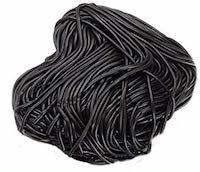
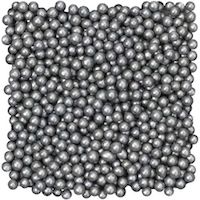
For his hair, I used black liquorice lace, but you could use the black frosting tube to draw it in instead. I also used silver ball sprinkle for the screws on his face, but this was only because I had them on hand. They were pretty expensive where I got them, so you could substitute that with stick pretzels and insert them into the sides of the brownies.
If you can’t find any of these items in store, I’ve included amazon links at the bottom of the recipe if you’d like to purchase them.
Here’s the printable recipe:
Frankenstein Brownies
Easy Frankenstein Brownies.
Ingredients
- 1 box of Brownie Mix + ingredients needed for preparation
- 1-2 cans of store bought white vanilla frosting
- Green gel food colouring
- 1 package large edible candy eyes
- 1 package small edible candy eyes
- Black liquorice laces
- Black tube of frosting
- Silver ball sprinkles (see notes)
Instructions
- Line your baking pan with a large sheet of aluminum foil, leaving about 2 inches hanging off the sides.
- Prepare and bake brownie mix according to package directions.
- Once baked, allow to cool for about 30 minutes on a wire rack.
- Lift the brownies out of the pan, using the excess foil and, using a sharp knife, slice the brownies into even bars.
- Remove the lid and the foil topping from your can of white vanilla frosting and microwave for about 20-25 seconds to soften. Tint with green gel food colouring, mixing until frosting is completely coloured.
- Scoop a spoonful of frosting into the centre of the brownie and gently spread it around until the entire brownie is covered. Repeat with remaining brownies.
- Place a large and small edible candy eye onto the brownies.
- Cut the black liquorice into smaller strips and stick it on top the brownie to create the hair.
- Using the black frosting tube, draw on the mouth which is one horizontal line and 3 vertical lines crossing over.
- Place a silver ball sprinkle on each side of the mouth. Serve and enjoy!
Notes
- Store in an airtight container at room temperature for up to 3 days.
- The amount of brownies you get depends on the size of your brownie batch. The box mix I bought was for a 9x9-inch pan, but if your brownie mix yields a 9x13-inch pan, you’ll end up with more brownies.
- For his hair, I used black liquorice lace, but you could use the black frosting tube to draw it in instead.
- You could substitute the silver pearl sprinkles with stick pretzels and insert them into the sides of the brownies.
Recommended Products
As an Amazon Associate and member of other affiliate programs, I earn from qualifying purchases.
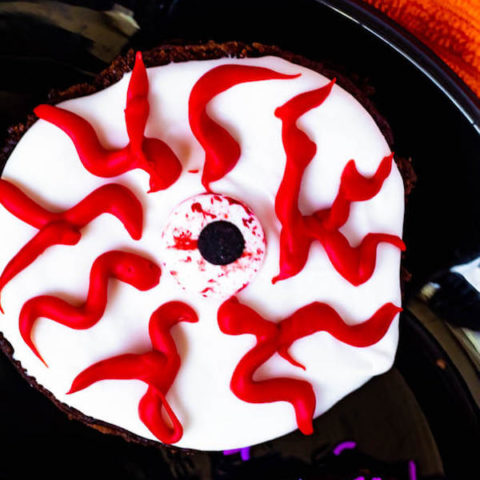
Bloodshot Eyeball Brownies
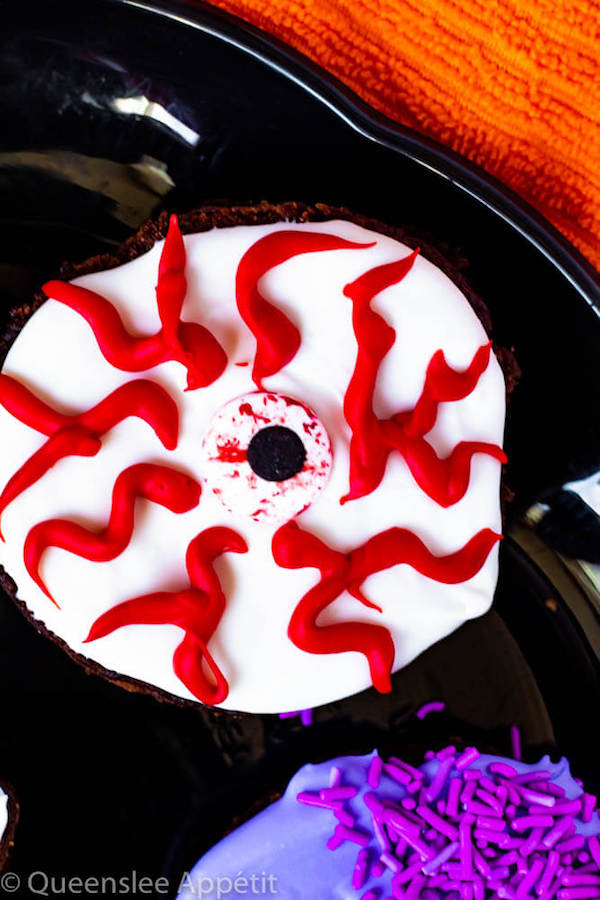
These Bloodshot Eyeball Brownies are a bit more on the gory side. I found some bloodshot versions of the normal candy eyes I’d been using, so I decided to make a larger version with the brownies.
These brownies are covered in white frosting with a bloodshot candy eye in the centre. If you can’t find bloodshot candy eyes, you can use normal candy eyes.
I had some red candy melts on hand, so I melted them down to pipe out the red veins. You can definitely tint the vanilla frosting red and use that to pipe the bloodshot veins. This may be the better option especially for consuming because the candy melts harden up and detach from the frosting.
If you can’t find bloodshot candy eyes in store, I’ve included amazon links at the bottom of the recipe if you’d like to purchase them.
Here’s the printable recipe:
Bloodshot Eyeball Brownies
Bloodshot Eyeball Brownies.
Ingredients
- 1 box of Brownie Mix + ingredients needed for preparation
- Large round cookie cutter
- 2-3 cans of store bought white vanilla frosting
- 1 package bloodshot edible candy eyes
- Red gel food colouring
Instructions
- Line your baking pan with a large sheet of aluminum foil, leaving about 2 inches hanging off the sides.
- Prepare and bake brownie mix according to package directions.
- Once baked, allow to cool for about 30 minutes before you cut out the shapes.
- Lift the brownies out of the pan, using the excess foil. Lightly spray your cookie cutter with non-stick cooking spray and gently press it down into the brownies.
- Lift out the cut out brownie and use your fingers to gently push it out onto a parchment lined baking sheet. You can flip the brownie around to the back if you want a smoother surface. Repeat with the entire batch.
- Also make sure you start from the edges of the brownies and make each cut close together so you get the most shapes out of one batch of brownies.
- Remove the lid and the foil topping from your can of white vanilla frosting and microwave for about 20-25 seconds to soften.
- Scoop a spoonful of frosting into the centre of the brownie and gently spread it around until the entire brownie is covered. Repeat with remaining brownies.
- Place a bloodshot candy eye into the centre, set aside.
- Tint another can of vanilla frosting with red gel food colouring. Scoop into a ziploc bag and snip off a small corner.
- Pipe “lightning bolt” shaped veins around the candy eye to represent bloodshot veins. Serve and enjoy!
Notes
- Store in an airtight container at room temperature for up to 3 days.
- The amount of brownies you get depends on how large or small your cookie cutter is, and the size of your brownie batch. The box mix I bought was for a 9x9-inch pan, but if your brownie mix yields a 9x13-inch pan, you’ll end up with more brownies.
Recommended Products
As an Amazon Associate and member of other affiliate programs, I earn from qualifying purchases.
Skull Brownies
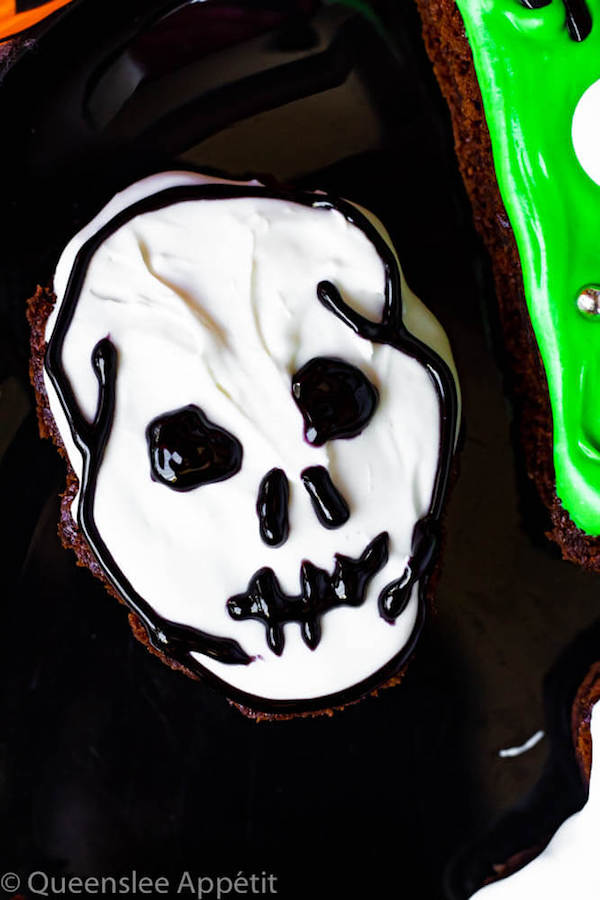
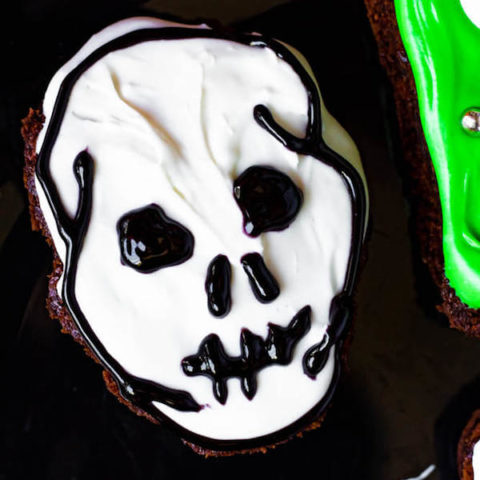
I’m pretty impressed with how these skull brownies turned out. It’s a bit more detailed than the other brownie designs, but it’s still really easy.
I used a skull cookie cutter to cut out the brownies, but once I spread on the frosting, they started to lose their skull shape. To fix this, I used my black frosting tube to pipe the outline of a skull so it could look a bit more realistic.
I went for the basic white skeleton, but you could totally customize these however you want. Tint the frosting red to make spooky red and black skeletons, or you could go with the gorgeous and traditional sugar skulls! The decoration process is supposed to be fun, so be creative!
If you can’t find any Skull Cookie Cutters or Black Frosting Tubes in store, I’ve included amazon links at the bottom of the recipe if you’d like to purchase them.
Here’s the printable recipe:
Skull Brownies
Easy Skull Brownies.
Ingredients
- 1 box of Brownie Mix + ingredients needed for preparation
- Skull cookie cutter
- 1 - 2 cans of store bought white vanilla frosting
- Black frosting tube
Instructions
- Line your baking pan with a large sheet of aluminum foil, leaving about 2 inches hanging off the sides.
- Prepare and bake brownie mix according to package directions.
- Once baked, allow to cool for about 30 minutes before you cut out the shapes.
- Lift the brownies out of the pan, using the excess foil. Lightly spray your cookie cutter with non-stick cooking spray and gently press it down into the brownies.
- Lift out the cut out brownie and use your fingers to gently push it out onto a parchment lined baking sheet. You can flip the brownie around to the back if you want a smoother surface. Repeat with the entire batch.
- Also make sure you start from the edges of the brownies and make each cut close together so you get the most shapes out of one batch of brownies.
- Remove the lid and the foil topping from your can of white vanilla frosting and microwave for about 20-25 seconds to soften.
- Scoop a spoonful of frosting into the centre of the ghost brownie and gently spread it around until the entire brownie is covered. Repeat with remaining brownies. If you run out of 1 can of frosting, repeat step 7 with the second can. 1-2 cans should be enough for 1 batch of brownies.
- Snip off the end of the black frosting tube and pipe the outline of the skull (see the above photos for reference) pipe the eye sockets, nose holes and mouth. Serve and enjoy!
Notes
- The amount of brownies you get depends on how large or small your cookie cutter is, and the size of your brownie batch. The box mix I bought was for a 9x9-inch pan, but if your brownie mix yields a 9x13-inch pan, you’ll end up with more brownies.
- Store in an airtight container at room temperature for up to 3 days.
- I went for the basic white skeleton, but you could totally customize these however you want. Tint the frosting red to make spooky red and black skeletons, or you could go with the gorgeous and traditional sugar skulls! The decoration process is supposed to be fun, so be creative!
Recommended Products
As an Amazon Associate and member of other affiliate programs, I earn from qualifying purchases.
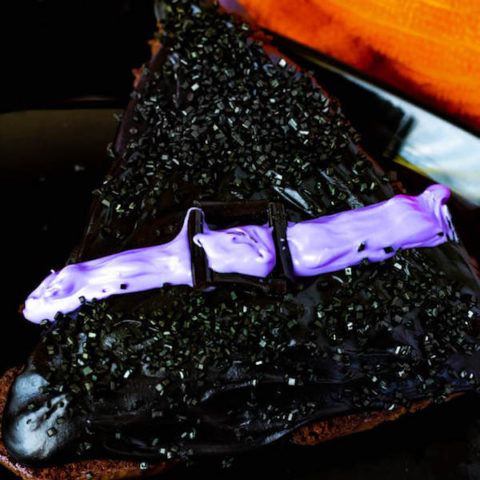
Witch Hat Brownies
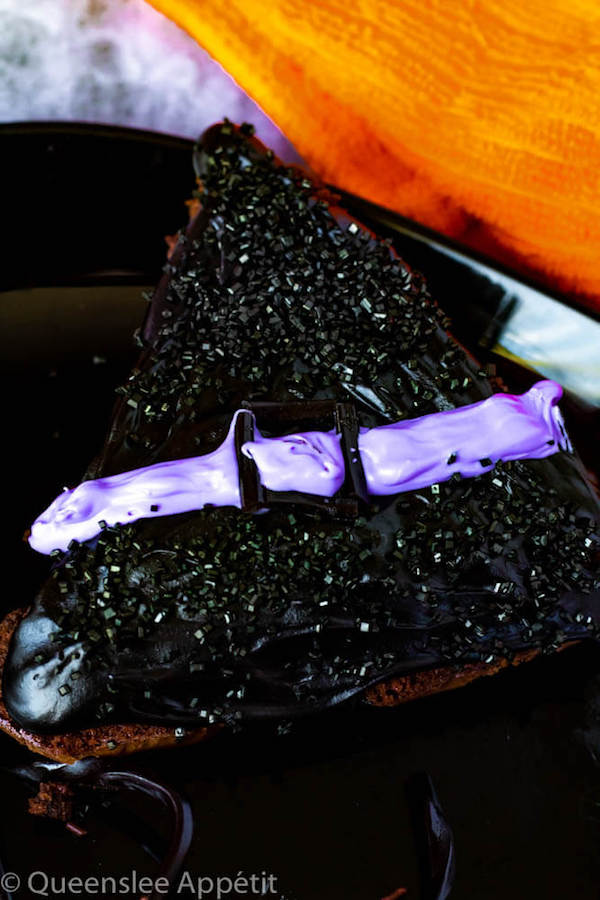
I came up with these at the very last minute so they’re very rushed, but they’re still super adorable and easy to make. Again, you don’t need a cookie cutter for this. Just use a knife to cut a triangle out of your brownies.
To make it look like a witches hat, I simply smothered it in black frosting and black sanding sugar. Then I took some extra purple frosting from the Monster Brownies and piped a horizontal line to separate the top and bottom of the hat. I then took some more black liquorice lace and cut it into tiny pieces to create the hat buckle in the centre of the witches hat.
If you can’t find any black sanding sugar or black liquorice lace in store, I’ve included amazon links at the bottom of the recipe if you’d like to purchase them.
Here’s the printable recipe:
Witch Hat Brownies
Easy Witch Hat Brownies.
Ingredients
- 1 box of Brownie Mix + ingredients needed for preparation
- 1-2 cans of store bought chocolate frosting
- Black gel food colouring
- Black sanding sugar
- 1 can store bought vanilla frosting
- Purple gel food colouring (or any colour of your choice)
- Black liquorice laces
Instructions
- Line your baking pan with a large sheet of aluminum foil, leaving about 2 inches hanging off the sides.
- Prepare and bake brownie mix according to package directions.
- Once baked, allow to cool for about 30 minutes on a wire rack.
- Lift the brownies out of the pan, using the excess foil and, using a sharp knife, slice the brownies into even bars.
- Remove the lid and the foil topping from your can of chocolate frosting and microwave for about 20-25 seconds to soften. Tint with black gel food colouring, mixing until frosting is completely coloured.
- Scoop a spoonful of frosting into the centre of the brownie and gently spread it around until the entire brownie is covered. Repeat with remaining brownies.
- Cover the brownies with black sanding sugar. Set aside.
- Tint the can of vanilla frosting with the purple food colouring or colour of your choice and scoop into a disposable piping bag fitted with a small petal tip. Alternatively, you can scoop it into a ziplock bag and snip off a corner.
- Pipe a horizontal line in the middle of the brownie. Cut black liquorice laces into small even pieces and use 4 pieces to make a square buckle in the centre of the line. Serve and enjoy!
Notes
- Store in an airtight container at room temperature for up to 3 days.
- The amount of brownies you get depends on the size of your brownie batch. The box mix I bought was for a 9x9-inch pan, but if your brownie mix yields a 9x13-inch pan, you’ll end up with more brownies.
Recommended Products
As an Amazon Associate and member of other affiliate programs, I earn from qualifying purchases.
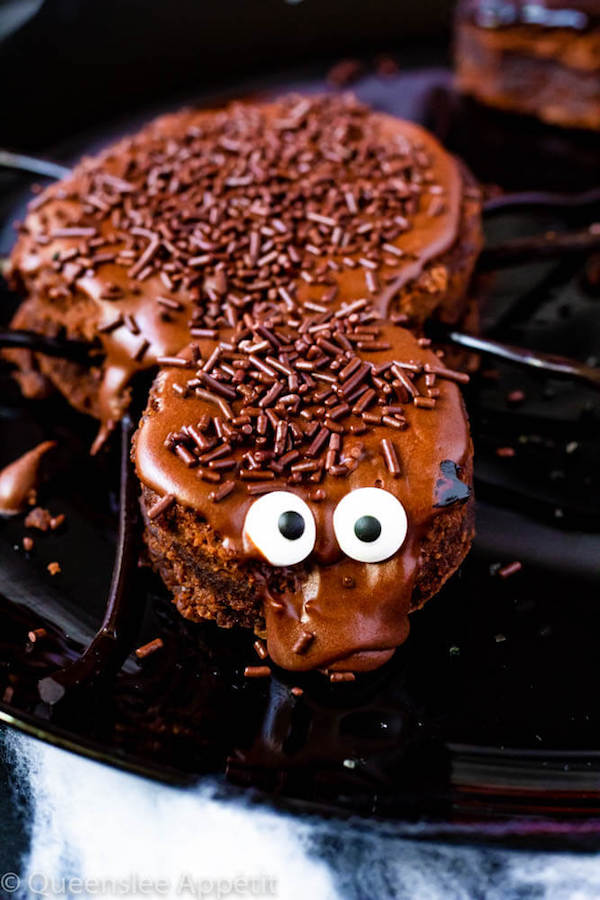
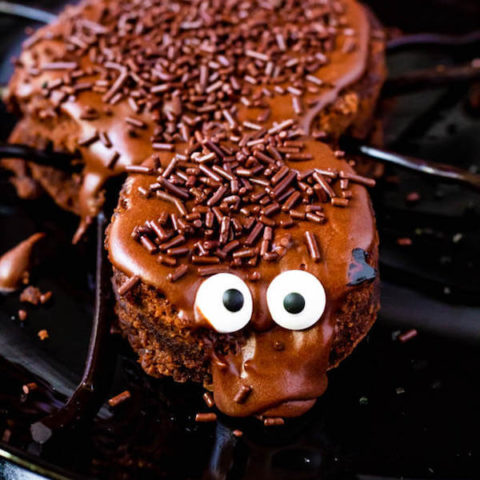
Spider Brownies
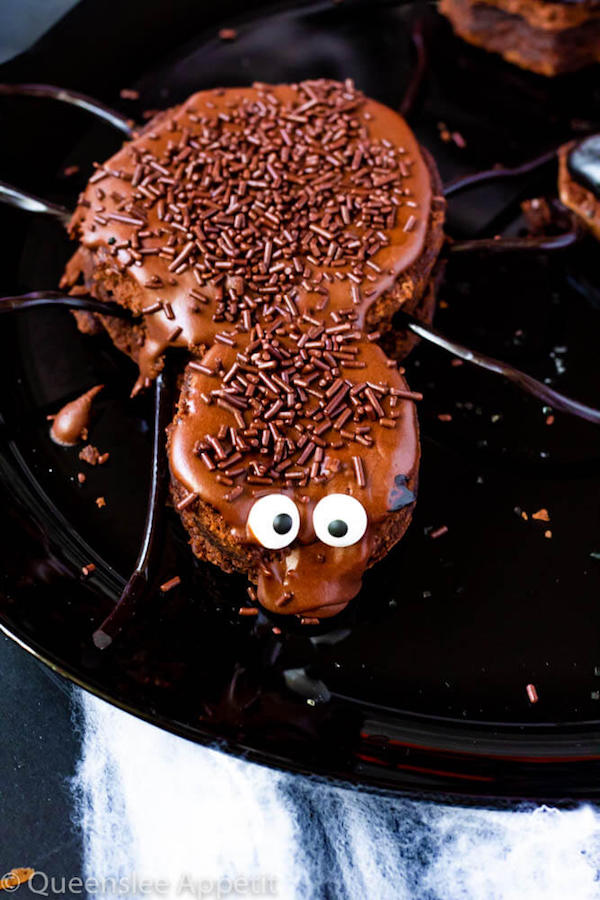
These brownies are a bit more difficult than the rest simply because there’s a few more steps.
This was supposed to be a simple circle shaped brownie, but I had enough brownie left to cut out a smaller circle so I decided to make a full-bodied spider.
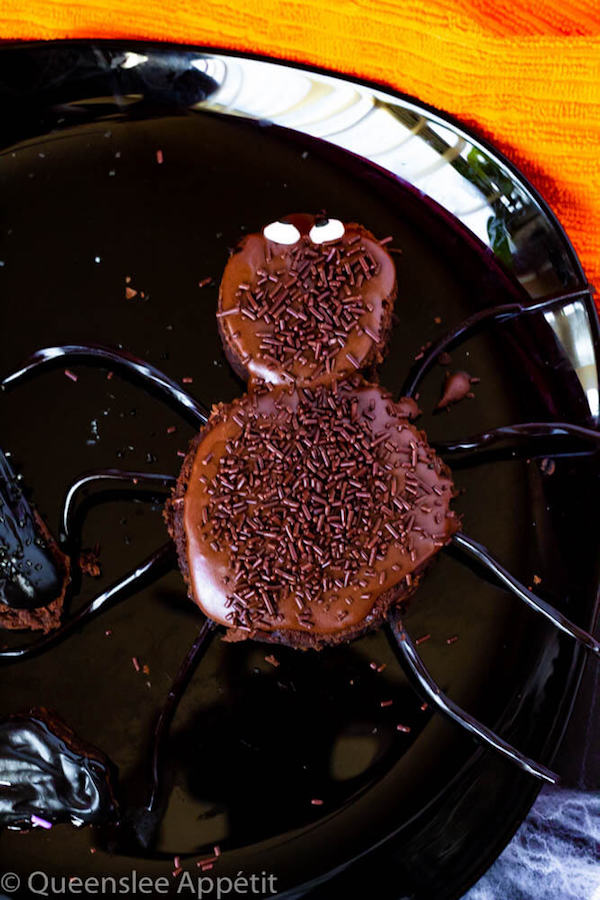
I used a toothpick to attach the small brownie circle onto the larger circle to create the head and body of the spider. For the legs, I snipped off some black liquorice lace and pushed it into the sides of both circles, 4 on each side.
Then I spread on some chocolate frosting and decorated with chocolate sprinkles to make the spider furry (cringe) and some candy eyes on the head. My brownie broke off in the front, but it worked out because it made the perfect area for eyes!
If you can’t find candy eyes or black liquorice laces in store, I’ve included amazon links at the bottom of the recipe if you’d like to purchase them.
Here’s the printable recipe:
Spider Brownies
Easy Spider Brownies
Ingredients
- 1 box of Brownie Mix + ingredients needed for preparation
- Large round cookie cutter
- Small round cookie cutter
- Toothpicks
- Black liquorice lace
- 1-2 cans of store bought chocolate frosting
- Chocolate sprinkles
- 1 package small edible candy eyes
Instructions
- Line your baking pan with a large sheet of aluminum foil, leaving about 2 inches hanging off the sides.
- Prepare and bake brownie mix according to package directions.
- Once baked, allow to cool for about 30 minutes before you cut out the shapes.
- Lift the brownies out of the pan, using the excess foil. Lightly spray your cookie cutters with non-stick cooking spray and gently press it down into the brownies. Cut out equal amounts of large circles and small circles.
- Also make sure you start from the edges of the brownies and make each cut close together so you get the most shapes out of one batch of brownies.
- Insert a toothpick about ¼ way into the side of a small circle brownie. Insert the other end into a larger circle brownie. This is the body of the spider.
- Use another toothpick to make a hole into the sides of the brownie where you want to insert the liquorice. You’ll need 4 holes on each side.
- Cut the liquorice laces into even pieces and gently insert them into the sides of the brownie where you made the holes.
- Remove the lid and the foil topping from your can of chocolate frosting and microwave for about 20-25 seconds to soften.
- Scoop a spoonful of frosting onto the brownie and gently spread it around until the entire brownie is covered. Repeat with remaining brownies.
- Garnish the tops with chocolate sprinkles to represent the spider’s furry back.
- Spread some frosting on the top of the small circle head, where the eyes will be. Place 2 candy eyes on top. Serve and enjoy!
Notes
- Store in an airtight container at room temperature for up to 3 days.
- The amount of brownies you get depends on how large or small your cookie cutter is, and the size of your brownie batch. The box mix I bought was for a 9x9-inch pan, but if your brownie mix yields a 9x13-inch pan, you’ll end up with more brownies.
Recommended Products
As an Amazon Associate and member of other affiliate programs, I earn from qualifying purchases.
>>PIN FOR LATER<<
FOLLOW QUEENSLEE APPÉTIT
Like what you see? Make sure you‘re following Queenslee Appétit for more tasty recipes!
Pinterest | Instagram | Facebook | Twitter |
Never miss a recipe, SUBSCRIBE at the bottom of this post!
Have any questions about the recipe? Contact me here, and I’ll be happy to help!
DID YOU MAKE A RECIPE?
I’d love to see how it turned out! Follow me on Instagram and use the hashtag #queensleeappetit so I can see all of the Queenslee Appétit recipes you’ve made!
More Halloween Treats
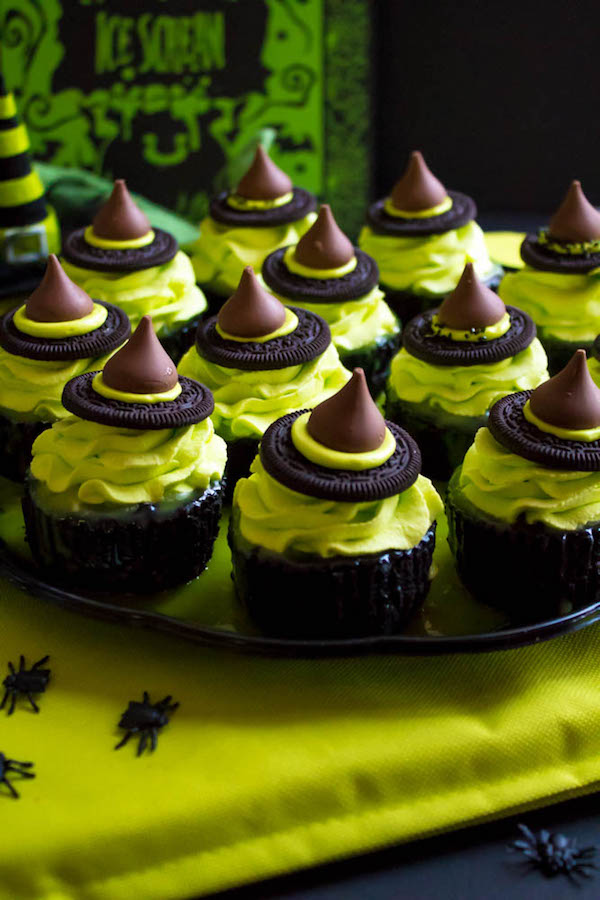
Mini Melting Witch Cheesecakes
©QUEENSLEE APPÉTIT. All images & content are copyright protected. Please do not use my images without prior permission. If you want to republish this recipe, please re-write the recipe in your own words, or link back to this post for the recipe.
This post may contain affiliate links. Please see my full disclosure policy for details.

Leave a Reply