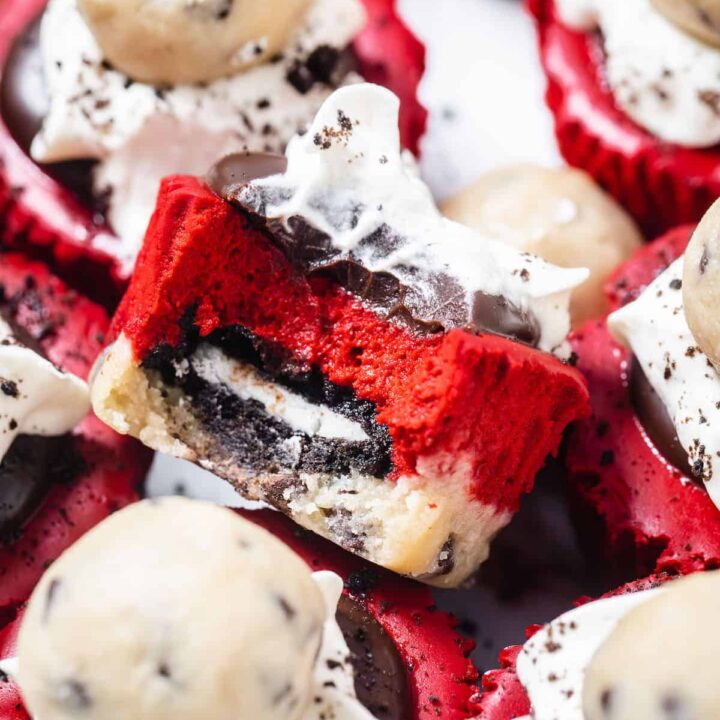
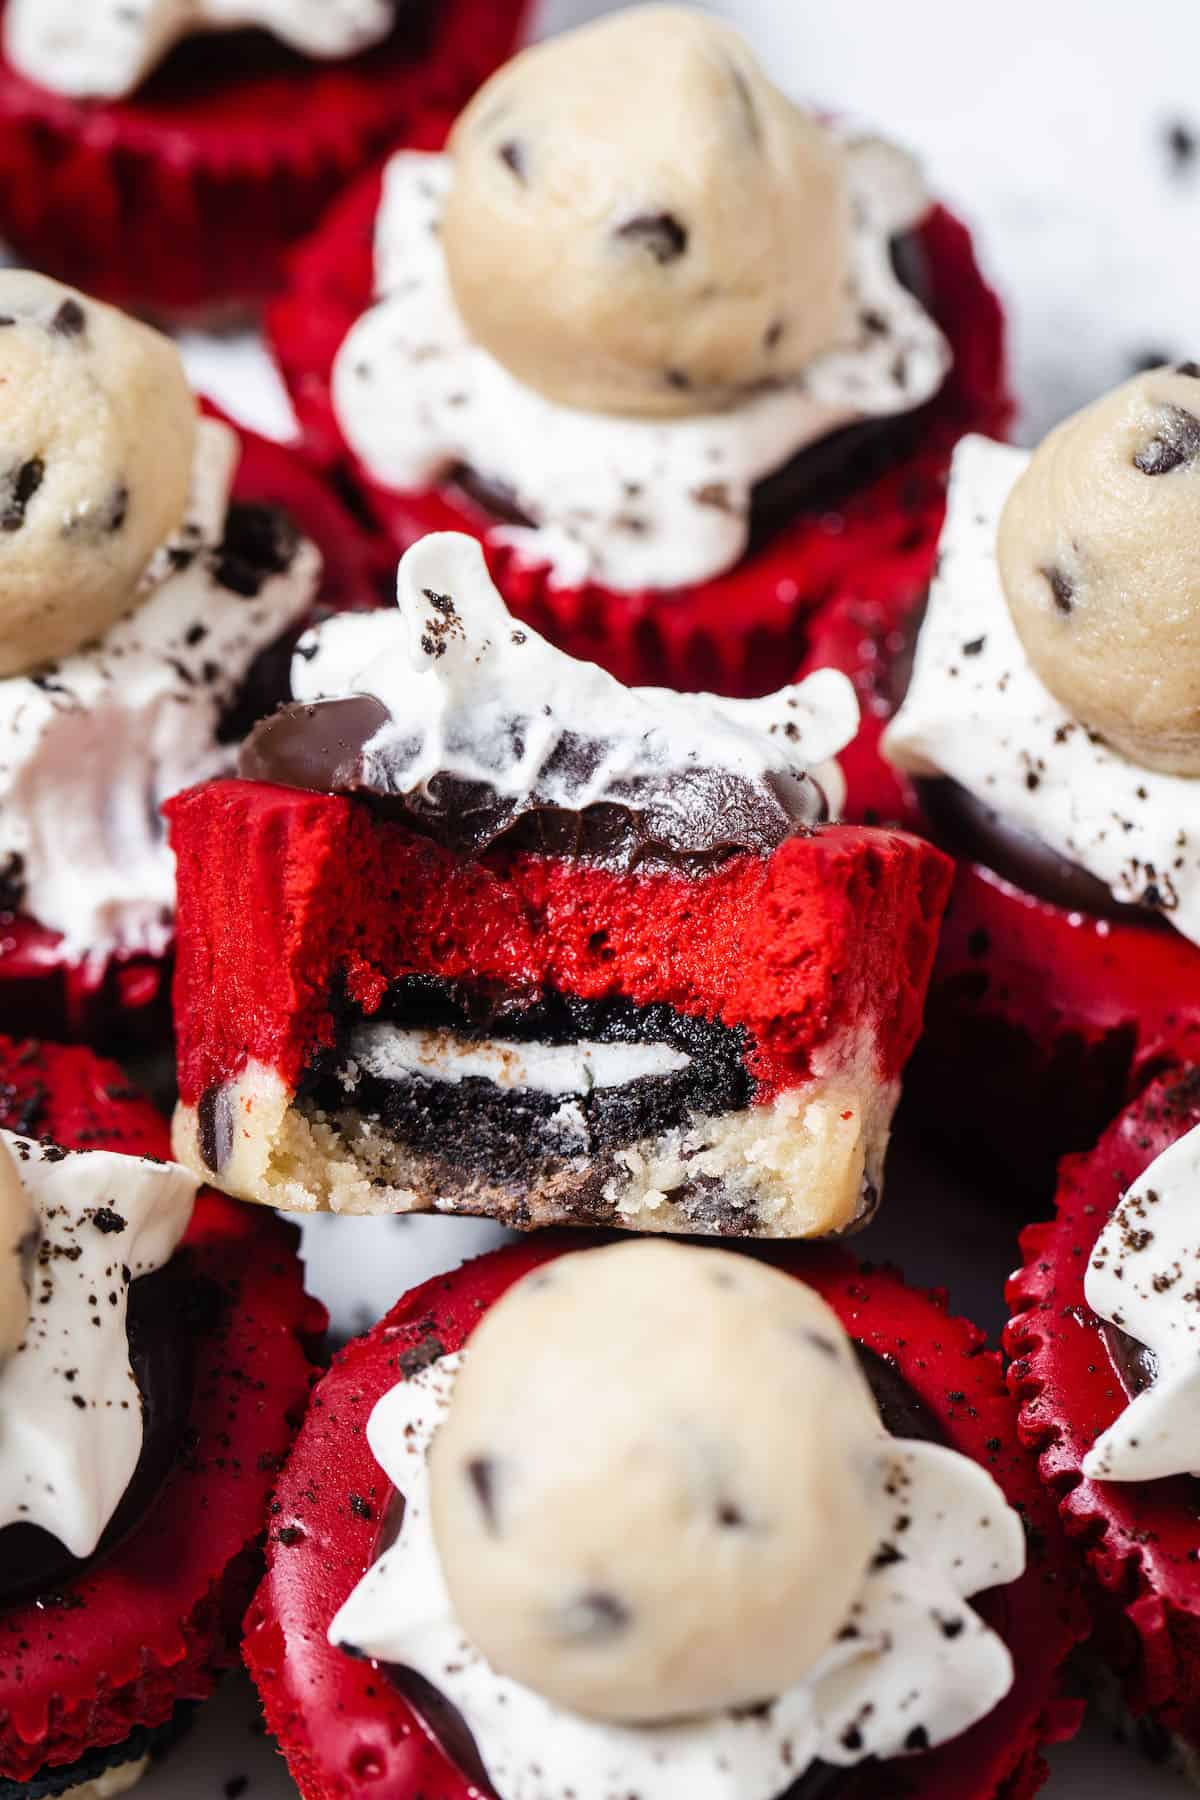
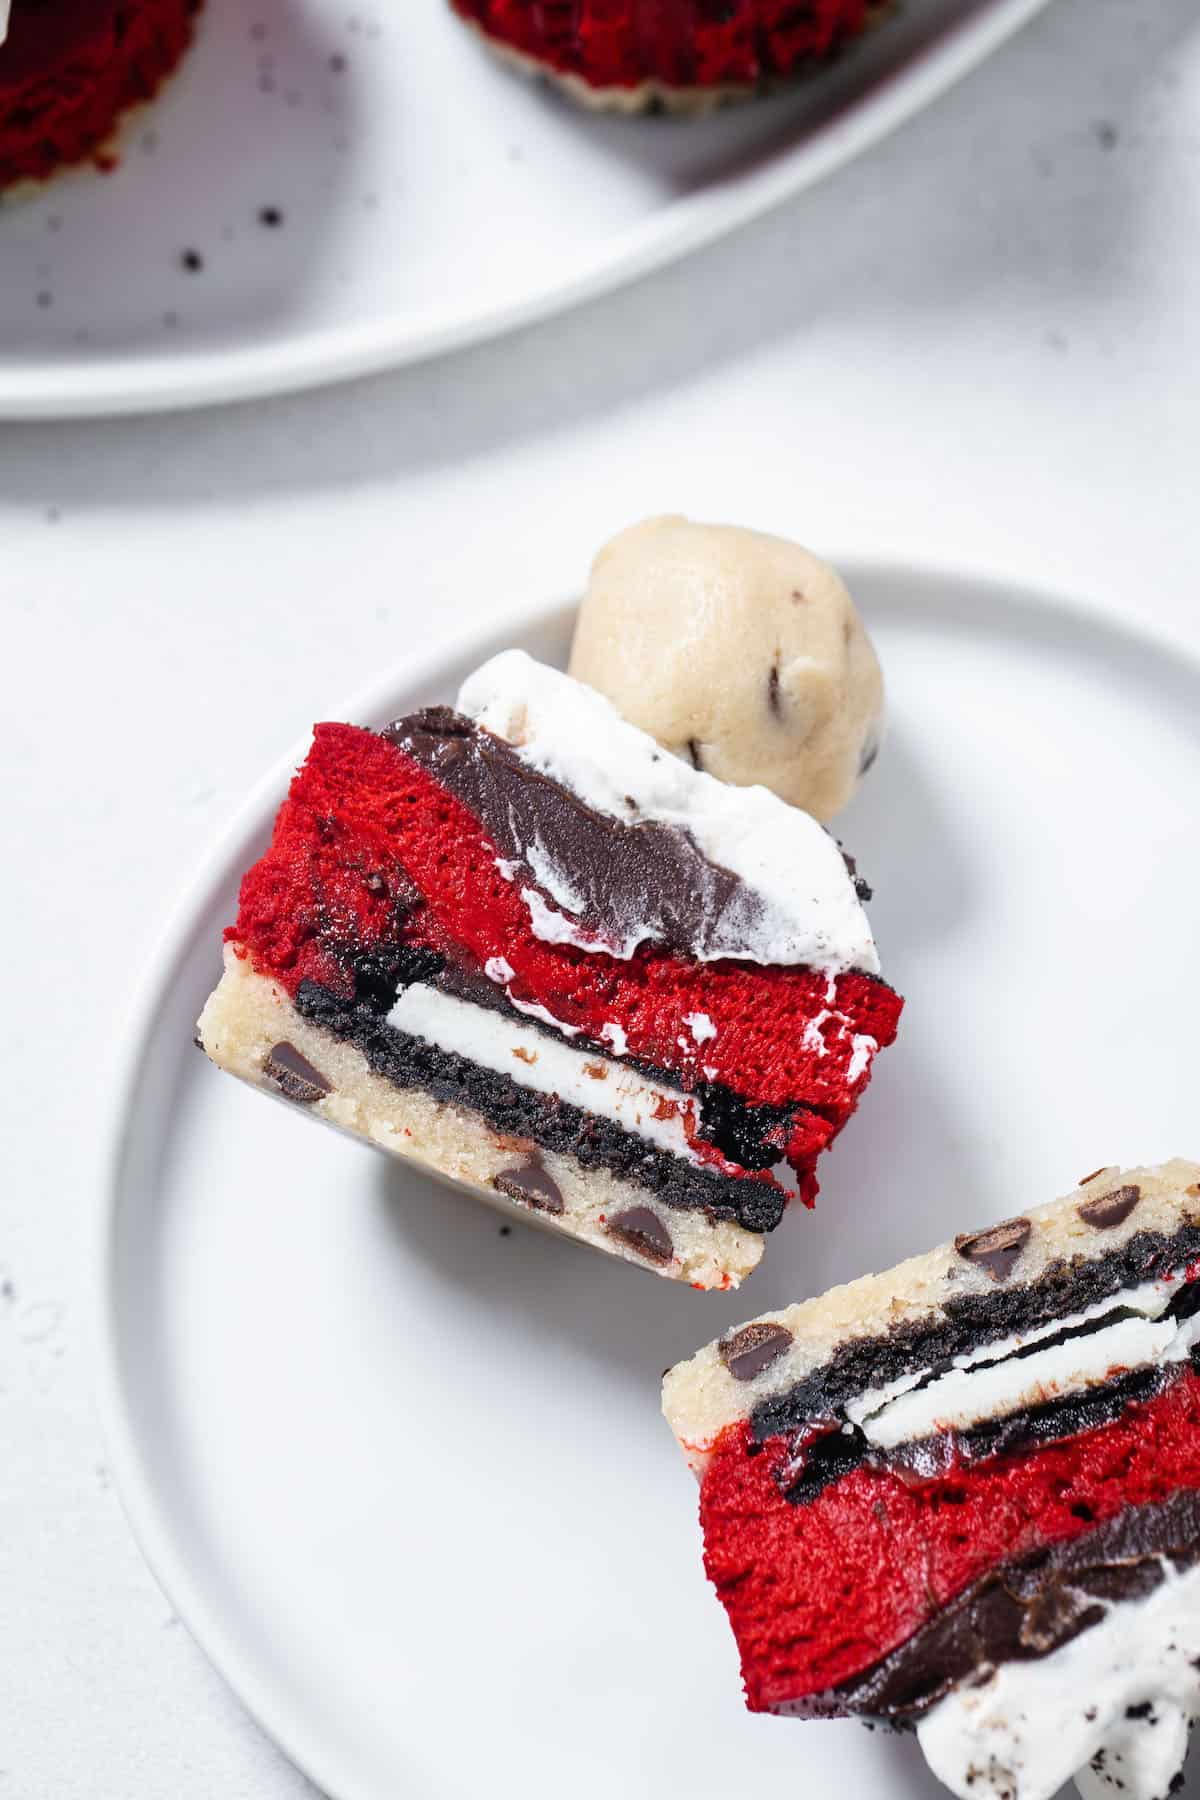
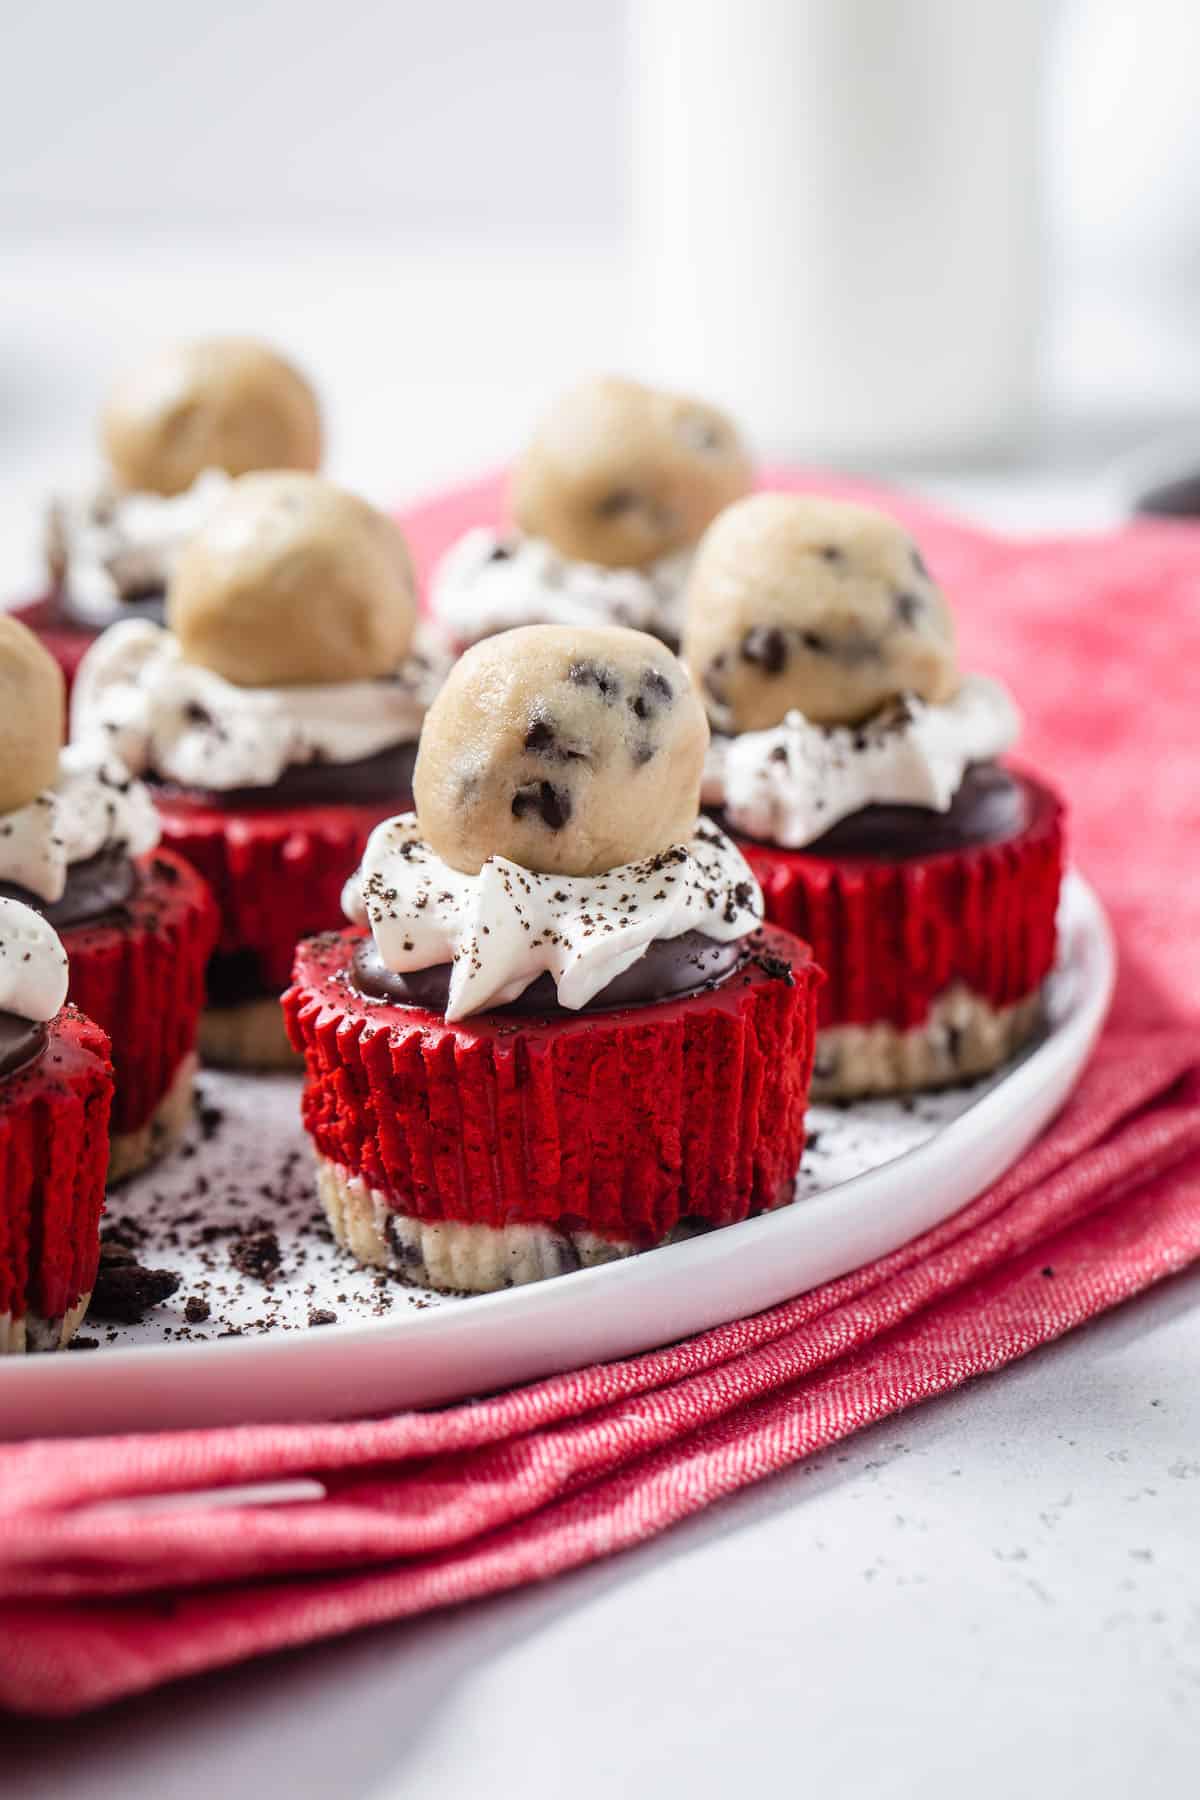
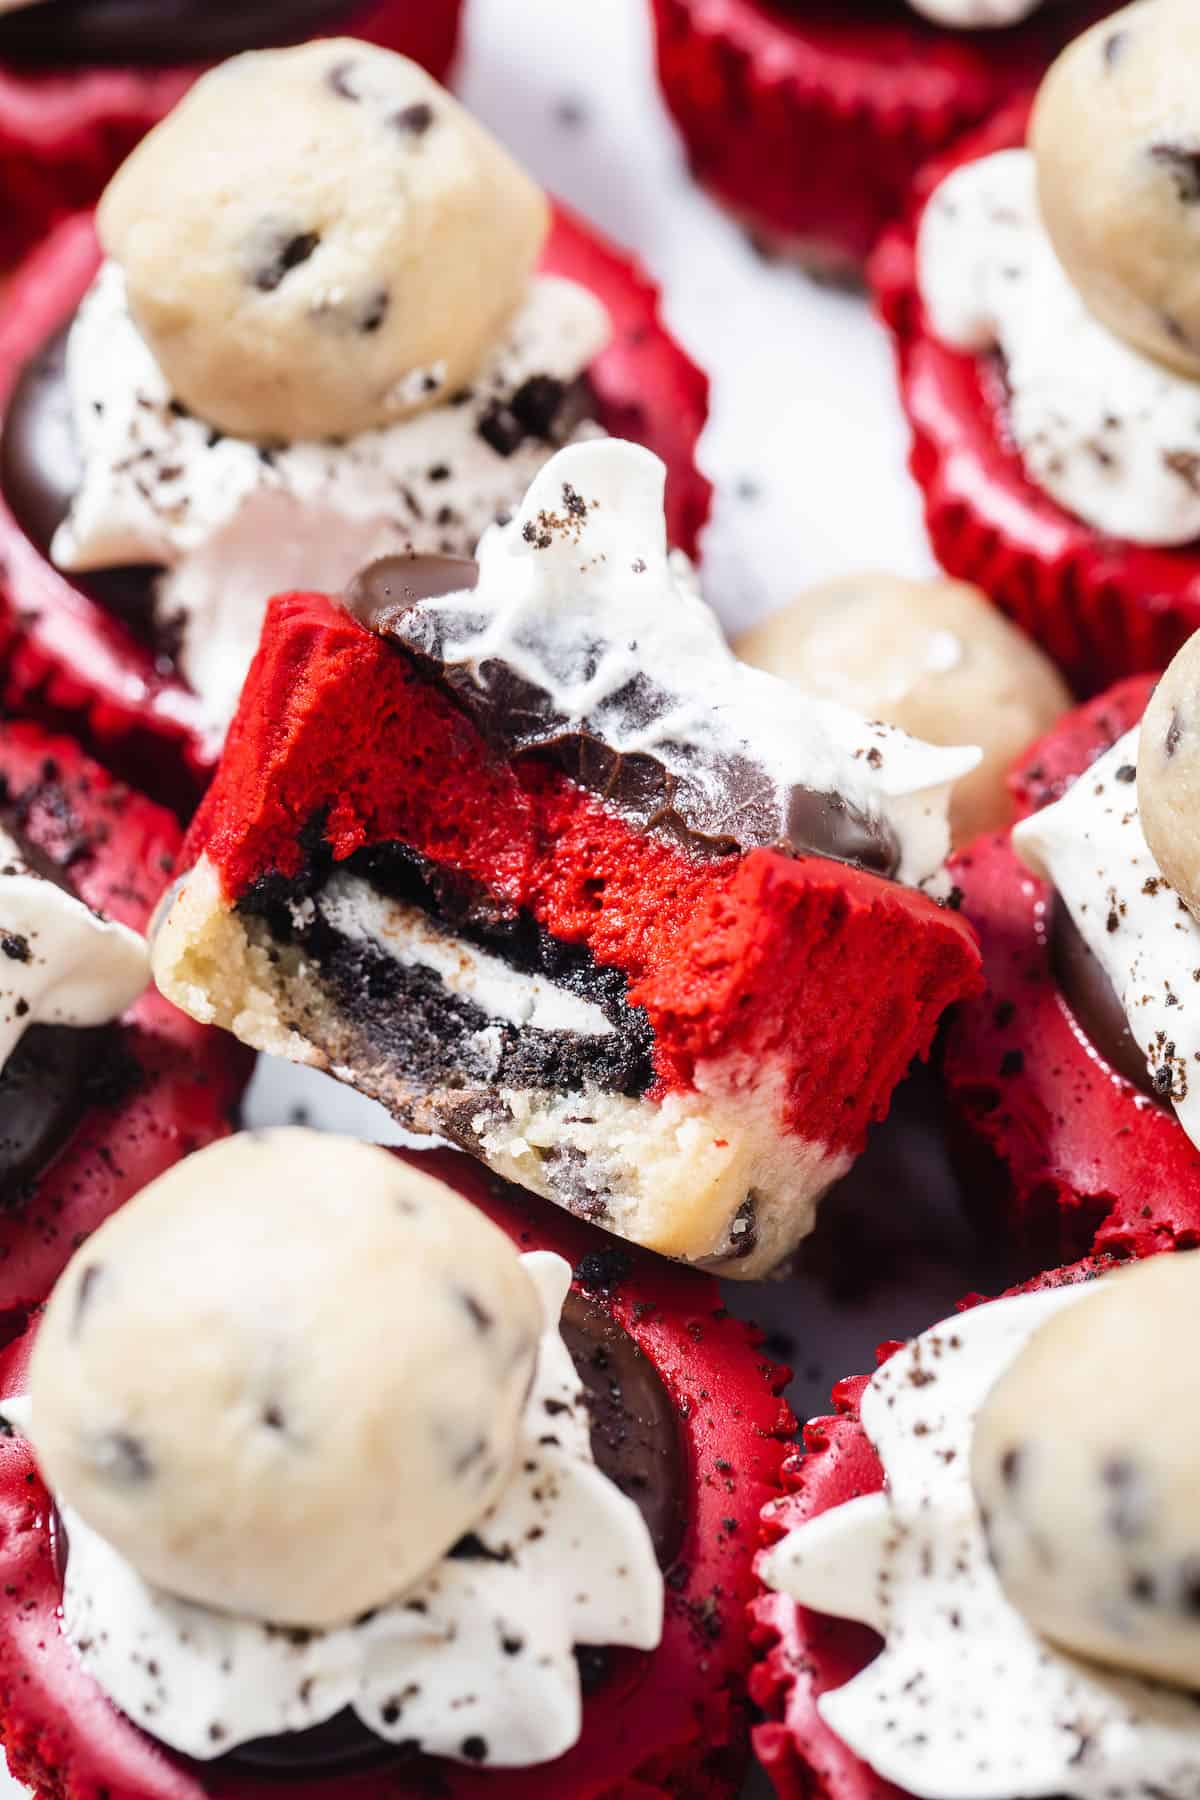
Get ready to indulge in a delightful treat this Valentine's Day with our Mini Red Velvet Cheesecakes! These delectable bites are perched on a glorious edible cookie dough base and boast a delightful surprise in the form of an Oreo cookie hidden within.
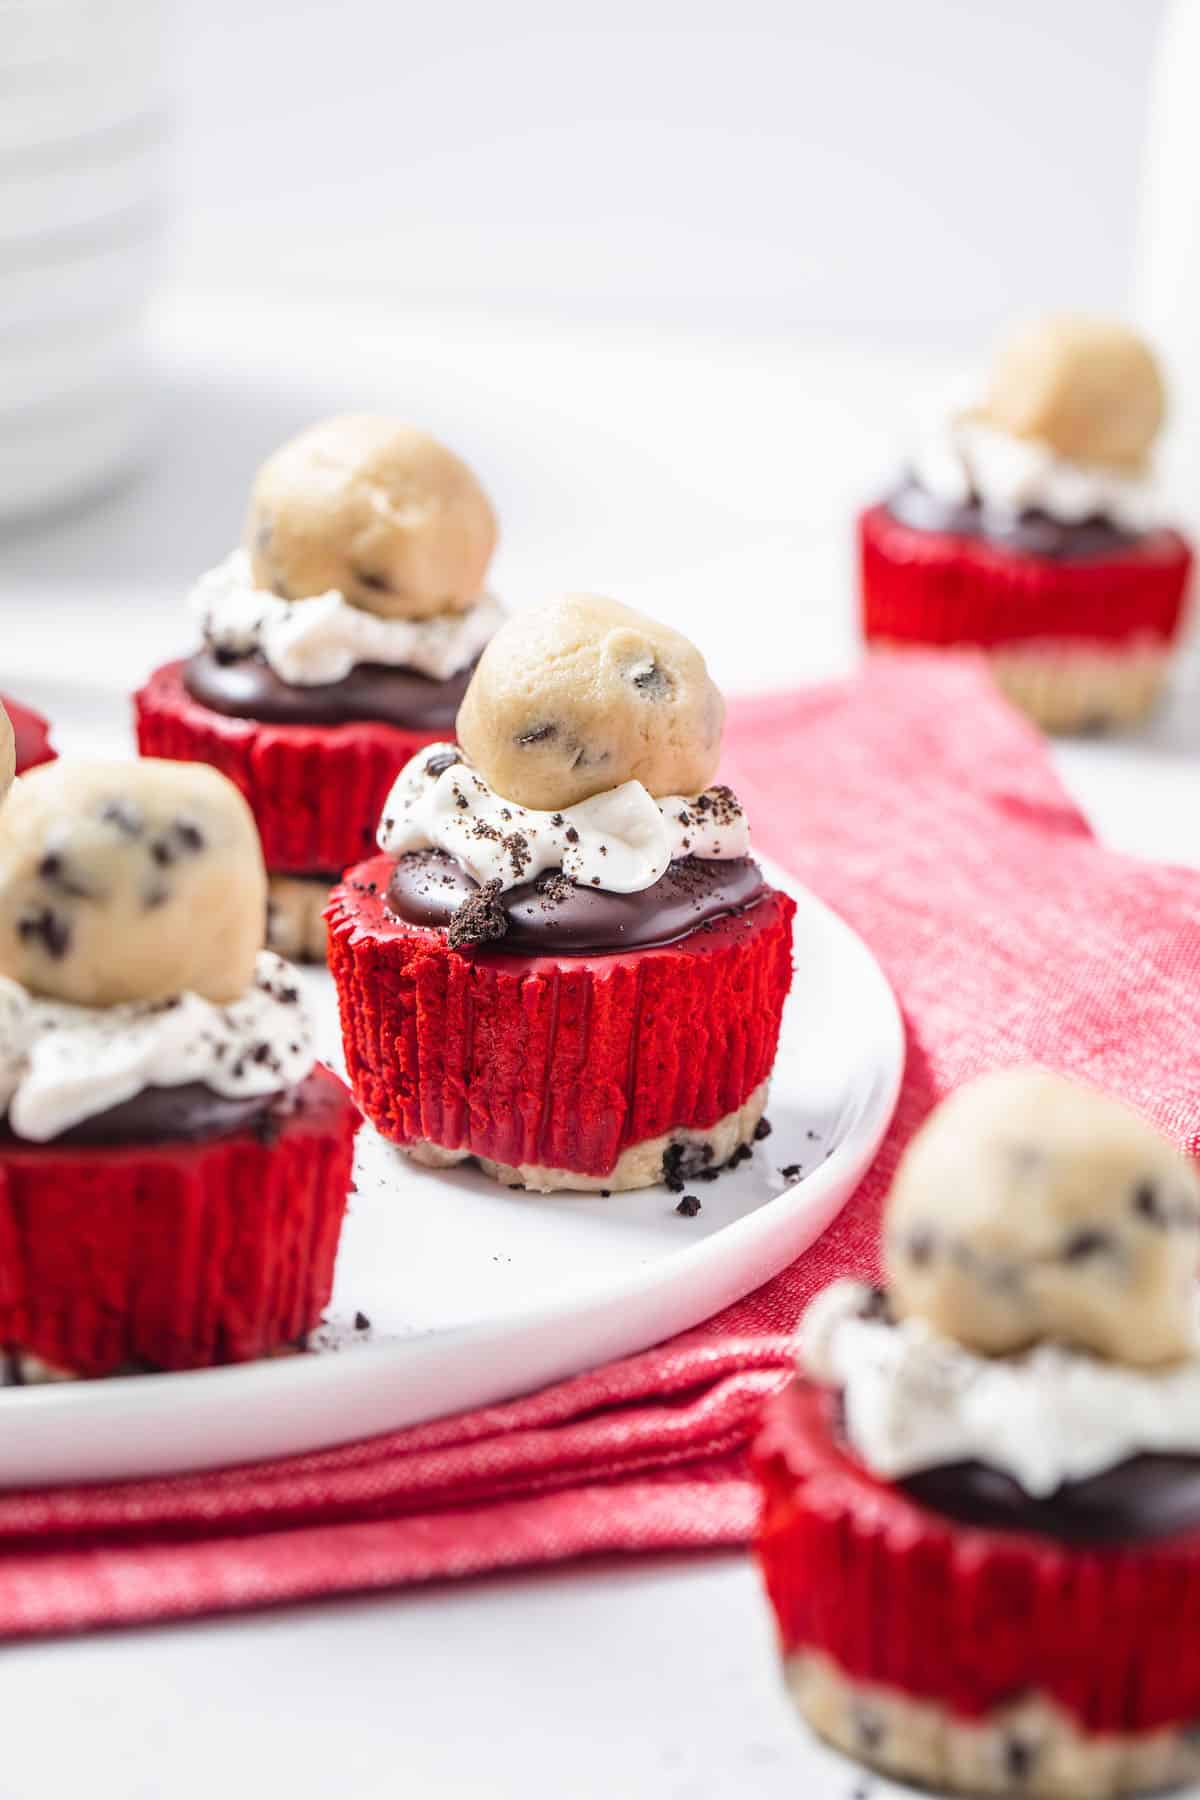
To add an extra touch of decadence, they are adorned with a velvety chocolate ganache, homemade whipped cream, and adorable mini cookie dough balls. These mini cheesecakes are simply irresistible and perfect for sharing the love on Valentine's Day!
This post may contain affiliate links. As an Amazon Associate, I earn from qualifying purchases. This in no way affects my opinion of those products and services. All opinions expressed on this site are my own. Please see my full disclosure policy for details.
Red Velvet, Oreo and Cookie Dough all in ONE!
Alright, I know, my Valentine’s day desserts are getting pretty predictable at this point. You can almost guarantee I’m gonna pair red velvet with either Oreo, cookie dough or both. But I can’t help it! I first made these Oreo Cookie Dough Red Velvet Cupcakes and immediately decided to recreate that decadent dessert in every form! I’ve made a cheesecake, a no-bake cheesecake and now I’m making mini cheesecakes!
There may or may not be some brownies coming. Stay tuned!
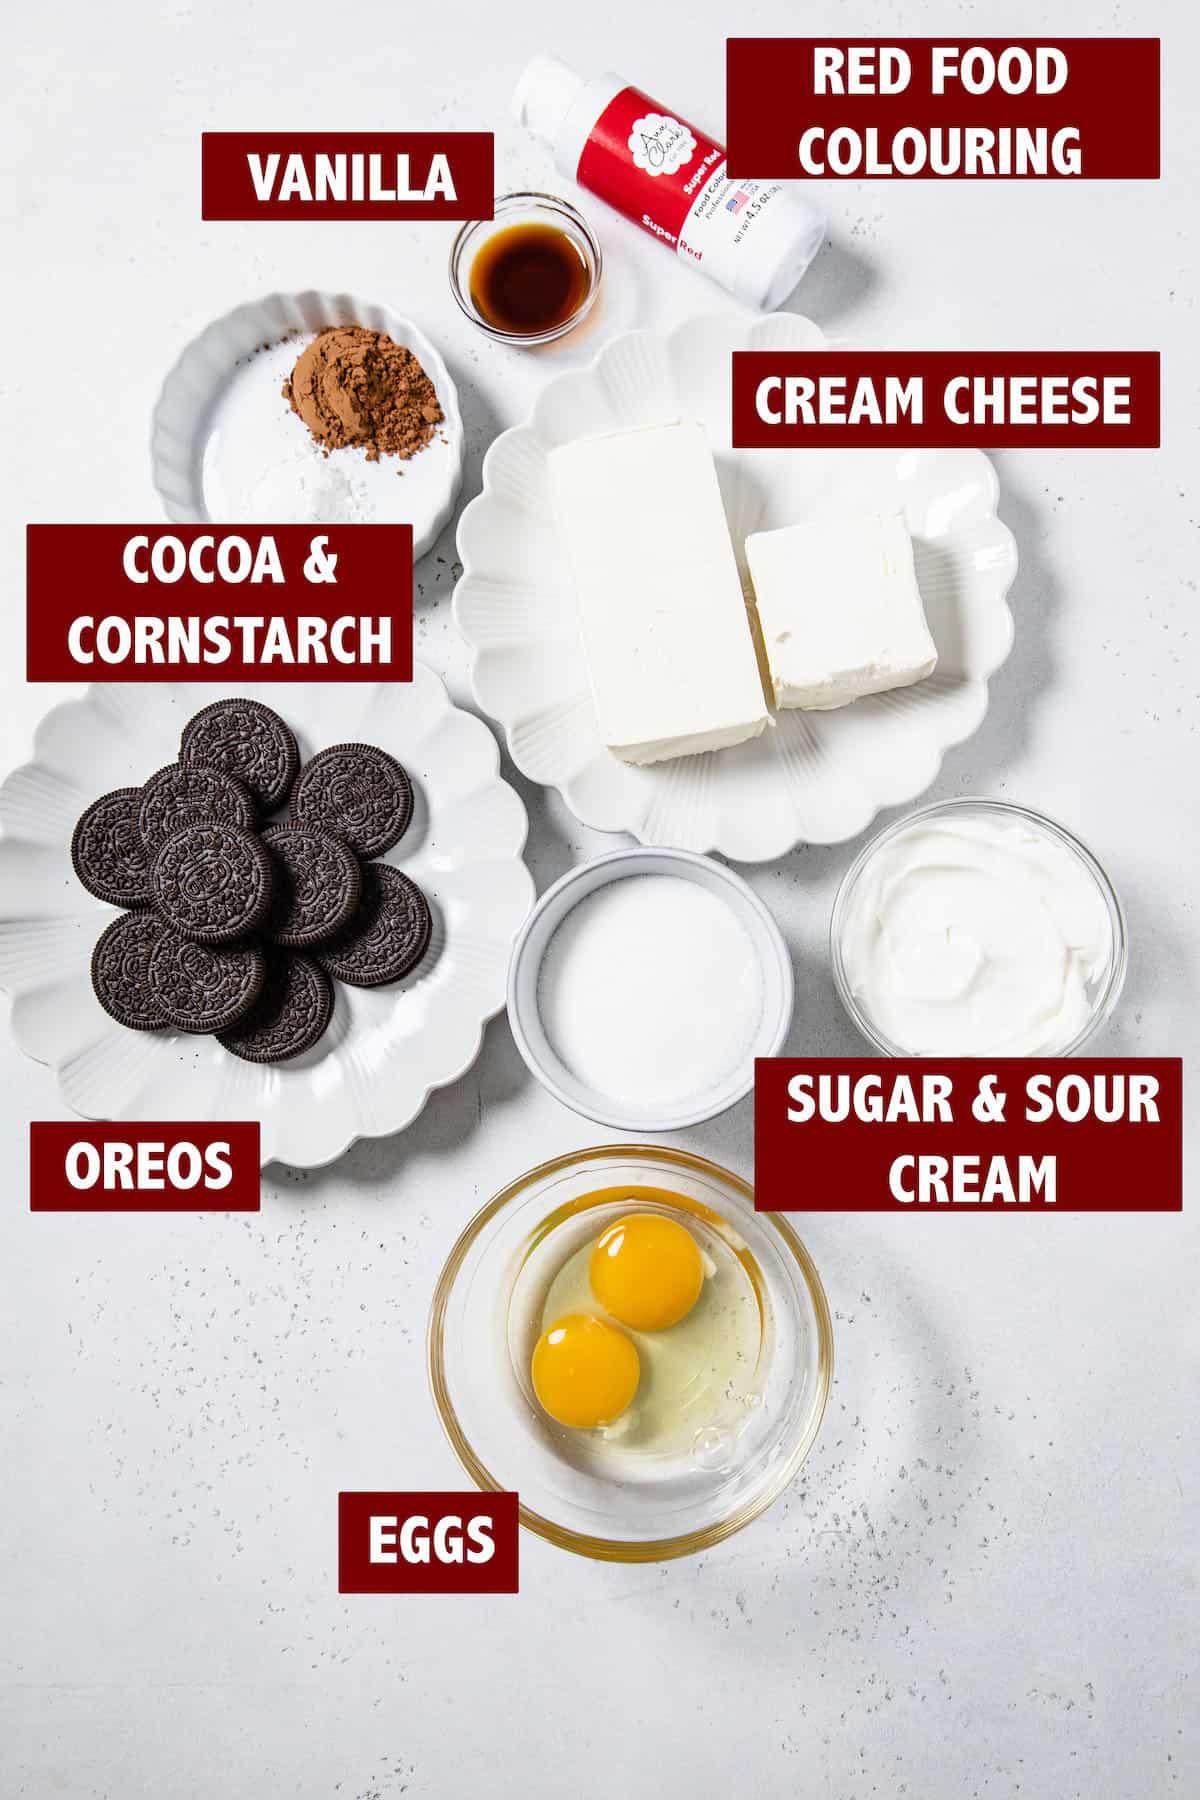
What you need for this Mini Red Velvet Oreo Cheesecake recipe
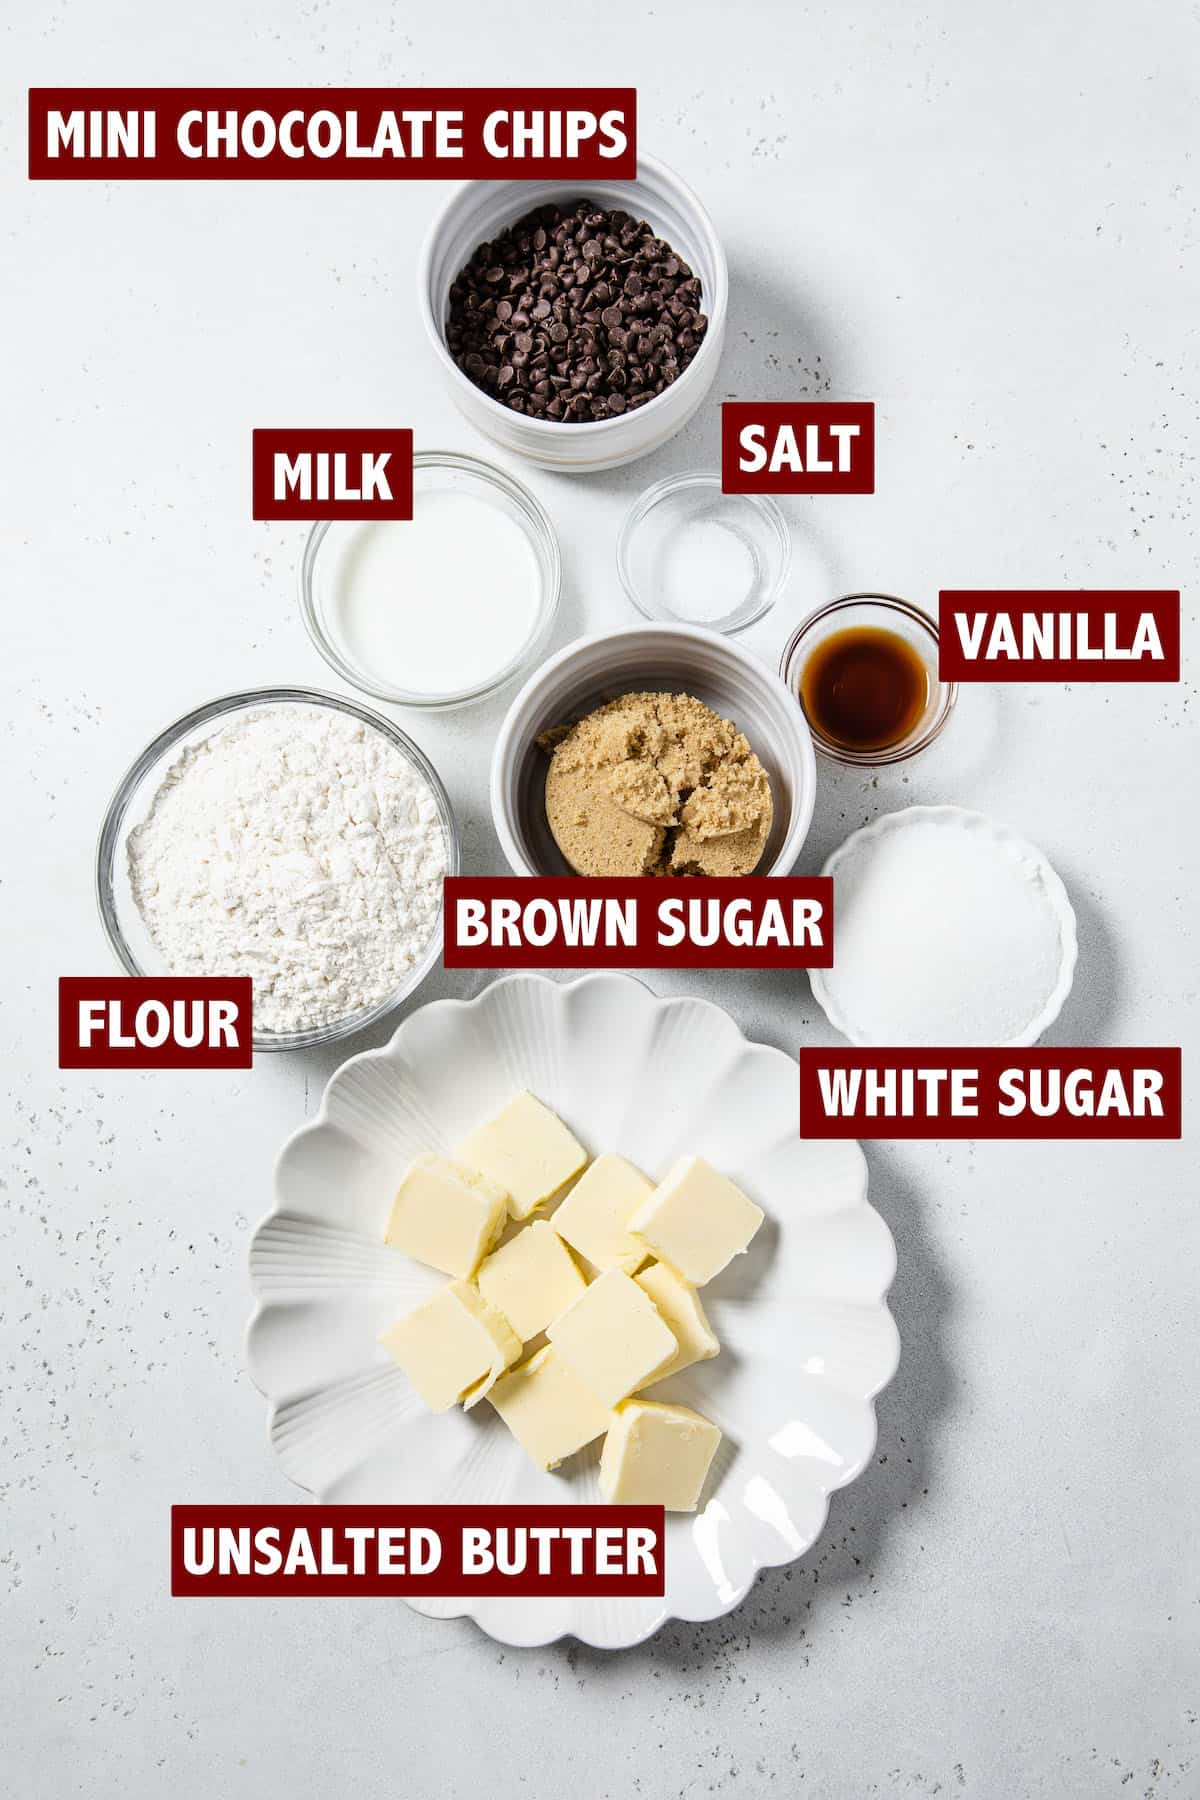
There’s 3 different parts to this recipe: the cookie dough base, the red velvet cheesecake and the ganache. Here’s the ingredients you’ll need for each part.
1. THE COOKIE DOUGH BASE
- All purpose flour — I recommend using all purpose flour. However, since we won’t be baking the cookie dough, you can probably get away with substituting with a flour of your choice.
- Butter — leave your butter to sit at room temperature for about 30 minutes to an hour until it gets soft. You can also melt the butter, but you’ll need to let it cool or else it’ll cause the chocolate chips to smudge.
- Sugar — as with most cookie recipes, we’ll be using a mixture of light brown sugar and granulated sugar.
- Vanilla — flavour, baby!
- Salt — to cut back some of that sweetness.
- Milk — since this is a no-bake edible cookie dough recipe, we won’t be using eggs. Therefore, the batter will be crumbly after mixing the above ingredients. To smoothen it out, we’ll be adding a few tablespoons of milk!
- Mini Chocolate Chips — I don’t suggest replacing the mini chocolate chips with regular chocolate chips because the mini’s blend into the dough better, making it easier to work with.
2. THE RED VELVET CHEESECAKE FILLING
Heard of red velvet cupcakes? Well this is that, but in cheesecake form! Combine the basic ingredients for red velvet cake with the basic ingredients for cheesecake and you’ve got a silky red velvet cheesecake!
- Oreos — The Oreos will be placed on top of the cookie dough crust so they’ll be in the middle of the cheesecakes when you bite into them. Feel free to chop them up and fold them into the cheesecake batter instead!
- Cream Cheese — Philadelphia cream cheese is the way to go! Though if you can use any brand, just make sure it’s full-fat cream cheese. You’ll need 12 ounces, which is 1 and ½ bricks of cream cheese as one package equals to 8 ounces.
- Granulated Sugar — always a must in cheesecake to sweeten up the batter!
- Cocoa Powder — as with all red velvet recipes, you must add a little bit of cocoa powder. Just 1 and ½ tablespoons to get that touch of chocolate flavour without darkening the batter too much to where we can’t get a nice red colour.
- Cornstarch — I always add cornstarch to improve the cheesecake texture and provide a bit of stability when it sets.
- Sour Cream — this gives our cheesecake its light and creamy texture! You can substitute with plain greek yogurt if you can’t find sour cream.
- Vanilla Extract — for flavour, of course. Use pure vanilla extract for the best results, we don’t use artificial vanilla over here.
- Red Food Colouring — use gel food colouring instead of liquid so it won’t affect the cheesecakes texture. I used this brand of food colouring to get the boldest red colour without needing to add too much.
- Eggs — to hold everything together! Use large eggs, not medium and not extra large. You also want to make sure the eggs are at room temperature before adding to the batter, so take them (and all refrigerated ingredients) out of the refrigerator at least 30 minutes before you begin.
How to Make these Mini Cheesecakes
They may seem intimidating upon first glance, but I promise they are very easy to make! Just take it one step at a time, let’s start with the base!
1. EDIBLE COOKIE DOUGH BASE
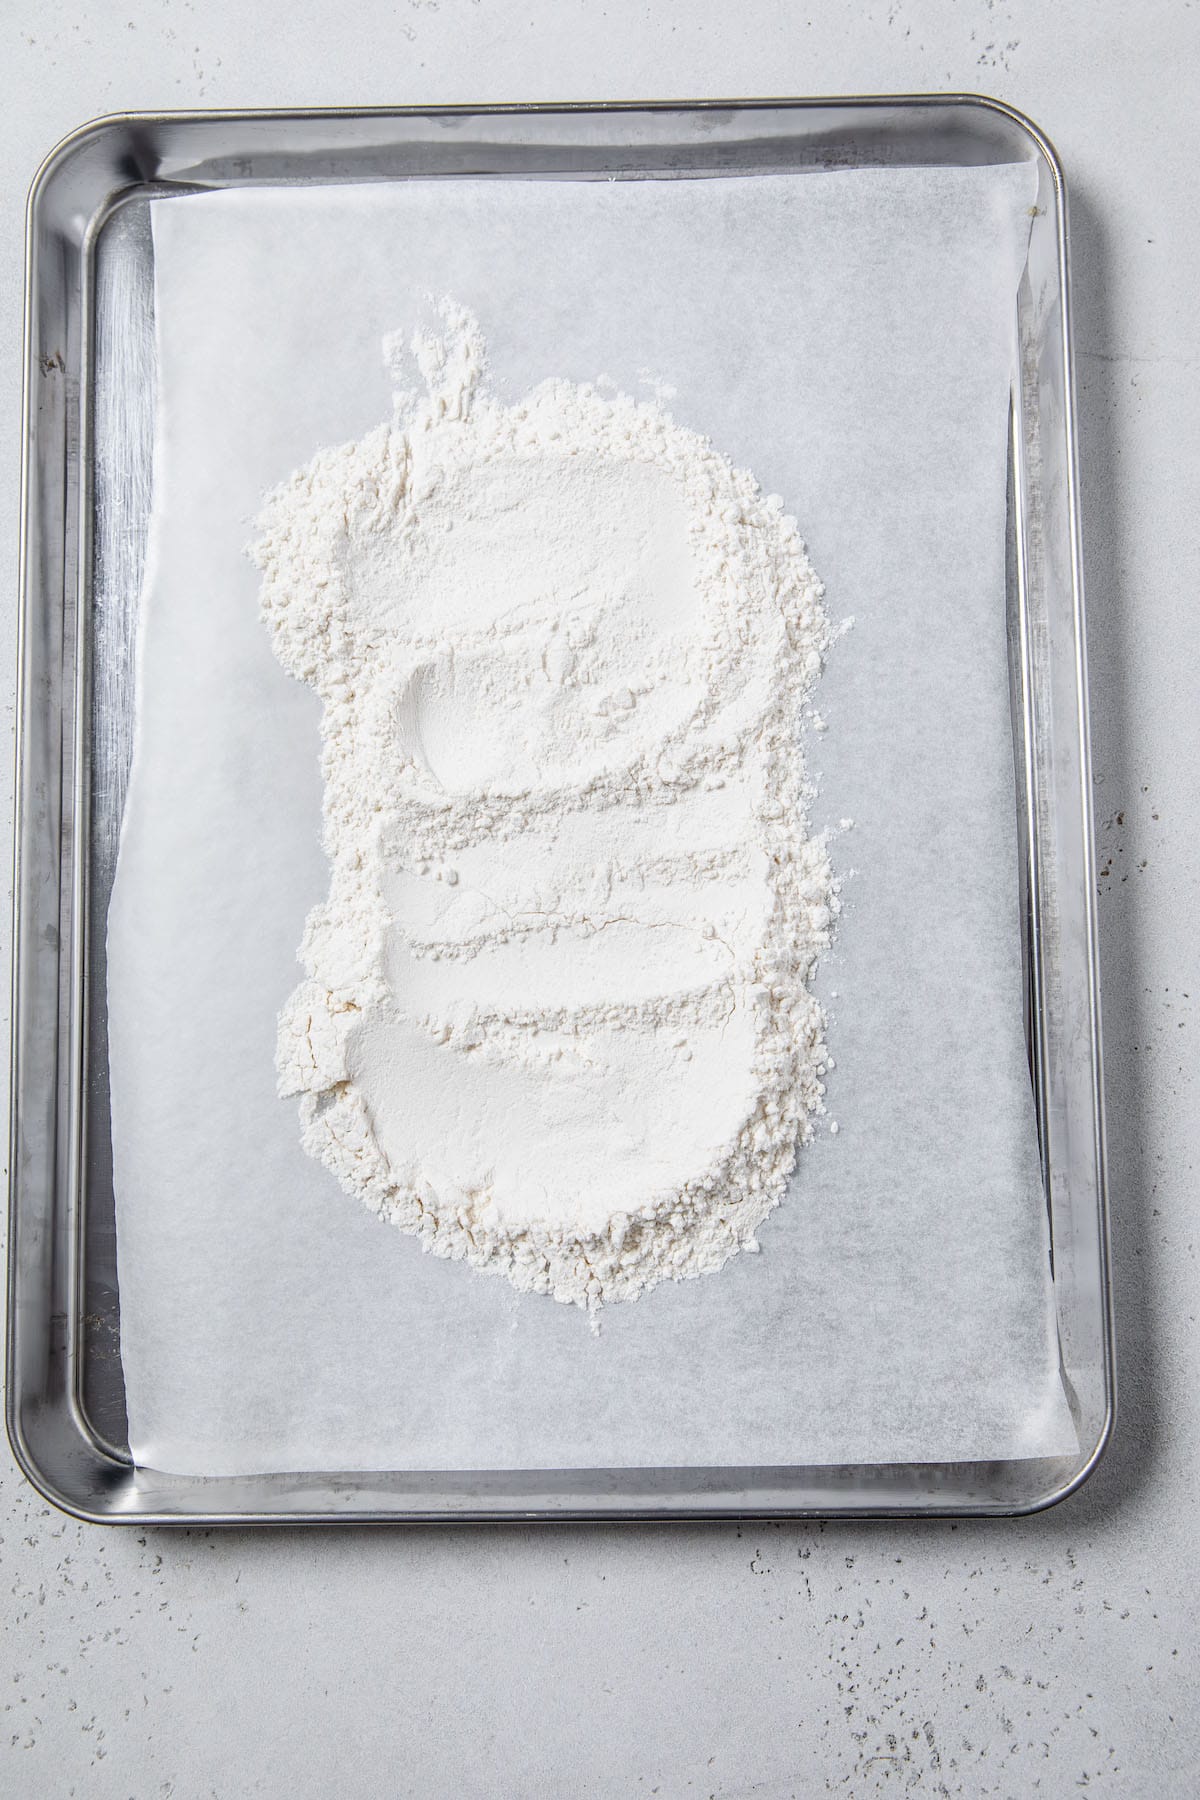
- Bake the flour — you heard right! We’re not baking this cookie dough, I mean the cheesecakes are going in the oven but the balls of dough on top are not. Because of this we need to destroy the bacteria in the flour by heating it.
Spread the flour on a parchment-lined baking sheet and bake in a 350°F oven for 5 minutes. Now the cookie dough will be safe to eat raw! Set the flour aside to cool a bit.
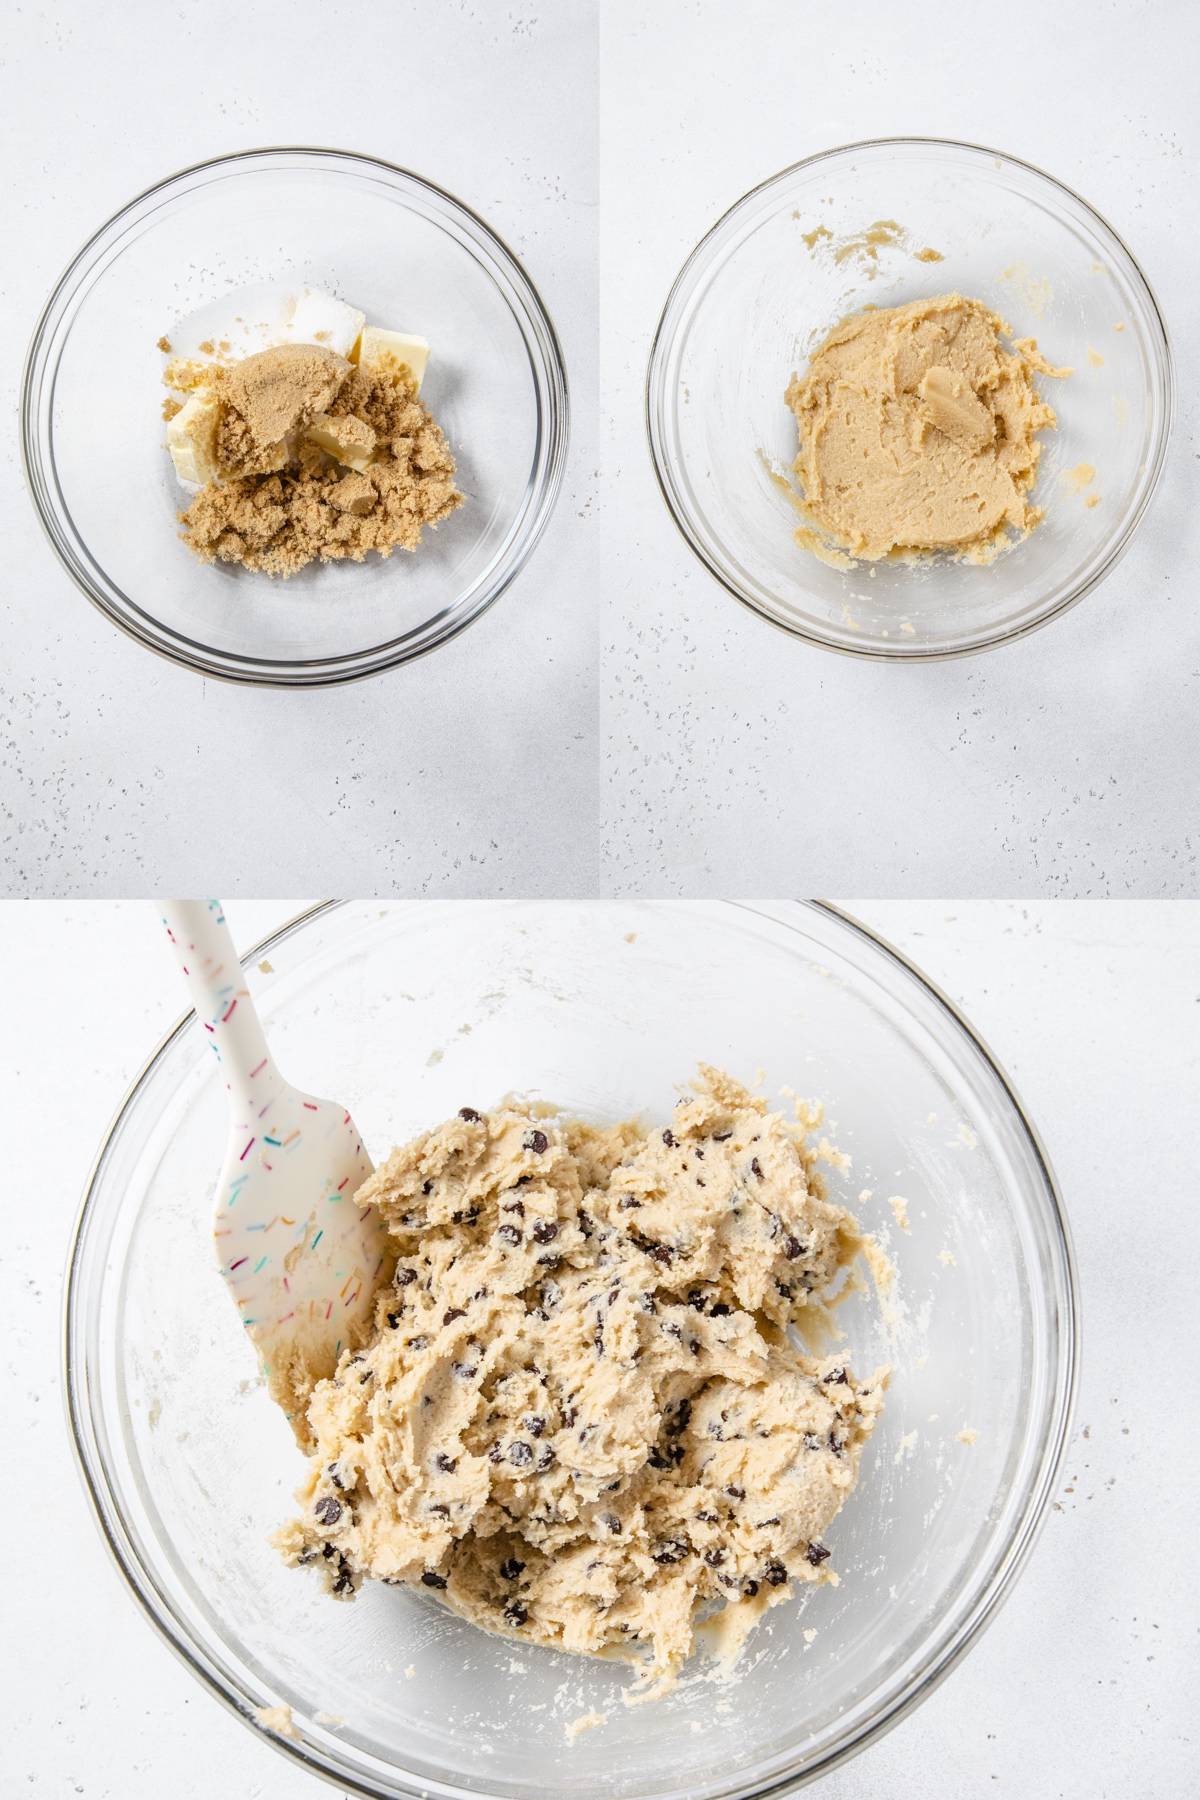
- Make the dough — start by beating the softened butter and both sugars in a medium mixing bowl with an electric mixer until fluffy and smooth. Mix in the vanilla and salt, then add the flour and mix on low speed until it’s all combined.
The batter will be crumbly, so add 2-3 tablespoons of milk, one tablespoon at a time and mix until the dough comes together. Mix in the mini chocolate chips.
That’s it! That’s how easy it is to make edible cookie dough!
Can I use pre-made cookie dough
I found out pillsbury cookie dough is now safe to eat raw (yayy!), so if you want to use that instead of making your own cookie dough go right ahead!
No springform pan, no worries. These cheesecakes will be baked in a muffin tin like cupcakes!
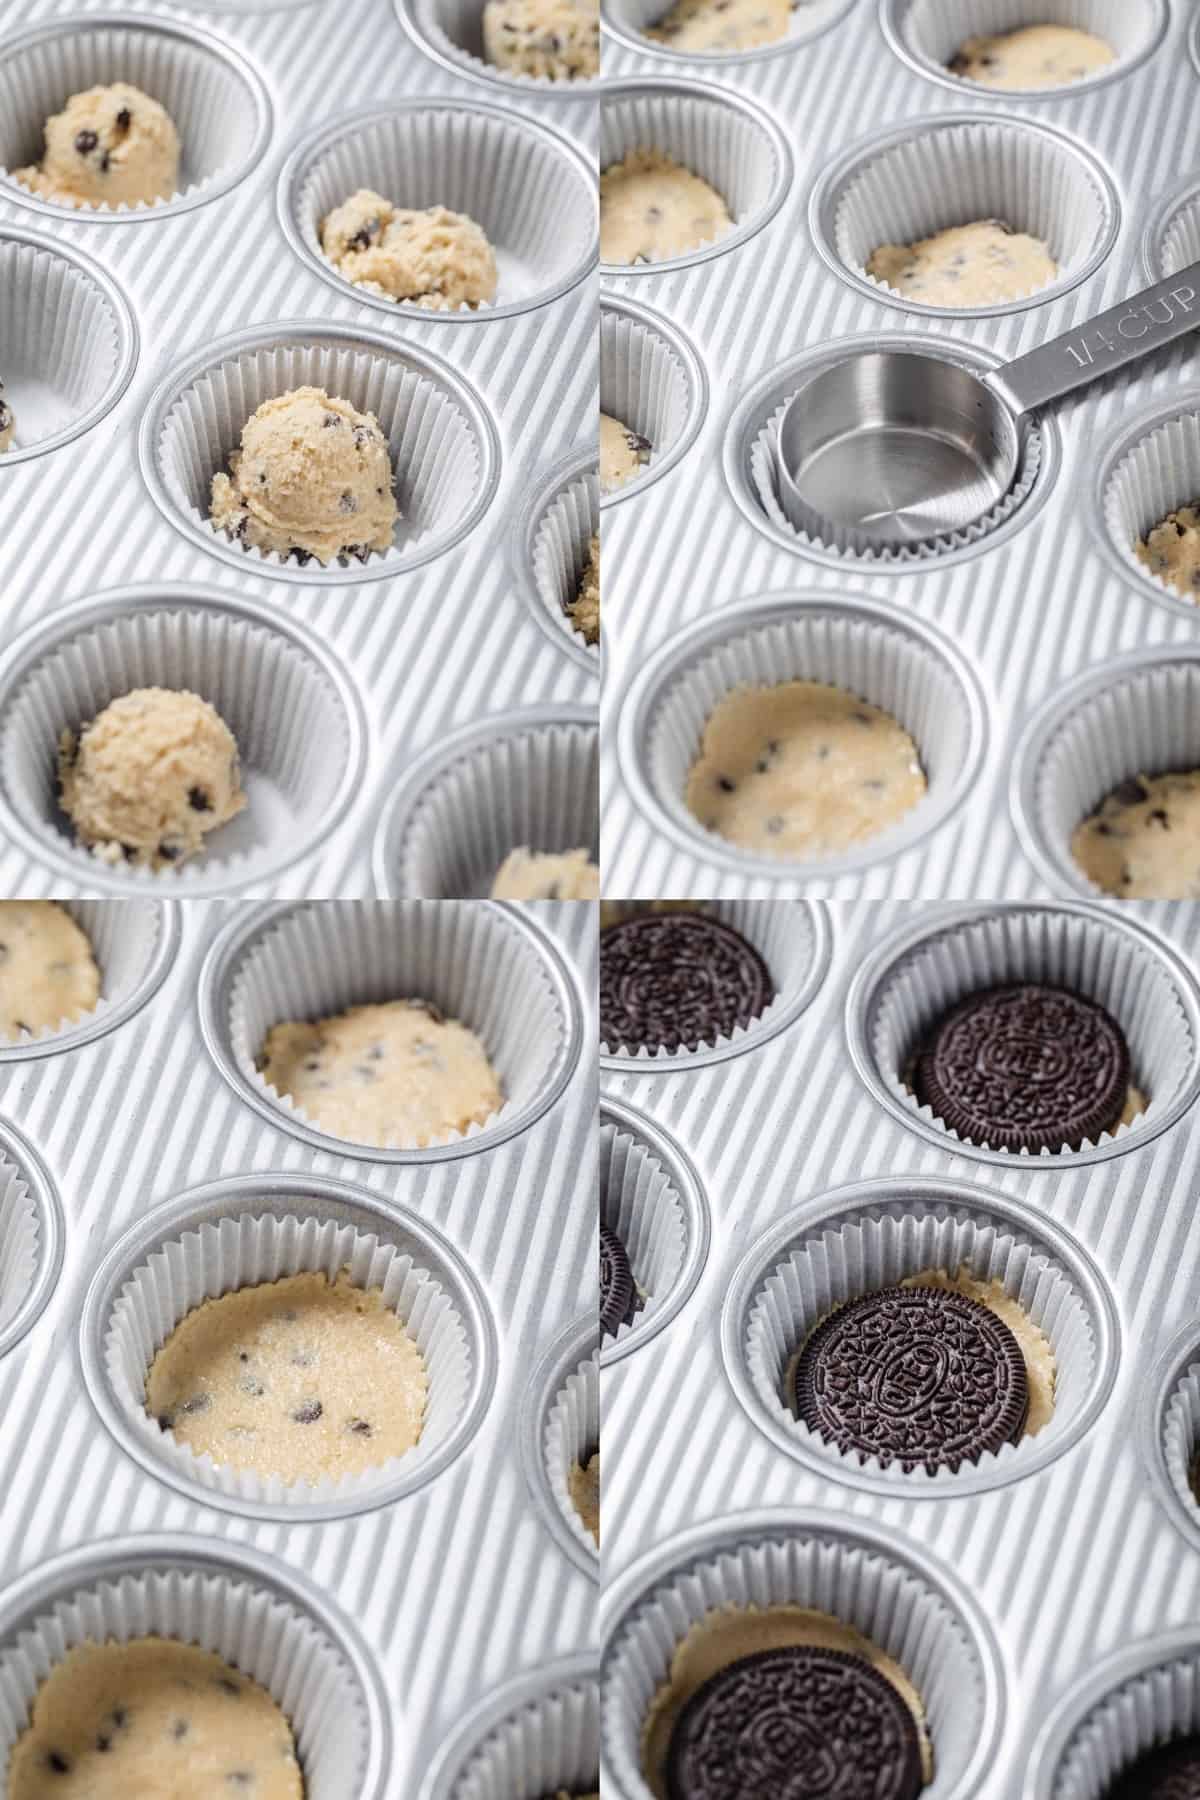
- Scoop the dough into liners — resist the urge to eat the cookie dough and scoop a tablespoon into each cupcake liner and use a flat bottomed object to flatten it out. I used a ¼ cup measuring cup and sprayed the bottom with nonstick cooking spray to prevent the dough from sticking to the bottom.
Roll the rest of the dough into tablespoon sized balls. You should get 12, just enough to top each cheesecake.
- Place an Oreo on top of the base — take a whole Oreo cookie on top of the cookie dough base and lightly press it into the dough so it doesn’t move around. Now place the entire muffin pan in the refrigerator while you prepare the red velvet cheesecake.
Want to Reverse the Recipe?
Before we get to the red velvet cheesecake recipe, let me tell you how you can reverse this recipe. By reverse, I mean an Oreo base and a cookie dough middle instead of the other way around!
If you want an Oreo crust, crush some Oreo cookies in a food processor or in a ziplock bag with a rolling pin. Combine the crumbs with melted butter, scoop into the liners and flatten. Here’s a mini cheesecake recipe of mine that uses an Oreo crust for specific measurements and instructions.
Now, scoop tablespoon sized portions of the cookie dough and roll them into balls. Place one cookie dough ball on the Oreo cookie crusts, then refrigerate. I’m totally going to try this method next time I make these!
3. Creamy Red Velvet Cheesecake Recipe
Set a timer, because when I tell you the red velvet cheesecake filling is FAST to make I mean it!
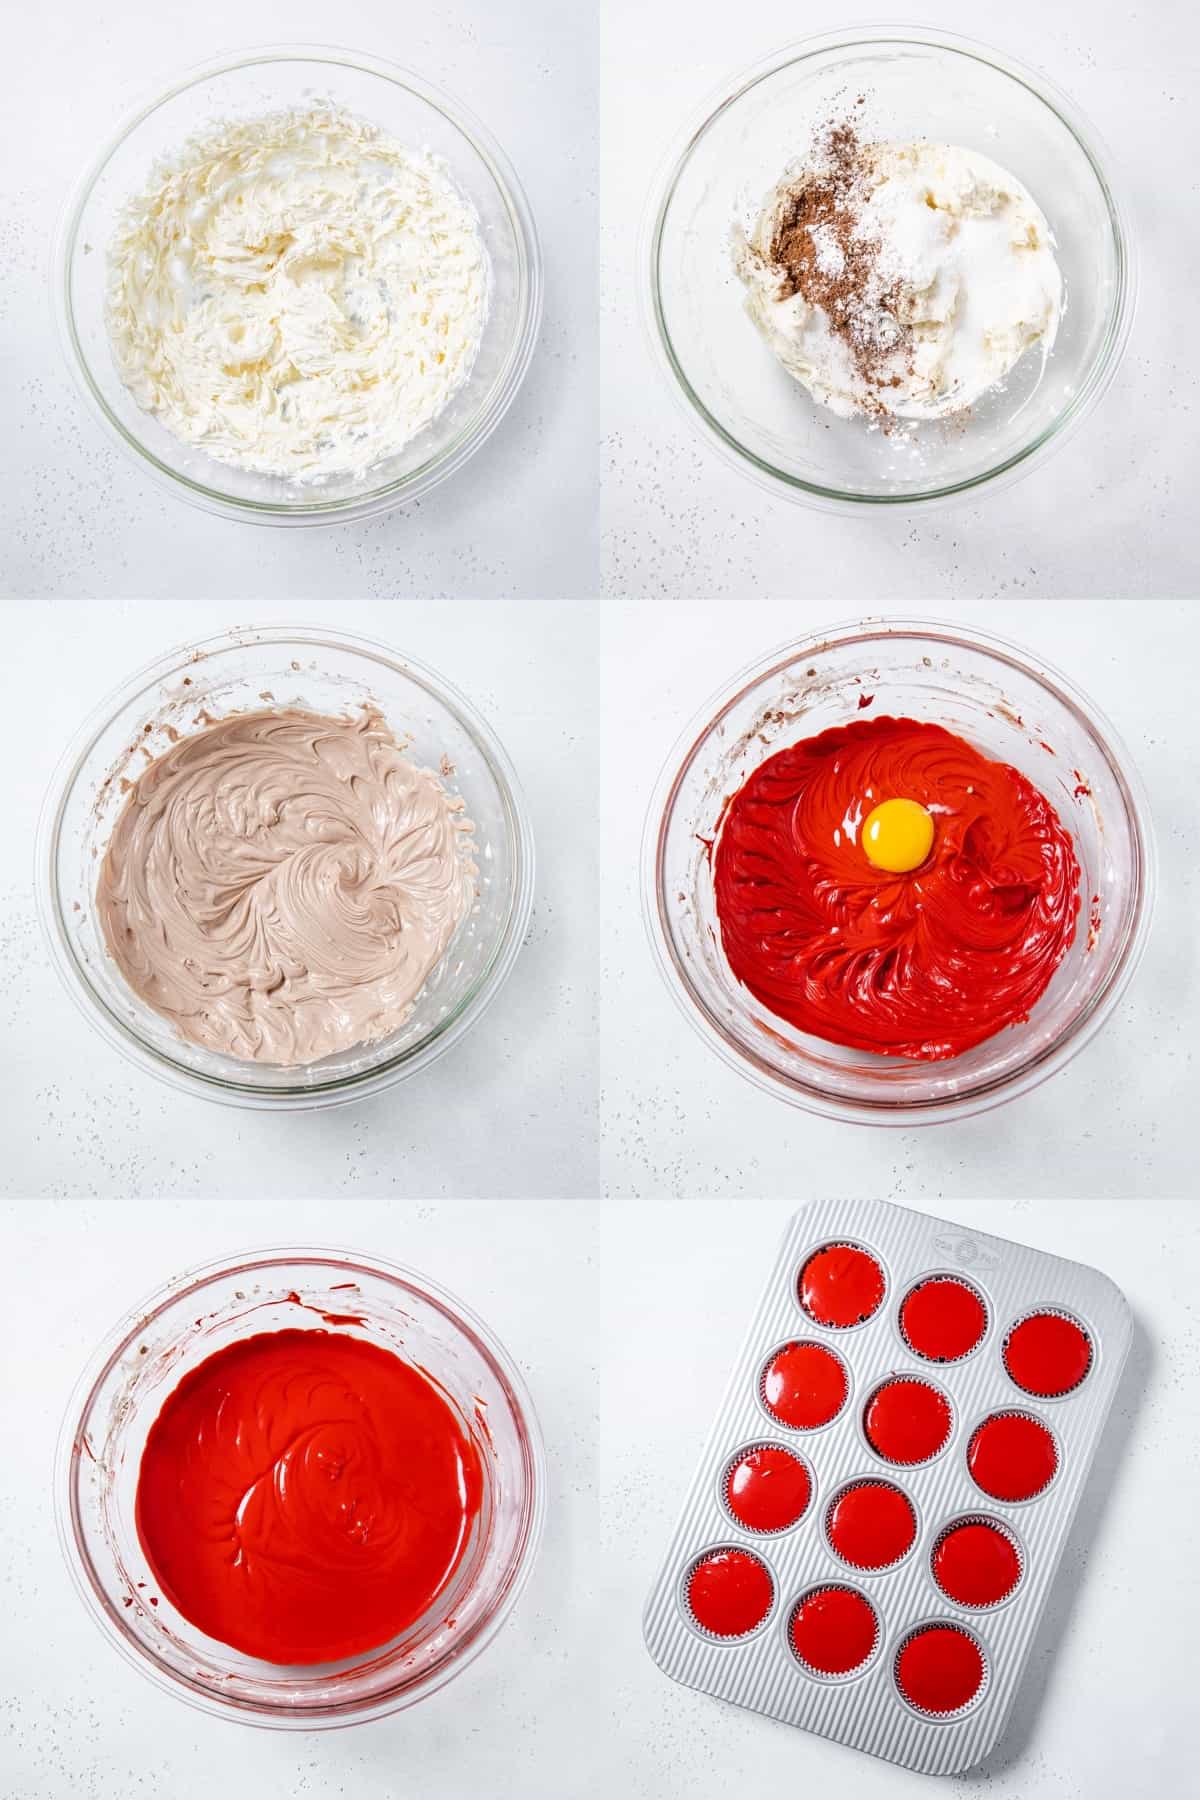
- Beat the cream cheese — in a large bowl using a hand mixer, or in a stand mixer bowl using the paddle attachment, beat the cream cheese until it’s smooth. Scrape down the sides of the bowl then add the sugar, cocoa and cornstarch and beat. Then add the sour cream and vanilla and beat until it’s all smooth and combined.
- Make it red — now squeeze in some of the red food colouring and mix it in. Start with a little, then add more until you’re satisfied with the colour. This is why we add the colouring before the eggs, because once you add the eggs, you don’t want to overmix the batter. Make sure to use a rubber spatula to scrape the bottom of the bowl and mix it properly to ensure every inch of the cheesecake batter is dyed red.
- Eggs — mix in the eggs one at a time on low speed. Again use a rubber spatula to make sure the bottom of the bowl is properly mixed. The batter should be nice and thick.
- Scoop the cheesecake mixture into the cupcake liners using a large cookie scoop or a ¼ measuring cup. Lightly tap the pan on the counter to remove any air bubbles.
- Bake cheesecakes in a preheated 325°F/160°C oven for 18-20 minutes or until the tops look dry but the cheesecakes still jiggle slightly.
- Cool on the countertop for at least an hour.
- Refrigerate — place a large sheet of paper towel over the cheesecakes and cover with plastic wrap. Then place the cheesecakes in the refrigerator for 6-8 hours or preferably overnight to chill and set completely.
4. Make ‘Em Pretty!
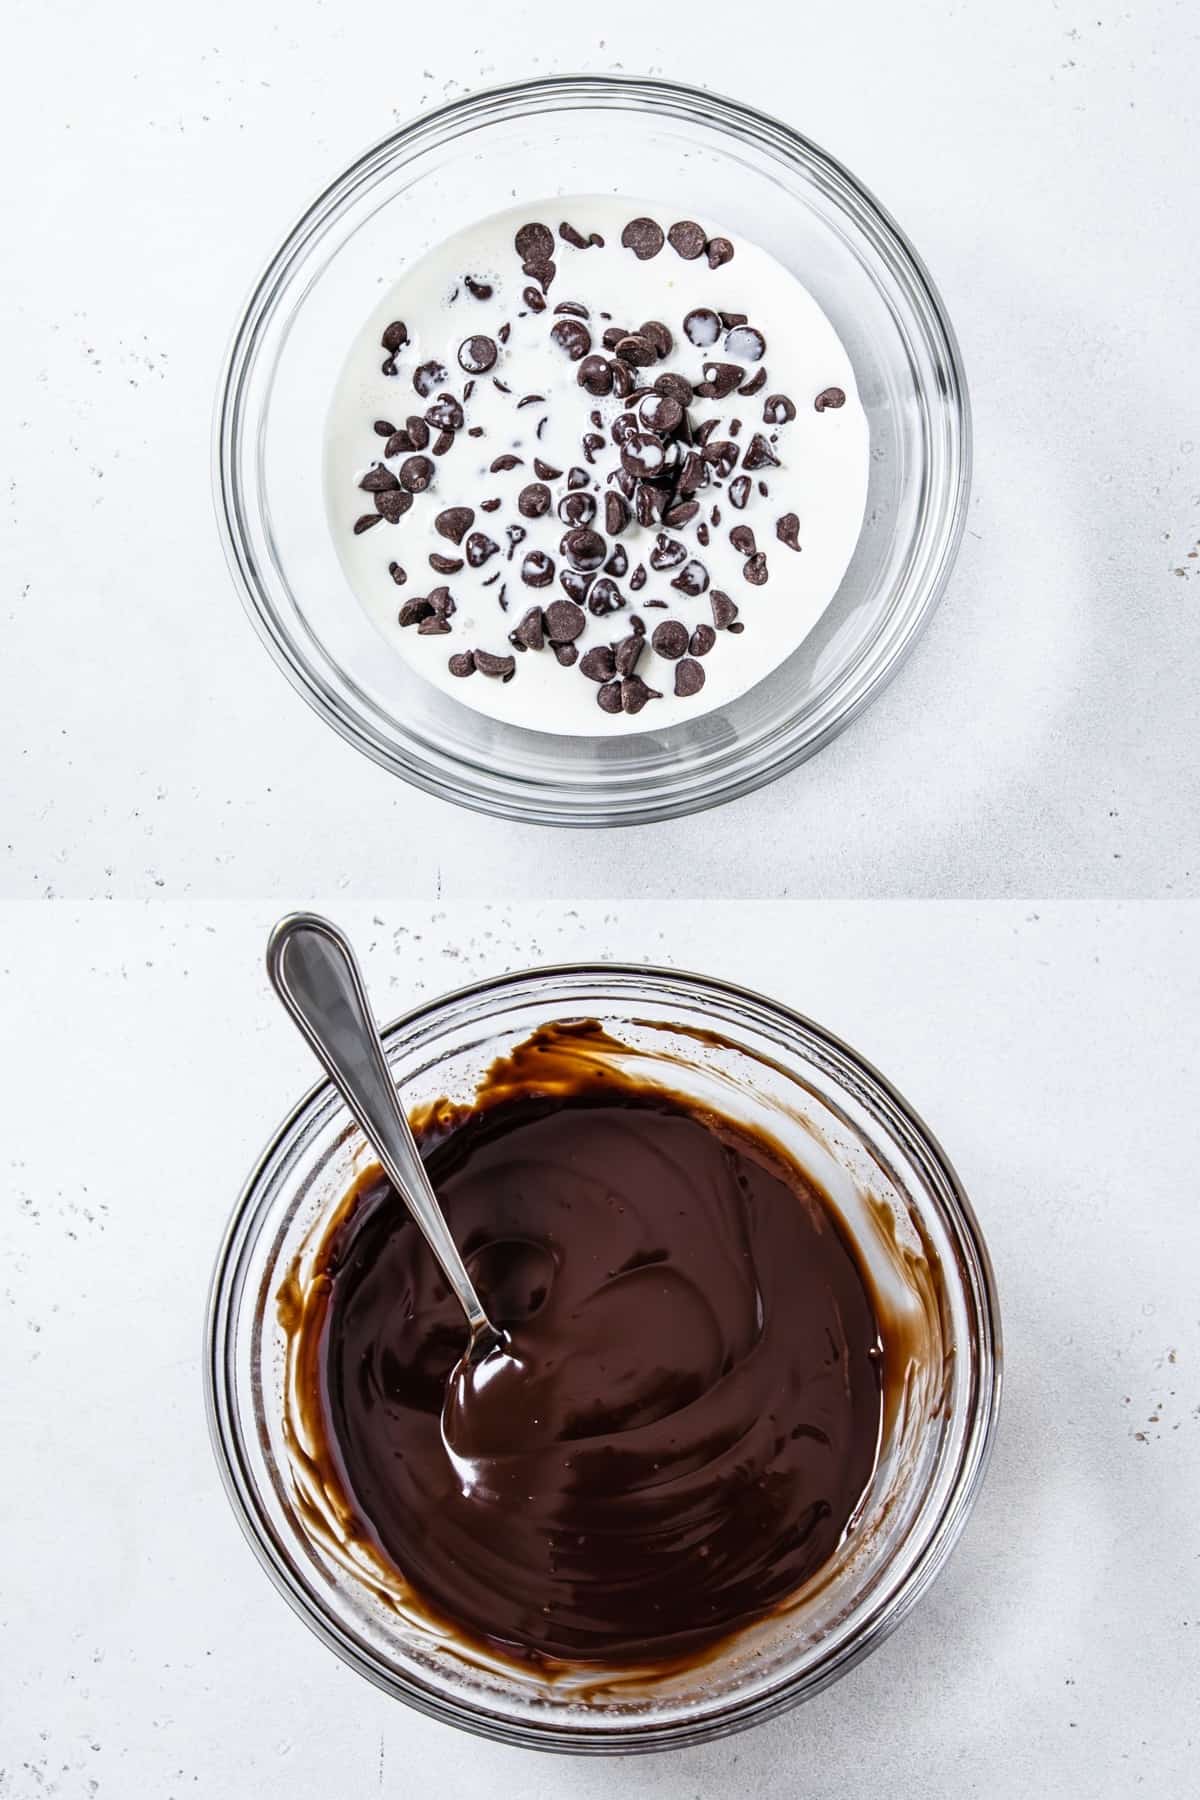
- Ganache — we’ll start by making ganache. Combine chocolate chips and heavy cream in a small bowl and microwave for 1 minute (in 30 second intervals), then stir slowly until it comes together. Spoon ganache onto the top of each cheesecake, then return them to the refrigerator to set.
- Whipped Cream — now this is optional, but I thought it would make the cheesecakes look a bit prettier. You can use pre-made whipped cream or make it from scratch. To do this, combine heavy whipping cream, vanilla and powdered sugar in a medium sized bowl and beat until stiff peaks form.
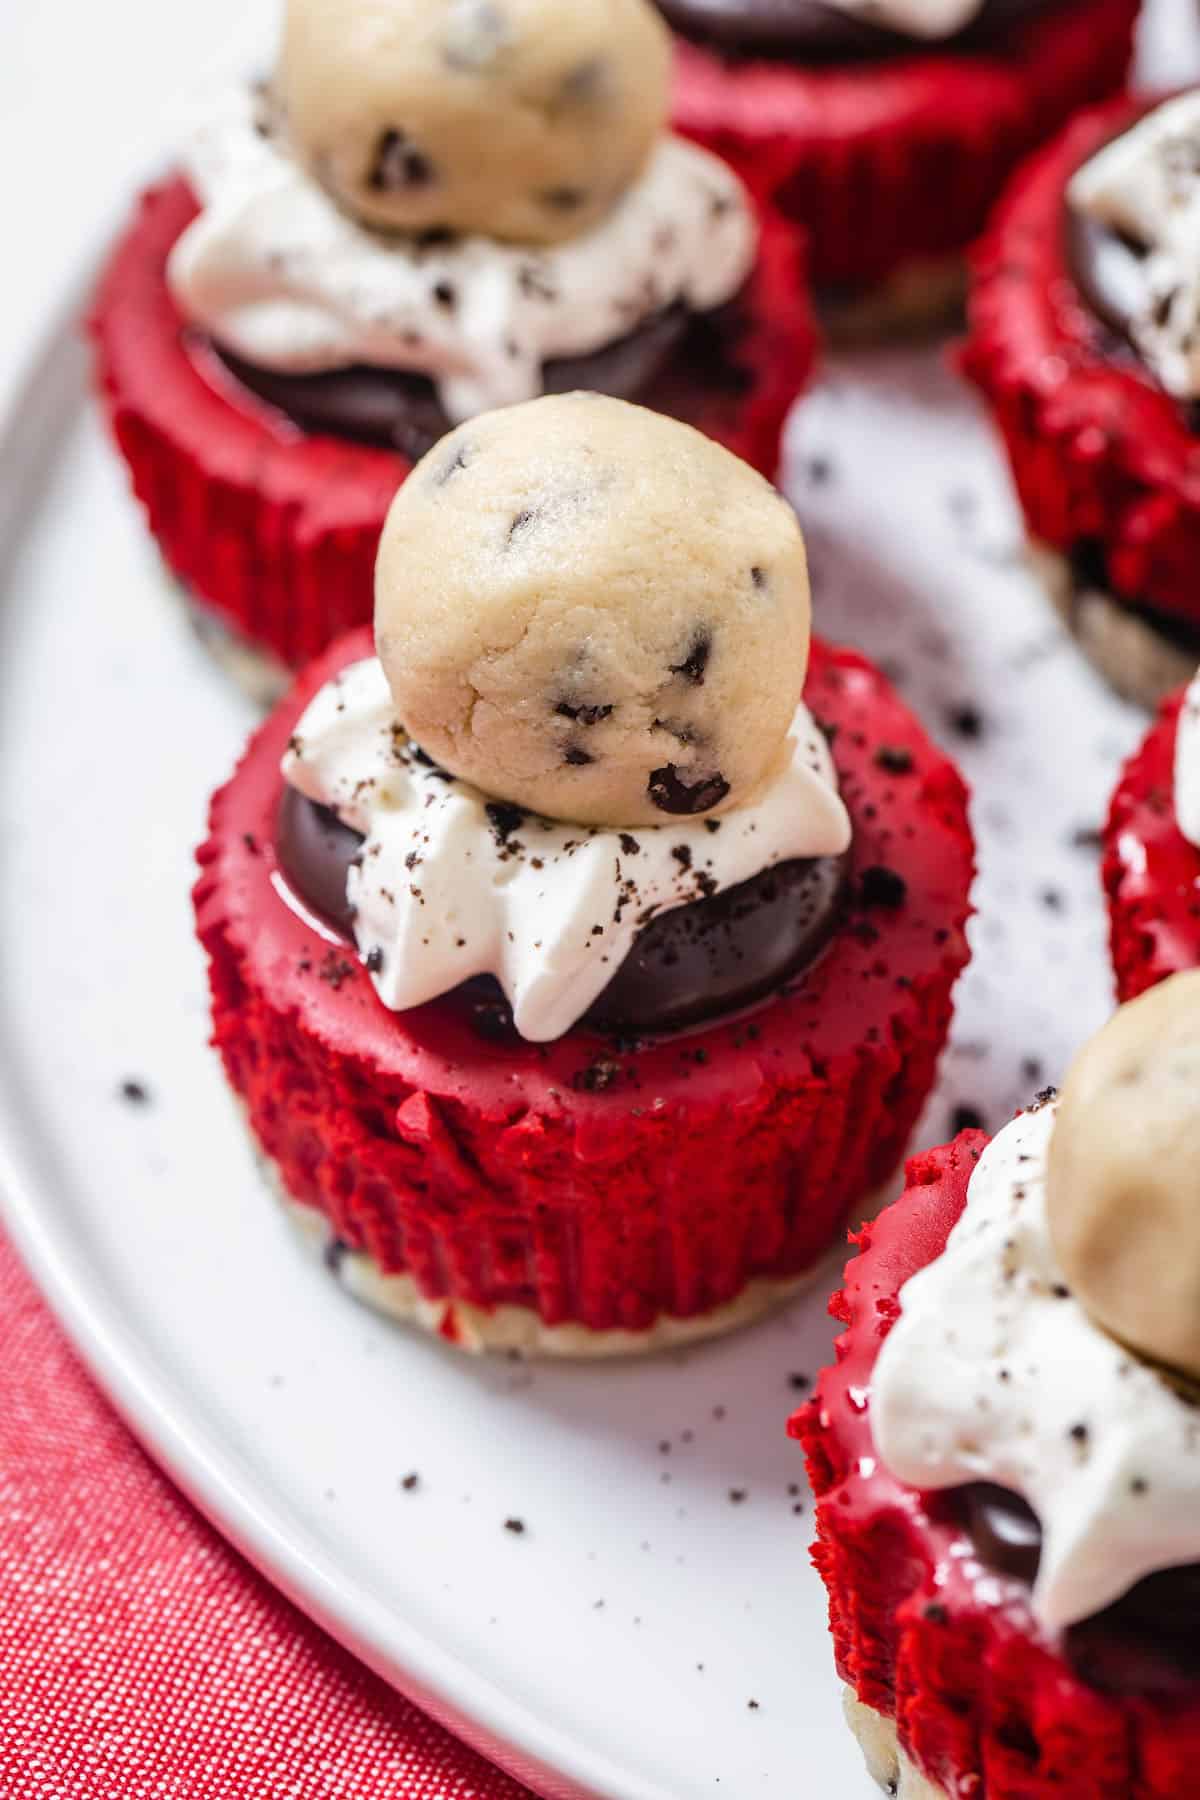
- Decorate — scoop the whipped cream into a piping bag with a large star tip, and pipe the cream on top of the cheesecakes. Garnish with crushed Oreo crumbs and the remaining cookie dough balls. You can also top them with a mini Oreo!
How to store mini cheesecakes
Store — The best way to store these cheesecakes is by keeping them in an airtight container in the refrigerator for a maximum of 5 days. However, I recommend serving and enjoying them in the first 24-48 hours, but do not decorate them with whipped cream until the day you plan to serve.
Freezing — Keep your homemade cheesecakes fresh and ready for any special occasion by freezing them individually for up to 3 months. When you're ready to indulge, simply thaw them overnight in the refrigerator, add a dollop of whipped cream, and enjoy!
More Mini Cheesecakes:
- Mini Chocolate Chip Cookie Dough Cheesecakes
- Mini Vanilla Cheesecakes
- Mini Oreo Cheesecakes
- Mini Reese’s Peanut Butter Cheesecakes
- Mini Triple Chocolate Cheesecakes
- Mini Ferrero Rocher Stuffed Cheesecakes
SHARE YOUR PICS!
Follow me on Instagram and tag #queensleeappetit so I can see and share all of your Queenslee Appétit creations in my stories and the QA Newsletter!
>>PIN THIS FOR LATER<<
FOLLOW QUEENSLEE APPÉTIT
Like what you see? Make sure you‘re following Queenslee Appétit for more tasty recipes!
Pinterest | Instagram | Facebook | YouTube
Have any questions about the recipe? Contact me here, and I’ll be happy to help!
SWEETEN UP YOUR INBOX!
SUBSCRIBE to the Queenslee Appétit Newsletter to receive new recipe notifications and sneak peeks at upcoming recipes and more!
Let’s get baking!
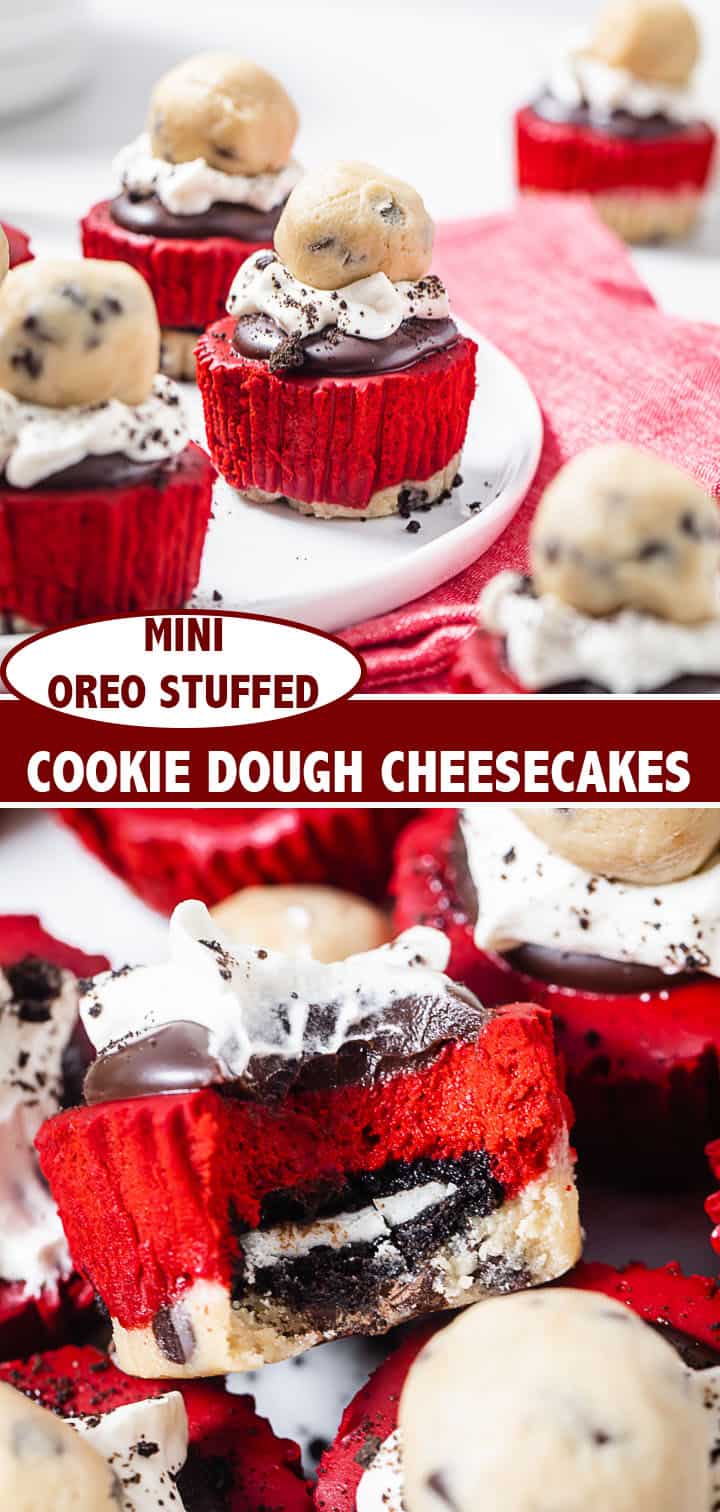
Mini Oreo Stuffed Red Velvet Cookie Dough Cheesecakes
Get ready to indulge in a delightful treat this Valentine's Day with our Mini Red Velvet Cheesecakes! These delectable bites are perched on a glorious edible cookie dough base and boast a delightful surprise in the form of an Oreo cookie hidden within.
Ingredients
Cookie Dough Crust:
- 1 cup all purpose flour
- ½ cup unsalted butter, softened
- ½ cup light brown sugar, packed
- ¼ cup granulated sugar
- 1 teaspoon pure vanilla extract
- ¼ teaspoon salt
- 2-3 Tablespoon milk
- ½ cup mini chocolate chips
- 12 whole Oreos
Red Velvet Cheesecake:
- 1 and ½ (8-ounce) packages (12 oz) full-fat cream cheese, room temperature
- ½ cup granulated sugar
- 1 and ½ Tablespoon unsweetened cocoa powder
- 1 Tablespoon cornstarch
- ½ cup sour cream, room temperature
- 1 and ½ teaspoon pure vanilla extract
- Red gel food colouring
- 2 large eggs, room temperature
Chocolate Ganache:
- 1 cup dark chocolate chips
- ½ cup heavy cream
Topping:
- ½ cup heavy cream, chilled
- ⅓ cup powdered sugar
- ½ teaspoon pure vanilla extract
- 4 Oreos, filling removed and crushed
Instructions
- Line a 12-cup muffin pan with cupcake liners. Set aside.
Baking the Flour:
- Preheat oven to 350°F. Line a baking sheet with parchment paper or a Silpat mat. Pour flour onto the baking sheet and spread into an even layer. Bake flour in preheated oven for 5 minutes. Pour into a separate bowl and set aside to cool. Turn the oven down to 325°F.
For the Edible Cookie Dough:
- In the bowl of a stand mixer fitted with a paddle attachment, or in a medium mixing bowl using a hand mixer, add the softened butter and both sugars. Beat on medium speed until light and fluffy, about 4-5 minutes. Mix in vanilla, flour and salt.
- The cookie dough will be crumbly, so add milk one tablespoon at a time and beat until dough comes together in large clumps. Mix in the mini chocolate chips on low speed.
For the Cookie Dough Crust:
- Scoop out (24) 1 tablespoon sized portions of cookie dough and place 12 balls into each cupcake liner. Roll the other 12 balls between your palms and place them in an airtight container, refrigerate until ready to use.
- Spray the bottom of a ¼ measuring cup or some other small flat bottomed object with nonstick cooking spray and press cookie dough down into an even layer.
- Lightly press a whole Oreo on top of each cookie dough base, then transfer pan to the refrigerator.
For the Red Velvet Cheesecake:
- In a large bowl using a handheld mixer, beat the cream cheese on low speed until smooth and creamy, about 1-2 minutes.
- Add the sugar, cocoa powder and cornstarch and continue to beat until combined.
- Scrape down the sides of the bowl and add sour cream and vanilla and continue beating until smooth.
- Add some red food colouring and mix until combined. Scrape the bottom of the bowl with a rubber spatula, then continue to mix until the cheesecake is coloured thoroughly.
- Add eggs one at a time, beating slowly until just combined, do not overbeat. Batter will be thick.
- Remove muffin pan from the refrigerator and fill each liner with ¼ cup of batter. You may have some batter left, so scoop an extra tablespoon of batter into each liner until it’s finished. These cheesecakes can be filled all the way to the top. Lightly tap the pan on the counter to remove any air bubbles.
- Bake in preheated oven for 18-20 minutes until the tops are puffed and look dry.
- Remove from oven and allow to cool completely on a cooling rack, about an hour.
- Once cooled, cover with a large sheet of paper towel and cover with plastic wrap and refrigerate until firm and chilled, about 6 hours or overnight.
For the Ganache:
- Put the chocolate chips and cream into a medium heat safe bowl. Microwave in two 30 second intervals, stirring after each interval until combined and smooth.
- Spoon ganache over cheesecakes and return them to the refrigerator until ganache is set.
Extra Decoration:
- In a chilled stainless steel or glass bowl, whip the chilled cream, powdered sugar, and vanilla until it reaches stiff peaks, about 3-4 minutes.
- Pipe the whipped cream in the middle of the cheesecakes, leaving some ganache visible. Decorate with crushed Oreos and a mini cookie dough ball! Serve and enjoy!
Notes
- Make Ahead: unbaked cheesecakes can be covered and refrigerated for up to 2 days before baking. Baked/undecorated cheesecakes can be refrigerated for up to 3 days before decorating. Freeze baked cheesecakes for up to 3 months. Thaw in the refrigerator overnight before decorating and serving.
- Tools I Used (affiliate links): 12-cup muffin pan | Cupcake liners | Mixing Bowl Set | 4-QT Mixing Bowl | Baking Sheet | Parchment Paper | 1-Tablespoon Cookie Scoop | Measuring Cups | Cordless Hand Mixer | Disposable Piping Bags | Wilton 1M Piping Tip | Red Gel Food Colouring
- Storage: the decorated cheesecakes will keep in the refrigerator for up to 5 days.
Nutrition Information:
Yield: 12 Serving Size: 1Amount Per Serving: Calories: 496Total Fat: 28gSaturated Fat: 16gTrans Fat: 0gUnsaturated Fat: 10gCholesterol: 84mgSodium: 150mgCarbohydrates: 58gFiber: 2gSugar: 42gProtein: 5g
BON APPÉTIT!
Love, Dedra
©QUEENSLEE APPÉTIT. All images & content are copyright protected. Please do not use my images without prior permission. If you want to republish this recipe, please re-write the recipe in your own words, or link back to this post for the recipe.



Leave a Reply