
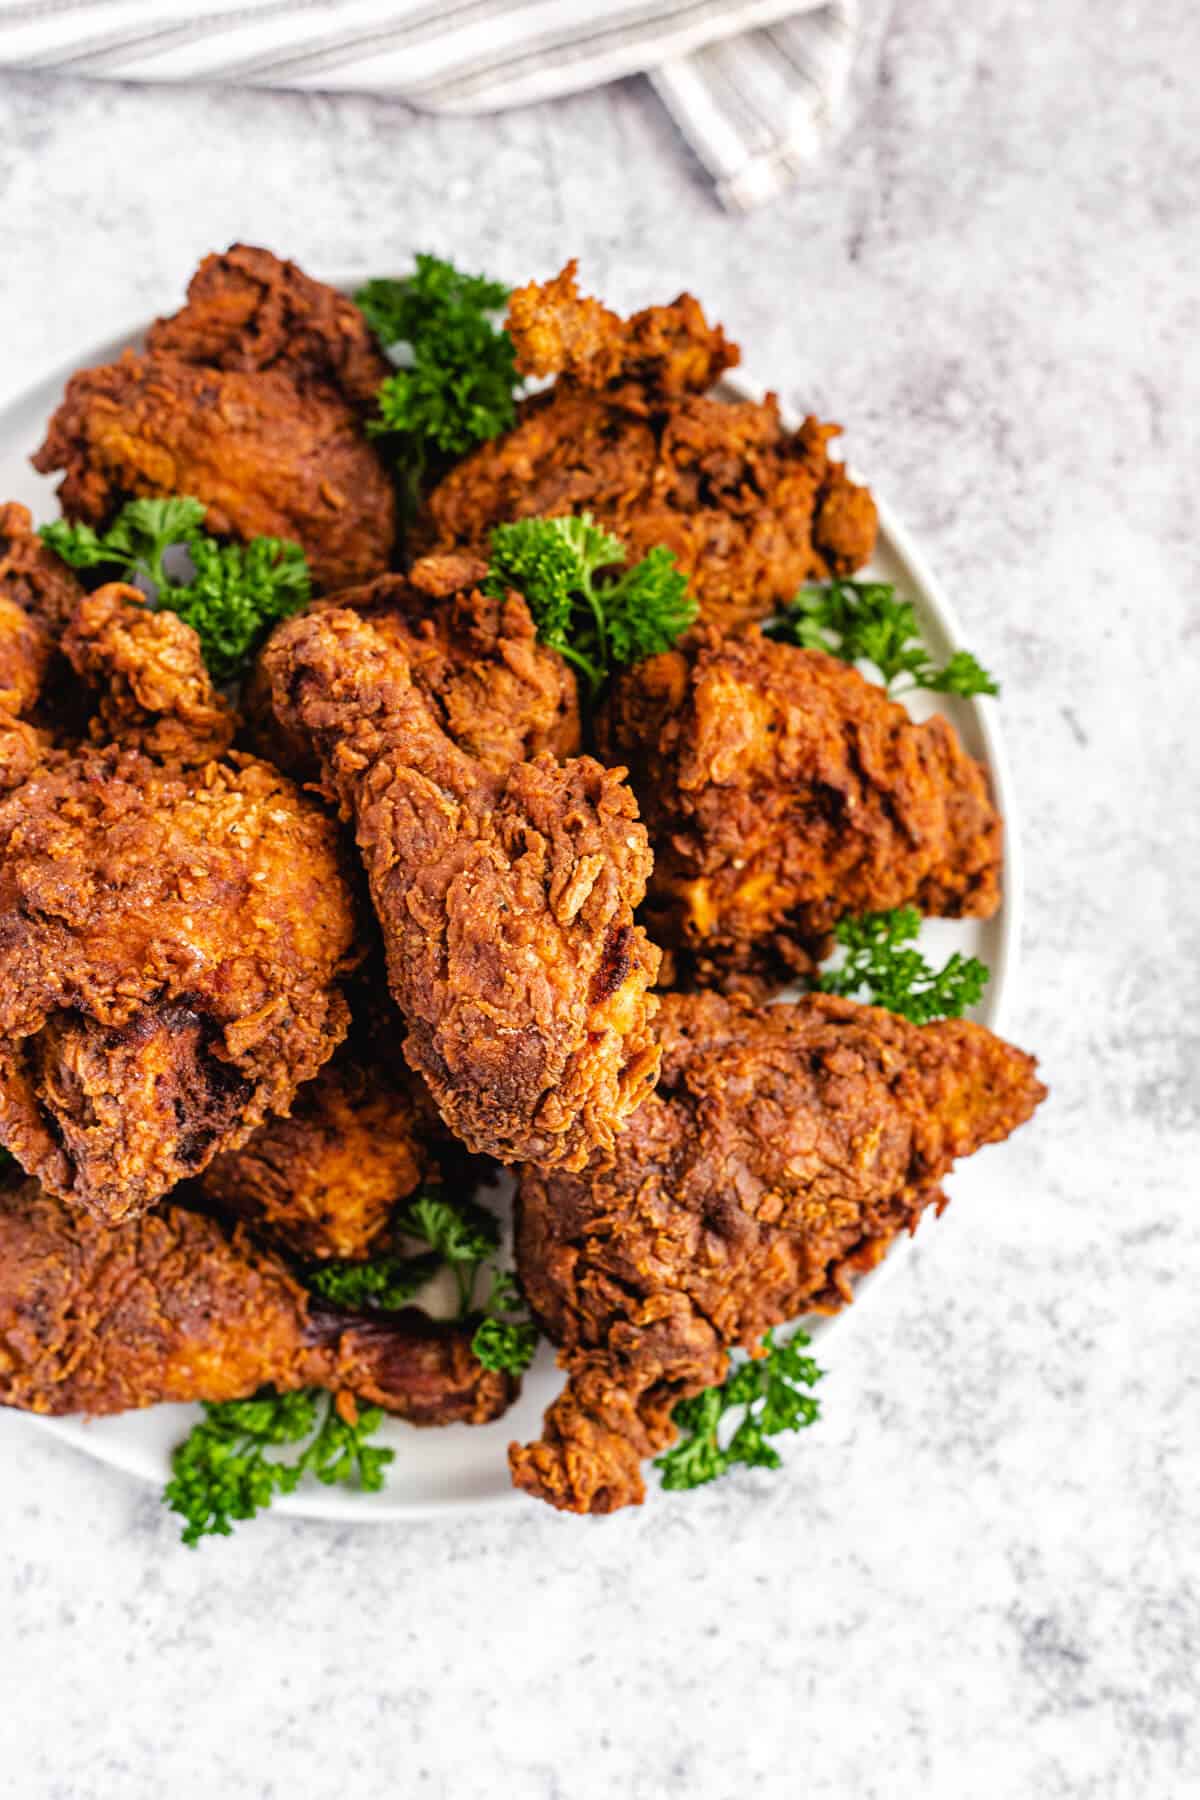
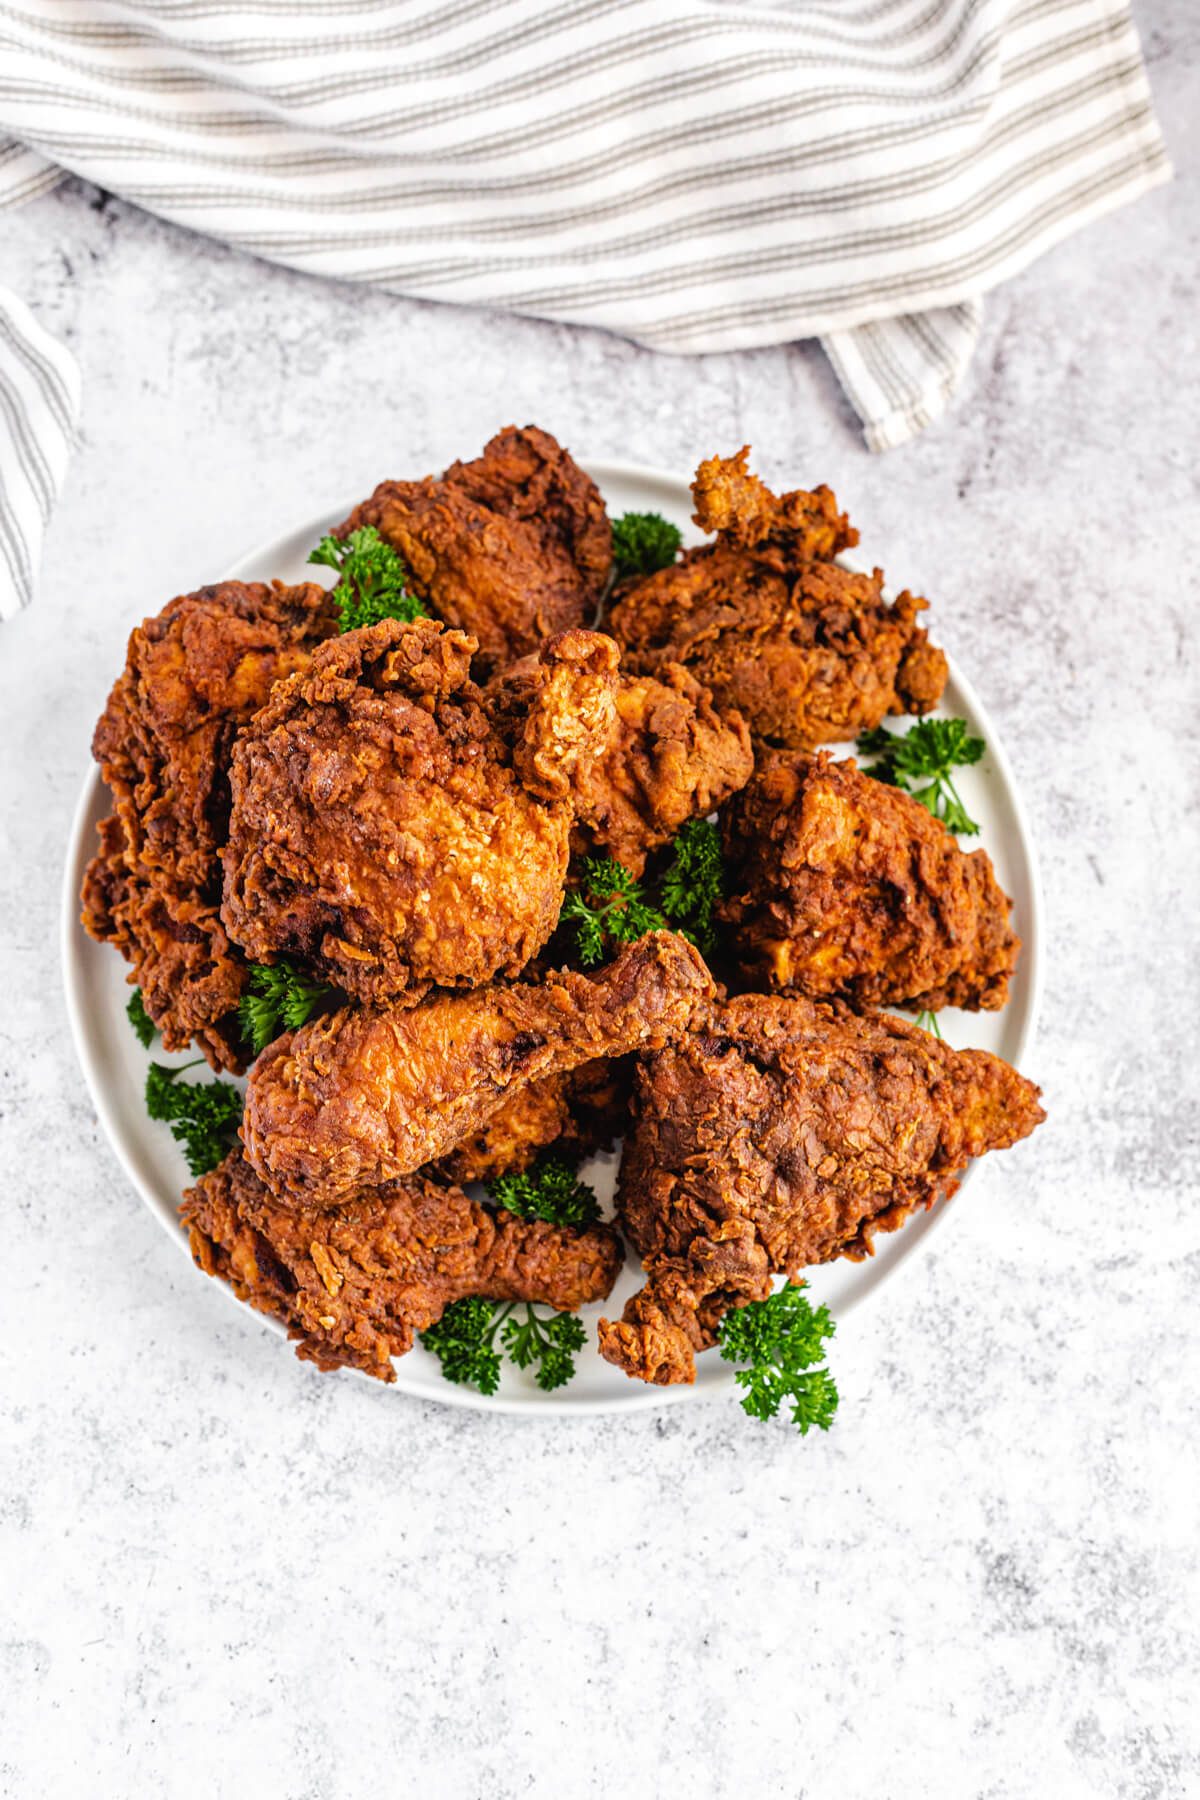
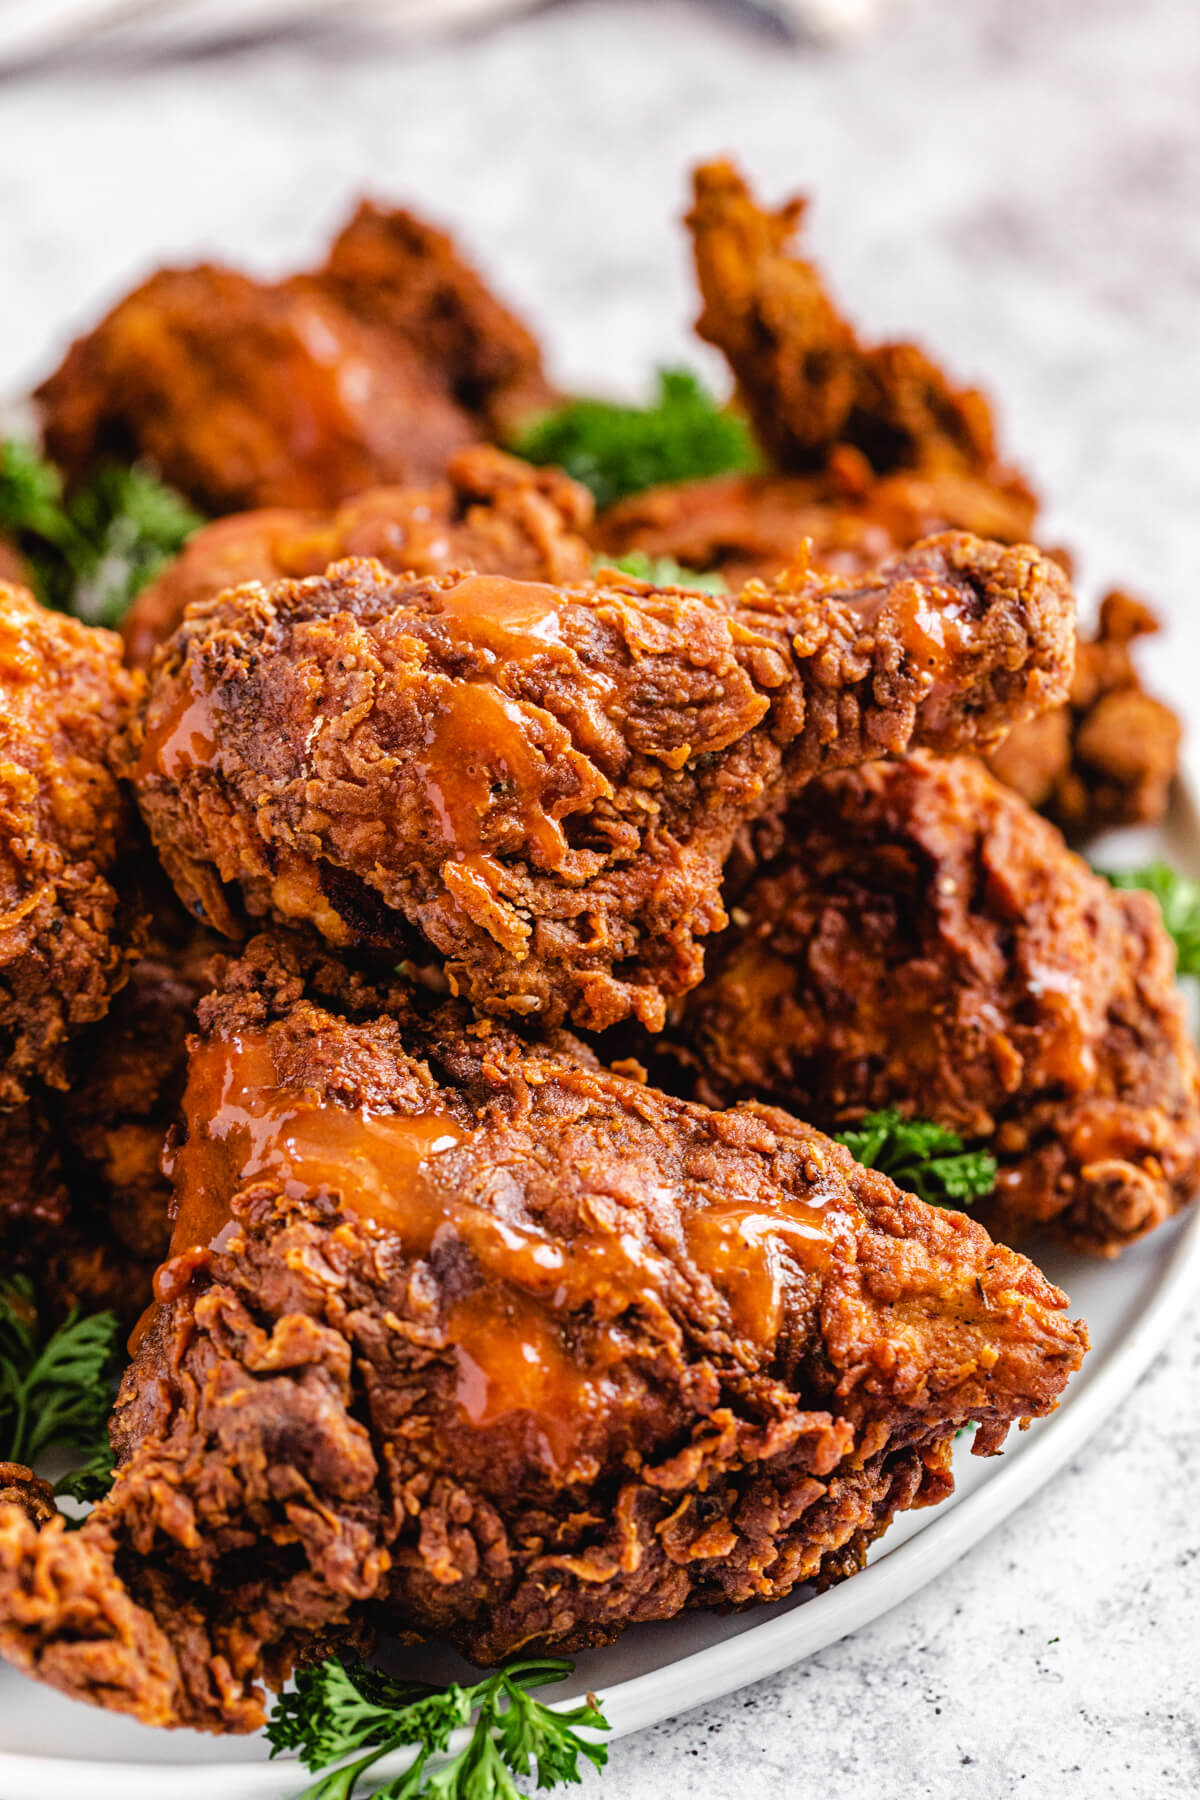
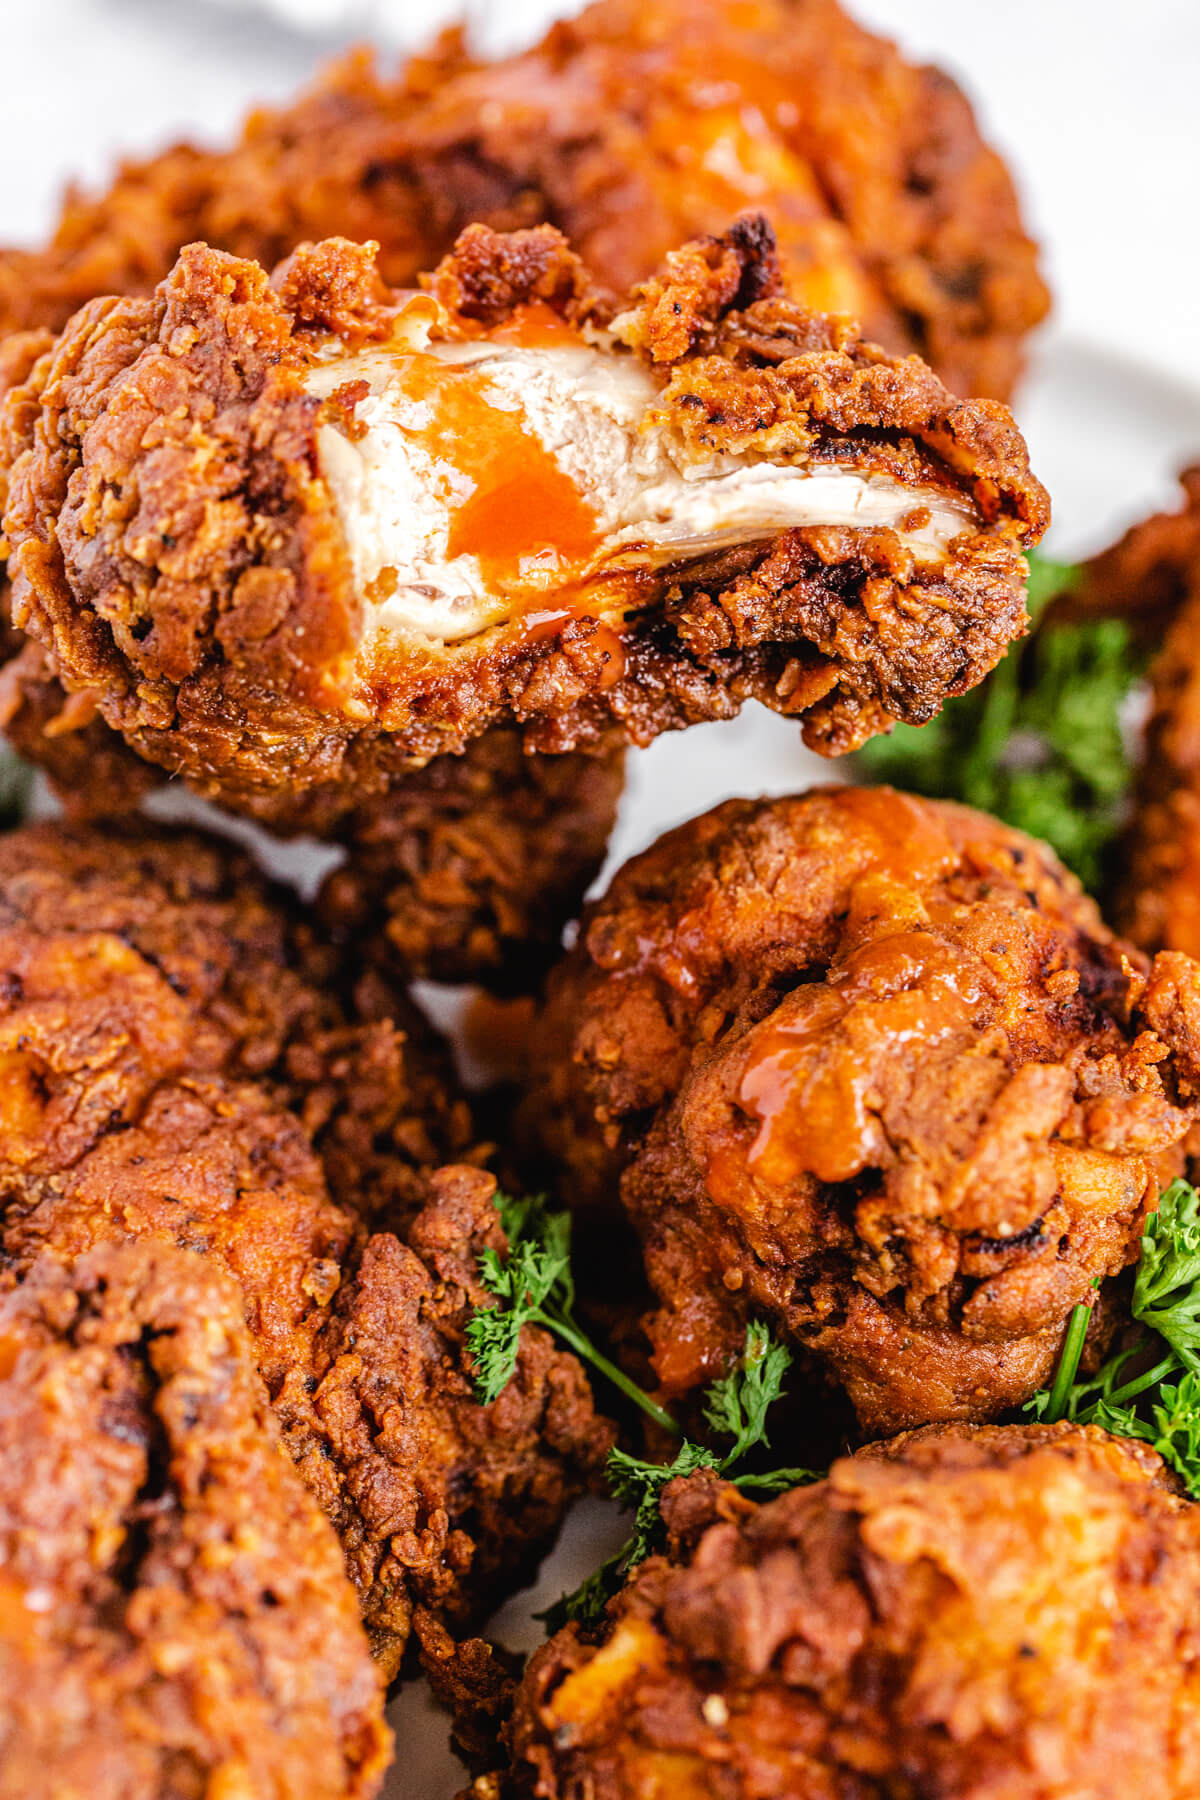
This Spicy Buttermilk Fried Chicken is crispy, juicy and seasoned to perfection. Everyone needs a favourite go-to fried chicken recipe, and once you try this one, I'm sure it'll be yours!
This post may contain affiliate links. As an Amazon Associate I earn from qualifying purchases. Please see my full disclosure policy for details.
*This recipe was originally posted on January 17, 2018 and was updated on July 6, 2020 with new photos*
I DID IT GUYS! I FINALLY MADE PERFECT FRIED CHICKEN!!! Sorry, I'm just so excited. After years of failed fried chicken attempts, I've finally nailed it! Fried chicken is one of the things everyone should try to make at home at least once in their lives. It takes quite a bit of work to prepare, but the sense of accomplishment you get once you're finished is completely worth the effort.
Spicy Buttermilk Fried Chicken
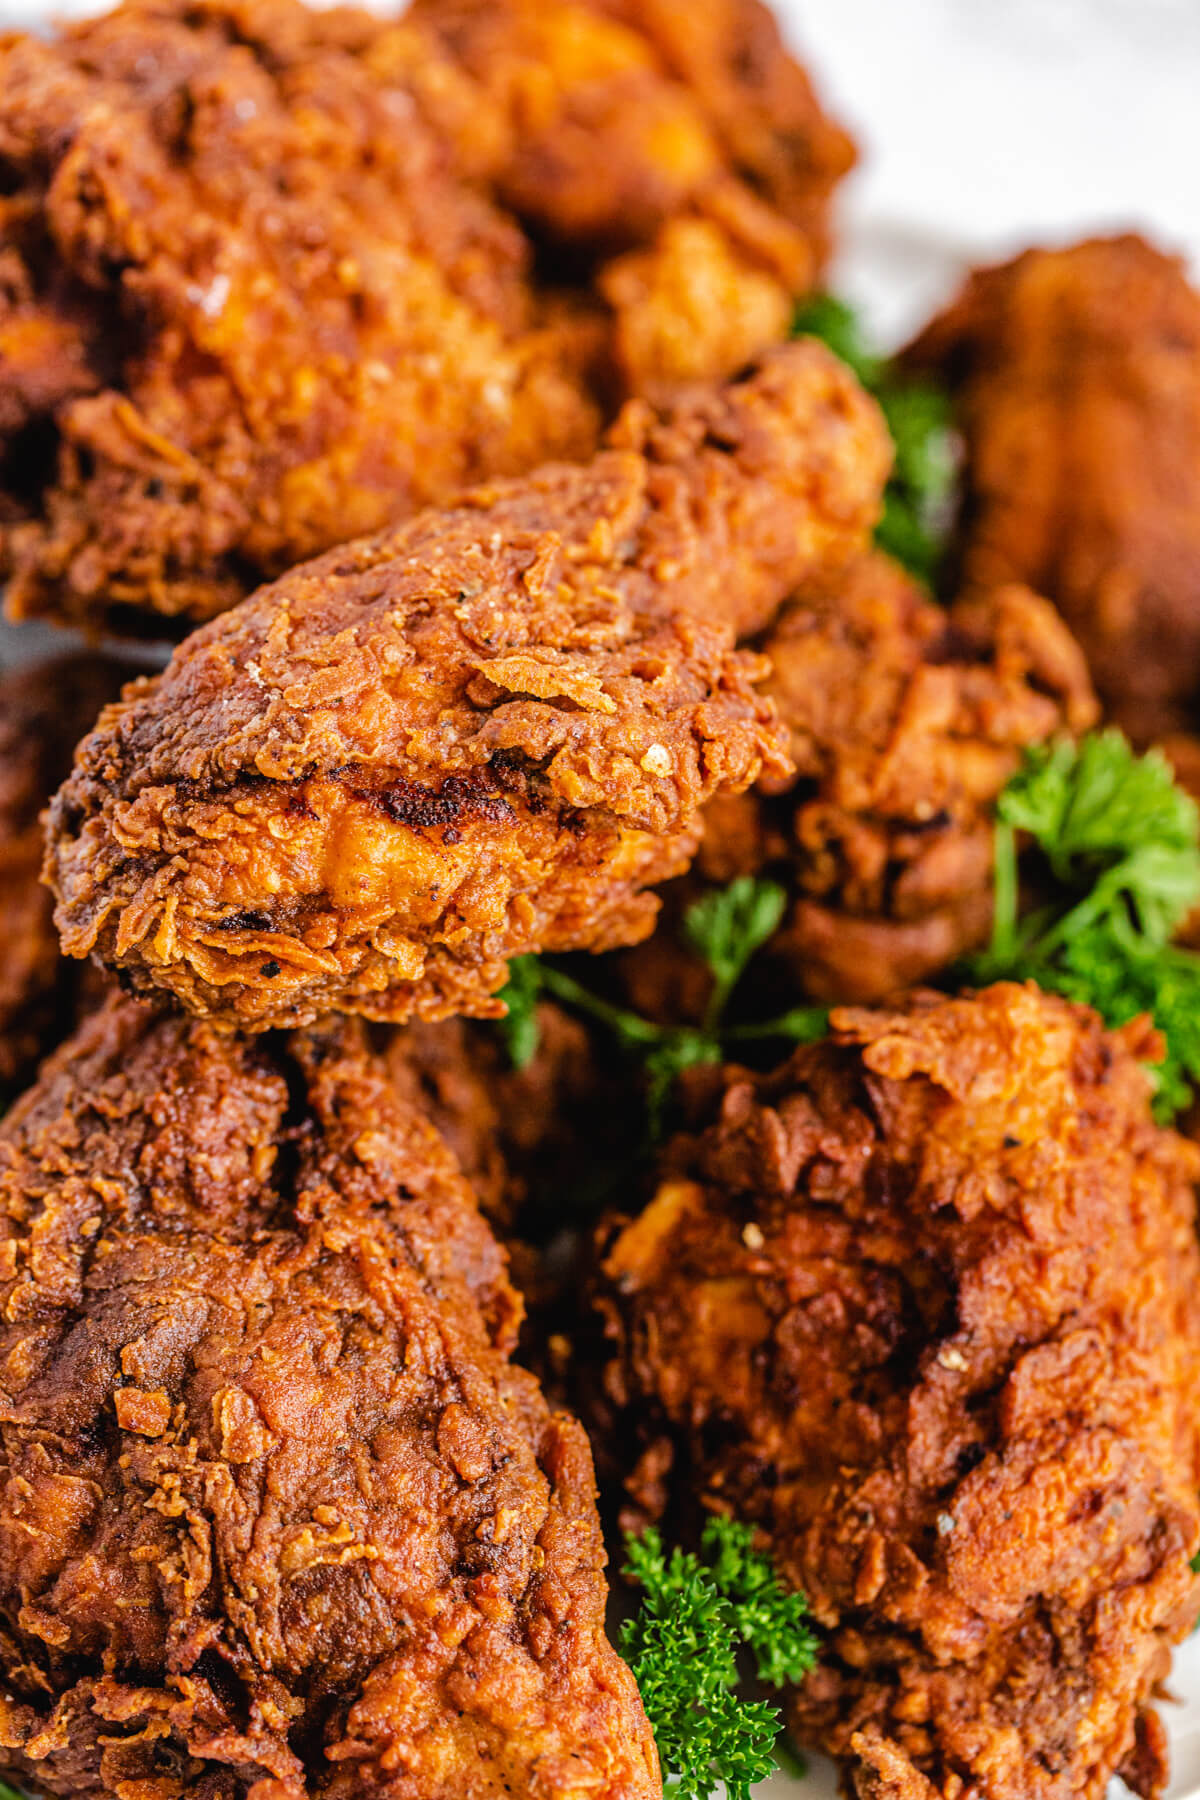
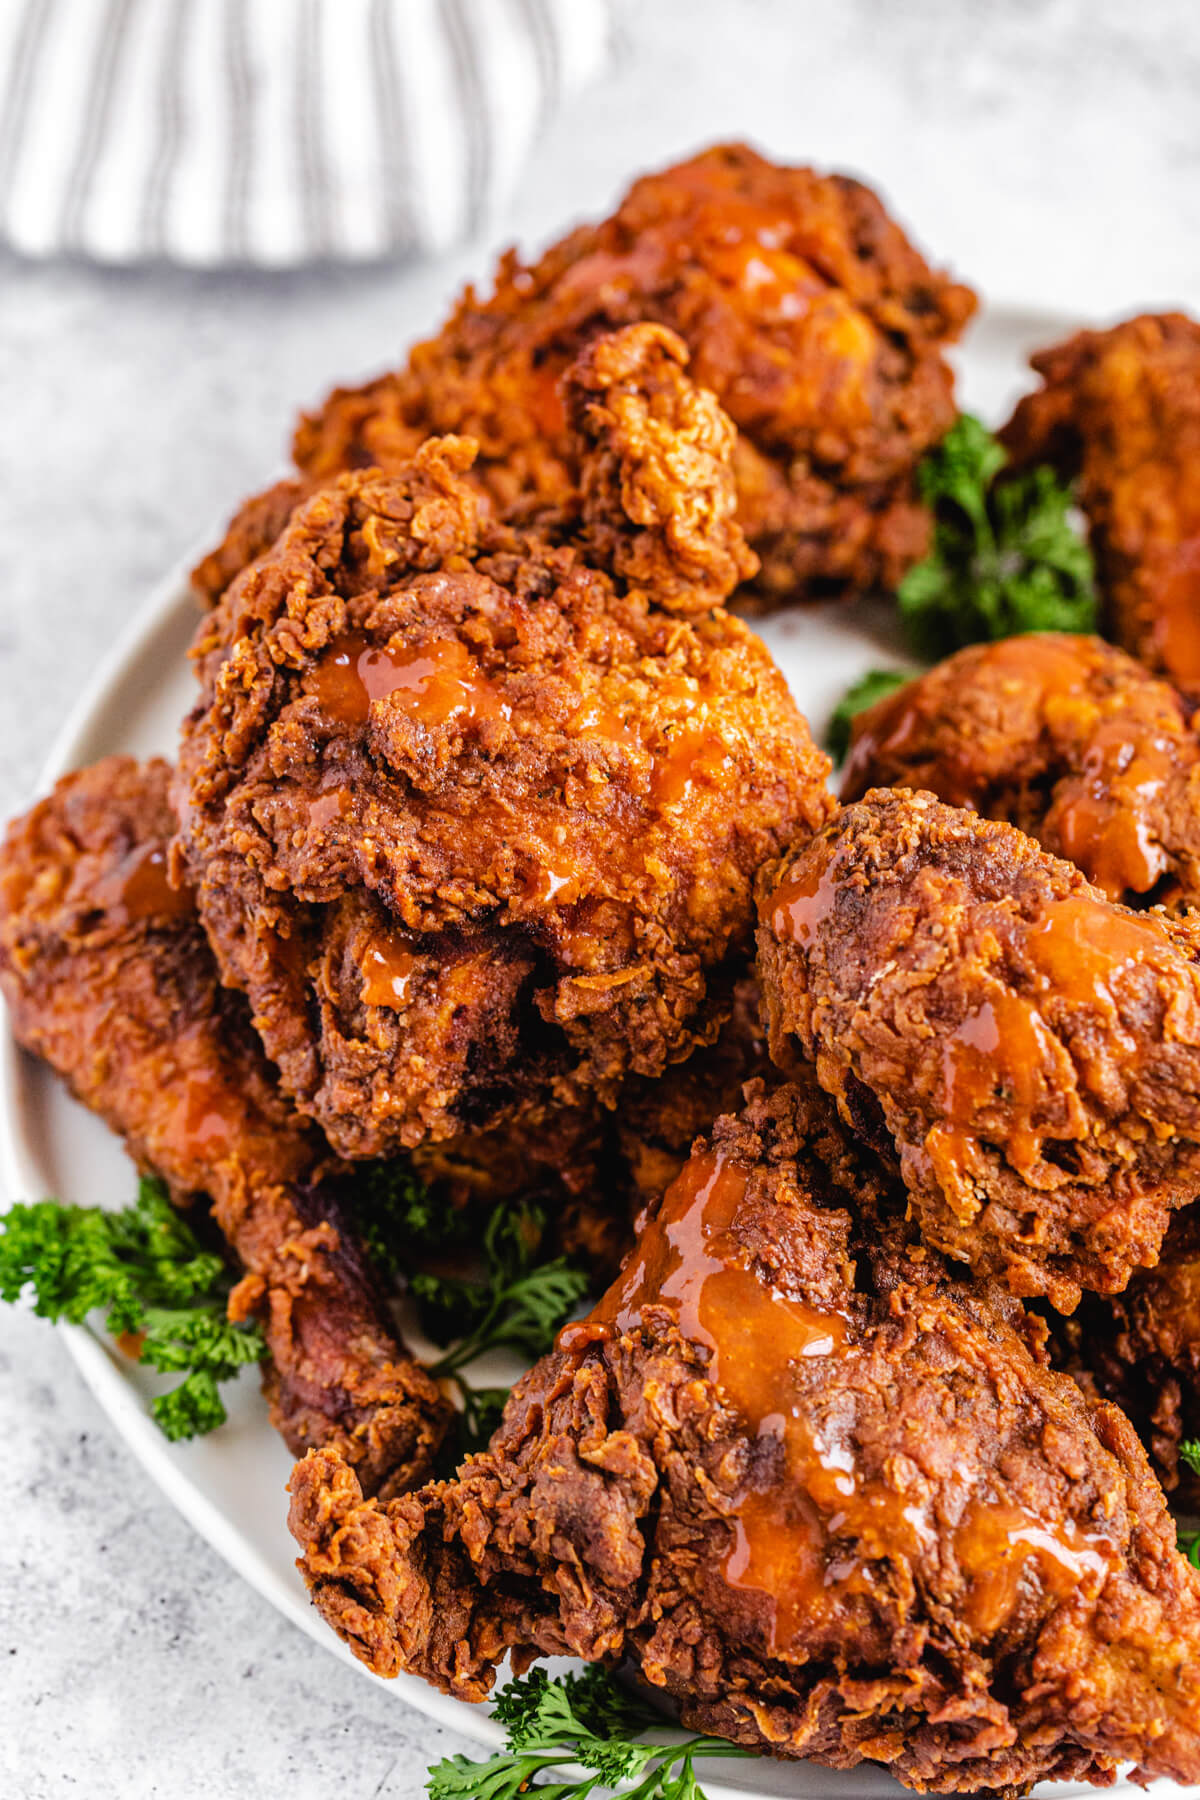
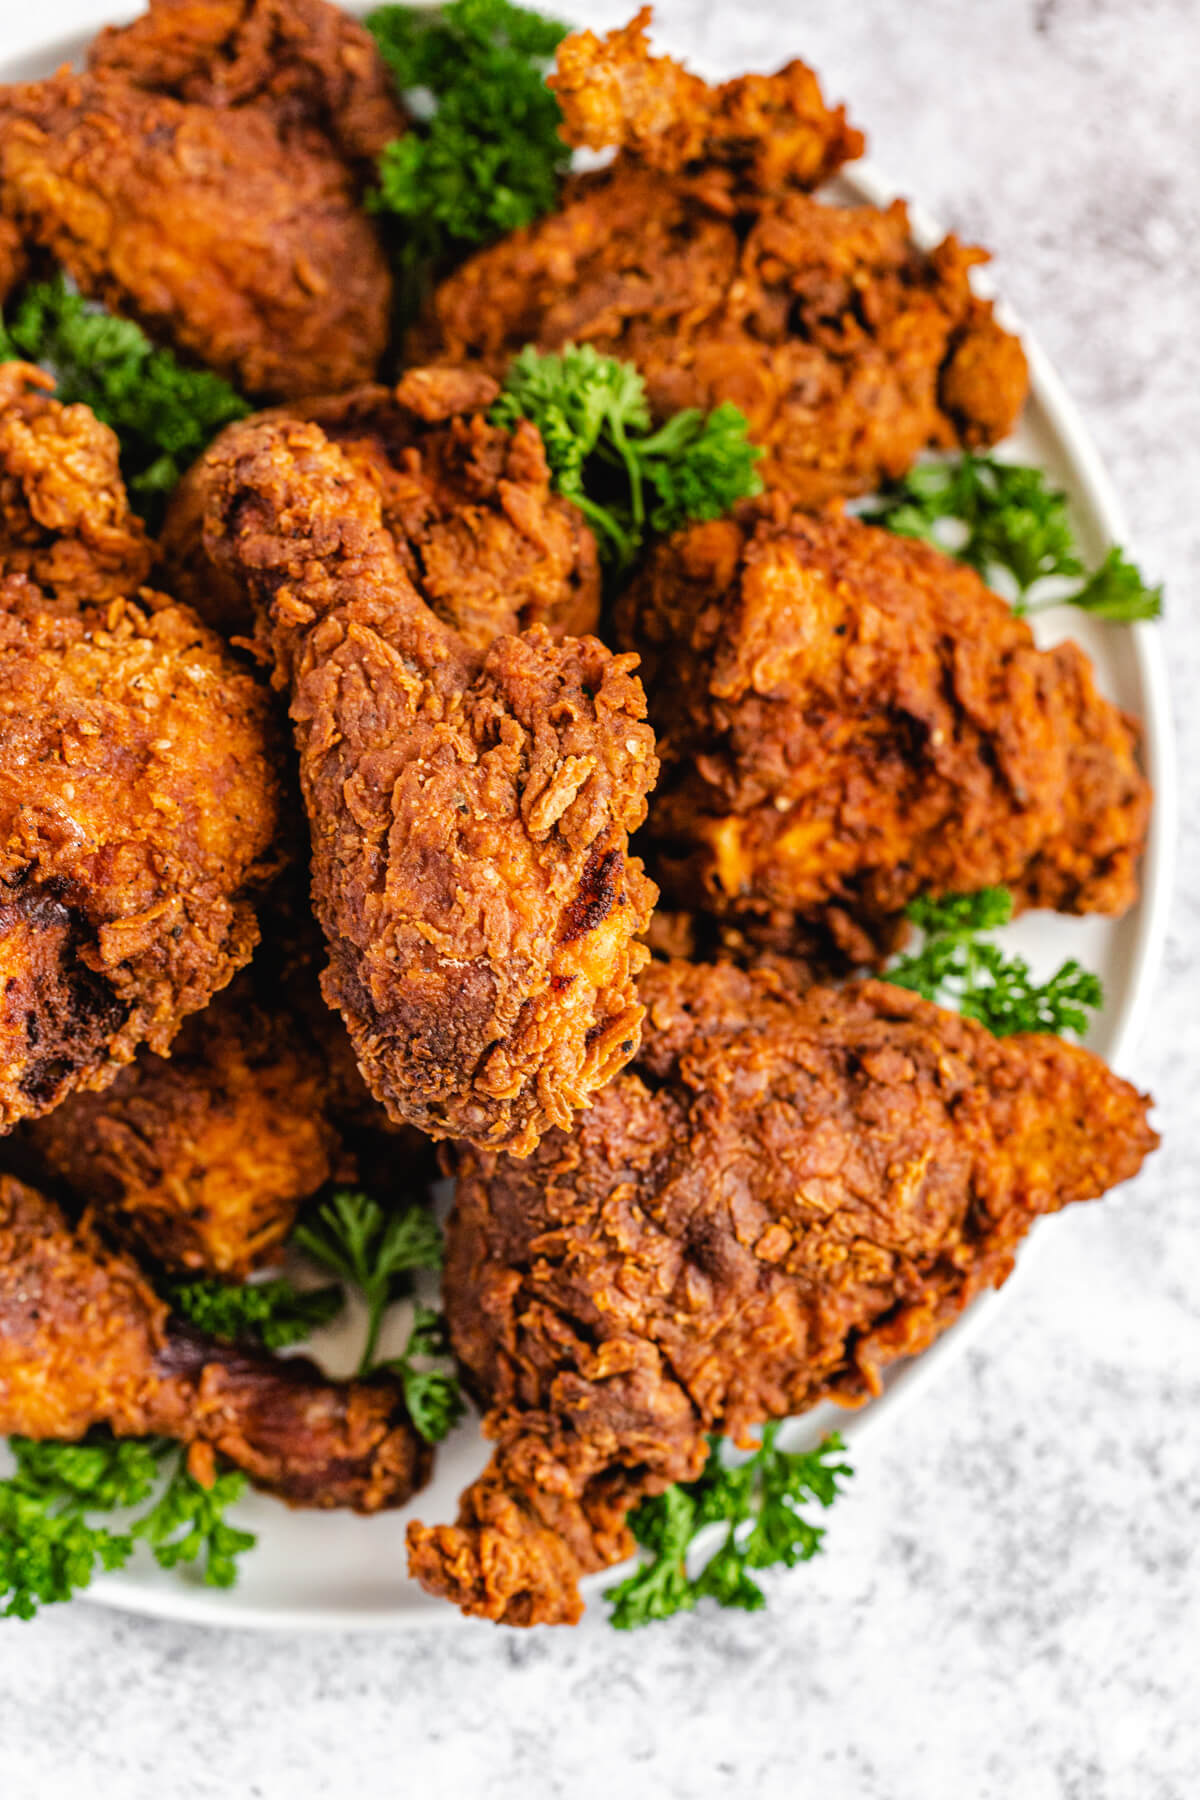
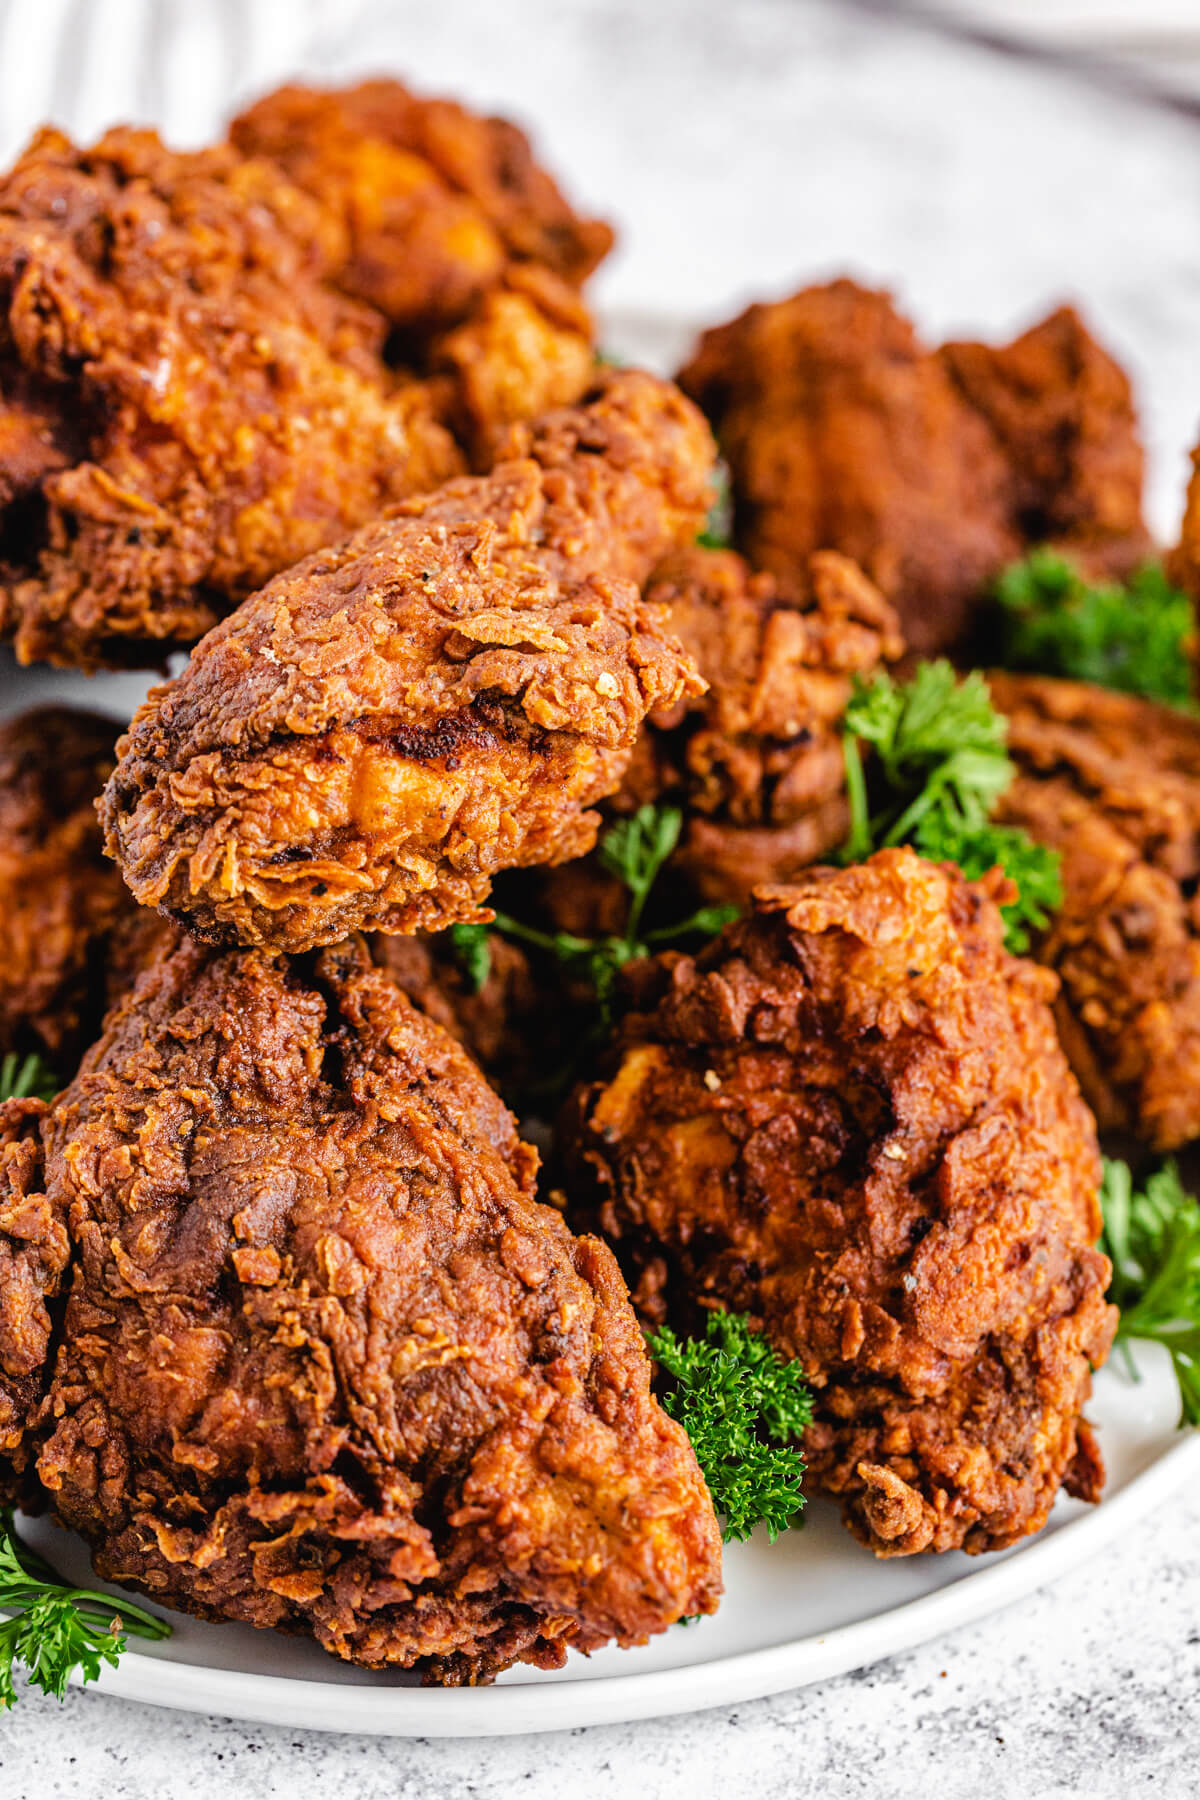
Everyone should have a fried chicken recipe they make over and over again, and this one has become mine. My Spicy Buttermilk Fried Chicken is pure perfection! It's juicy, tender, crunchy, spicy and perfectly seasoned all throughout. This would be the perfect dish to serve at your Superbowl party, or to simply enjoy for dinner with a side salad so you don't feel too guilty.
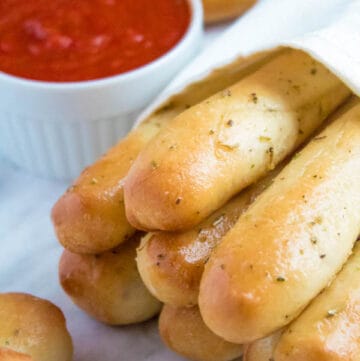
Or if you don't care about that, serve it alongside this Cajun Shrimp and Crab Mac and Cheese with a side of Homemade Cheddar Biscuits for the ultimate southern dinner!
A lot of people first learn to make fried chicken at home from their parents, grandparents etc. I didn't. I don't think anyone in my immediate family has ever made fried chicken, and you know why? They don't want to use up all their oil. That's literally it. Gotta love old school Jamaicans. Honestly, I had to fry this chicken when no one was home just to avoid getting cussed out for the gallons of oil I "wasted".
Anyways, everything I learned about fried chicken was from research and practice. I've made fried chicken about 3-4 times in my life, aside from now, and every attempt was a failure.
So many things went wrong!
- I didn't own a kitchen thermometer, so when I added the chicken to the oil, it was either way too hot or not nearly hot enough. When the oil was too hot, the outside coating immediately burned, like 7 minutes ahead of the cooking time. When it was barely hot, my chicken would just sink to the bottom of the pan, soak up all of the oil and take FOREVER to cook.
- Every time I removed the chicken from the oil, the skin would slip off and the chicken would plop back into the piping hot oil, nearly burning me half to death. Ok that was an exaggeration, but it wasn't a pleasant experience.
- My coating always ended up burnt, oily, soggy and depressing. It never looked appealing to eat, and if I wasn't afraid of getting my butt whooped for wasting food, I would've thrown it in the trash.
- And finally, the taste. Ugh. Guys, salt and pepper is not enough seasoning for chicken, but I'll get more into that later.
So here we are, 4 attempts later and I've finally succeeded in the art of frying the most perfect crispy chicken. There's a lot of steps to making fried chicken at home, but once you've got the technique down it's pretty easy, even if you're a beginner.
Tips for making fried chicken
1. Whole Chicken vs Chicken Pieces
For the chicken, you can cut up a whole chicken, or you can buy chicken that's already cut into pieces. Whole chickens were on sale at my local grocery store, so I decided to buy one instead of cut up chicken. I gotta say, cutting up a whole chicken was a gruesome and messy hell.
This is mainly because it was my first time, but if you don't want to go through the trouble, you don't have to. I ended up with 2 wings that I cut in half to make 4, 2 thighs, 2 drumsticks, and 4 breasts (2 breasts cut in half) to make a total of 12 pieces. Now you don't need all these parts of the chicken. If you and your family prefer drumsticks or wings, then buy a package of those.
Tip: don't wash your chicken! I know it's tempting, but washing chicken will spread germs. Any bacteria in the chicken will be killed while cooking. Just make sure your hands and utensils are thoroughly cleaned before handling the raw chicken.
2. The Buttermilk Marinade is a MUST!
The buttermilk marinade is 1000000% mandatory, so do NOT skip it. If you do, we can't be friends. I mean it. Now when I say buttermilk marinade, I don't mean buttermilk by itself. For the marinade, I added about 2 quarts (8 cups - yes, you need that much) of full-fat buttermilk to an extra large re-sealable bag. To the buttermilk, I added 1 large, sliced onion, sliced garlic cloves, hot sauce (for some heat), kosher salt, and black peppercorns.
Mix that together, then add the chicken pieces, making sure they're completely covered in the brine. Seal the bag and allow the chicken to marinate for not 30 minutes, not 2 hours, but at least 12-24 hours. I know it's a long wait, but it's crucial for tenderizing the chicken and making it super juicy and flavourful.
Tip: you don't exactly need to rinse the marinade off the chicken, but you can if you want to. I just shake off most of the buttermilk and swipe off any peppercorns or garlic pieces that got stuck on the chicken. You also don't want the chicken to be dripping with buttermilk, just wet enough so the flour will stick.
3. Don't skimp on the seasoning!
I mentioned above that my previous fried chicken failures tasted pretty bland and really lacked in flavour. When I was younger (about 4 years ago) my family would always make fun of me for measuring my seasoning, and I finally understand why.
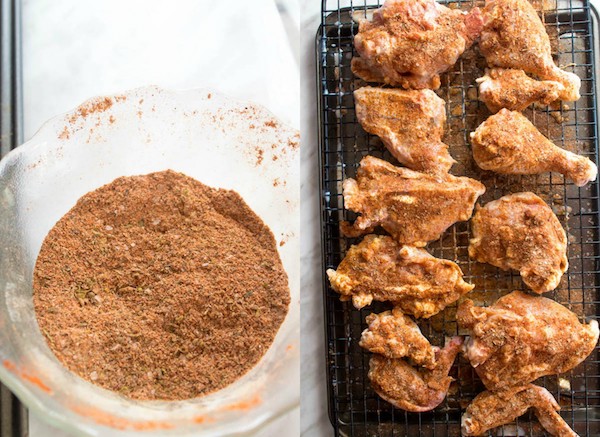
The recipes I tried back then called for about 1 teaspoon of salt and pepper and about ½ teaspoon of garlic powder and maybe a pinch of paprika. Oh hell no. Listen, my family and I won't stand for barely seasoned chicken and I wish I learned this back then. If you're one of the people who think salt and pepper is plenty of seasoning for chicken then please exit stage left. This recipe uses a blend of multiple seasonings: kosher salt, black pepper, garlic powder, onion powder, smoked paprika, cayenne pepper, white pepper, chilli powder, celery salt, dried oregano, dried basil and dried thyme. 13 spices all blended together to give this chicken the burst of flavour it deserves.
These are the spices I chose for my chicken, feel free to add or leave out whatever you want. And as you'll see in the recipe, we don't add measly ½ teaspoons of these spices, we add tablespoons. You may think it'll be too overpowering but the flavour will mellow out while frying.
Tip: season the front and back of the chicken with only half of the spice mixture. The remaining half will be added to the flour coating so the flavour will be in every part of this fried greatness.
4. Shake, Dip, Shake.
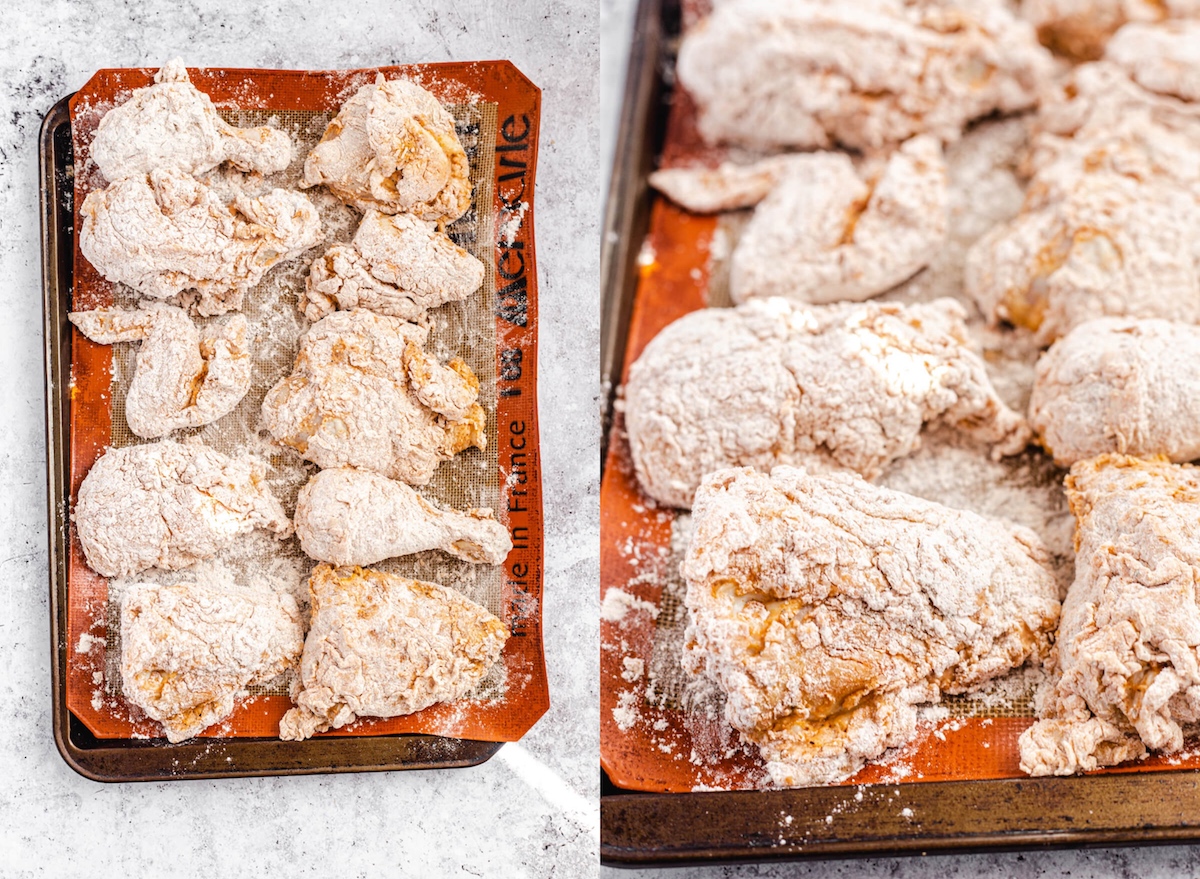
I know the main method for frying chicken is the "dredge, dip, dredge" method, but we're using an old-school method for this recipe. Pouring the flour mixture into a shallow dish and dipping the chicken in it NEVER works for me! I don't know why, but every time I use that method my chicken is never coated properly.
So for this recipe, instead of dredging the chicken in the flour, we add all the flour/spice mixture to an extra-large re-sealable bag (or a paper bag if you really wanna go old school), then add ALL of the chicken to the bag and seal. Then shake it, sh-shake it, shake it like a polaroid picture. Word to Outkast. This coats all of the chicken at once. Quick and easy!
Shake off the excess flour, then place the chicken on a wire rack over a baking sheet. Next, we make the the spicy buttermilk egg wash. Start by whisking the eggs until they're pale yellow all throughout. Then mix in buttermilk, hot sauce (for extra spiciness) and garlic powder for extra flavour.
Dip all your chicken pieces into the egg wash, one at a time, shake off the excess, then immediately return it back to the bag of flour. Once all your chicken pieces are back in the bag, repeat the shaking method. A double coating is what gives us that extra crispy skin that we all love!
5. Best type of pan and oil for frying chicken.
I highly recommend using a large dutch oven for frying the chicken. This isn't a fried chicken recipe where you use a little bit of oil, fry one side, then turn and fry the other side. We need to use an entire 2 and ½ quarts of oil because we want the chicken to be completely submerged for a consistent temperature which results in even frying. Because of this, we need to use a pot large enough to hold that much oil and also be tall enough so the oil doesn't spill out and create a dangerous mess.
I used regular old vegetable oil with a mix of canola oil because I ran out. I'm not gonna be strict with you and say you HAVE to use vegetable oil. Feel free to use whatever you choose, peanut oil, vegetable shortening, lard, whatever tickles your fancy.
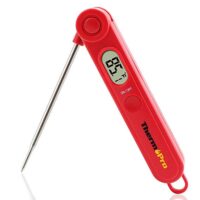
6. Use a kitchen thermometer for the best results.
I mentioned above the problems I had with oil that wasn't the correct temperature. The best way to avoid those failures, you'll need to use a kitchen thermometer. The best temperature for frying chicken is 350F. Clip your kitchen thermometer to the side of the pan, making sure it's not touching the bottom, then allow the oil to heat up to 350F. Thankfully, my grandmother has a large electric pot, so I was able to control what temperature the pot heated up to.
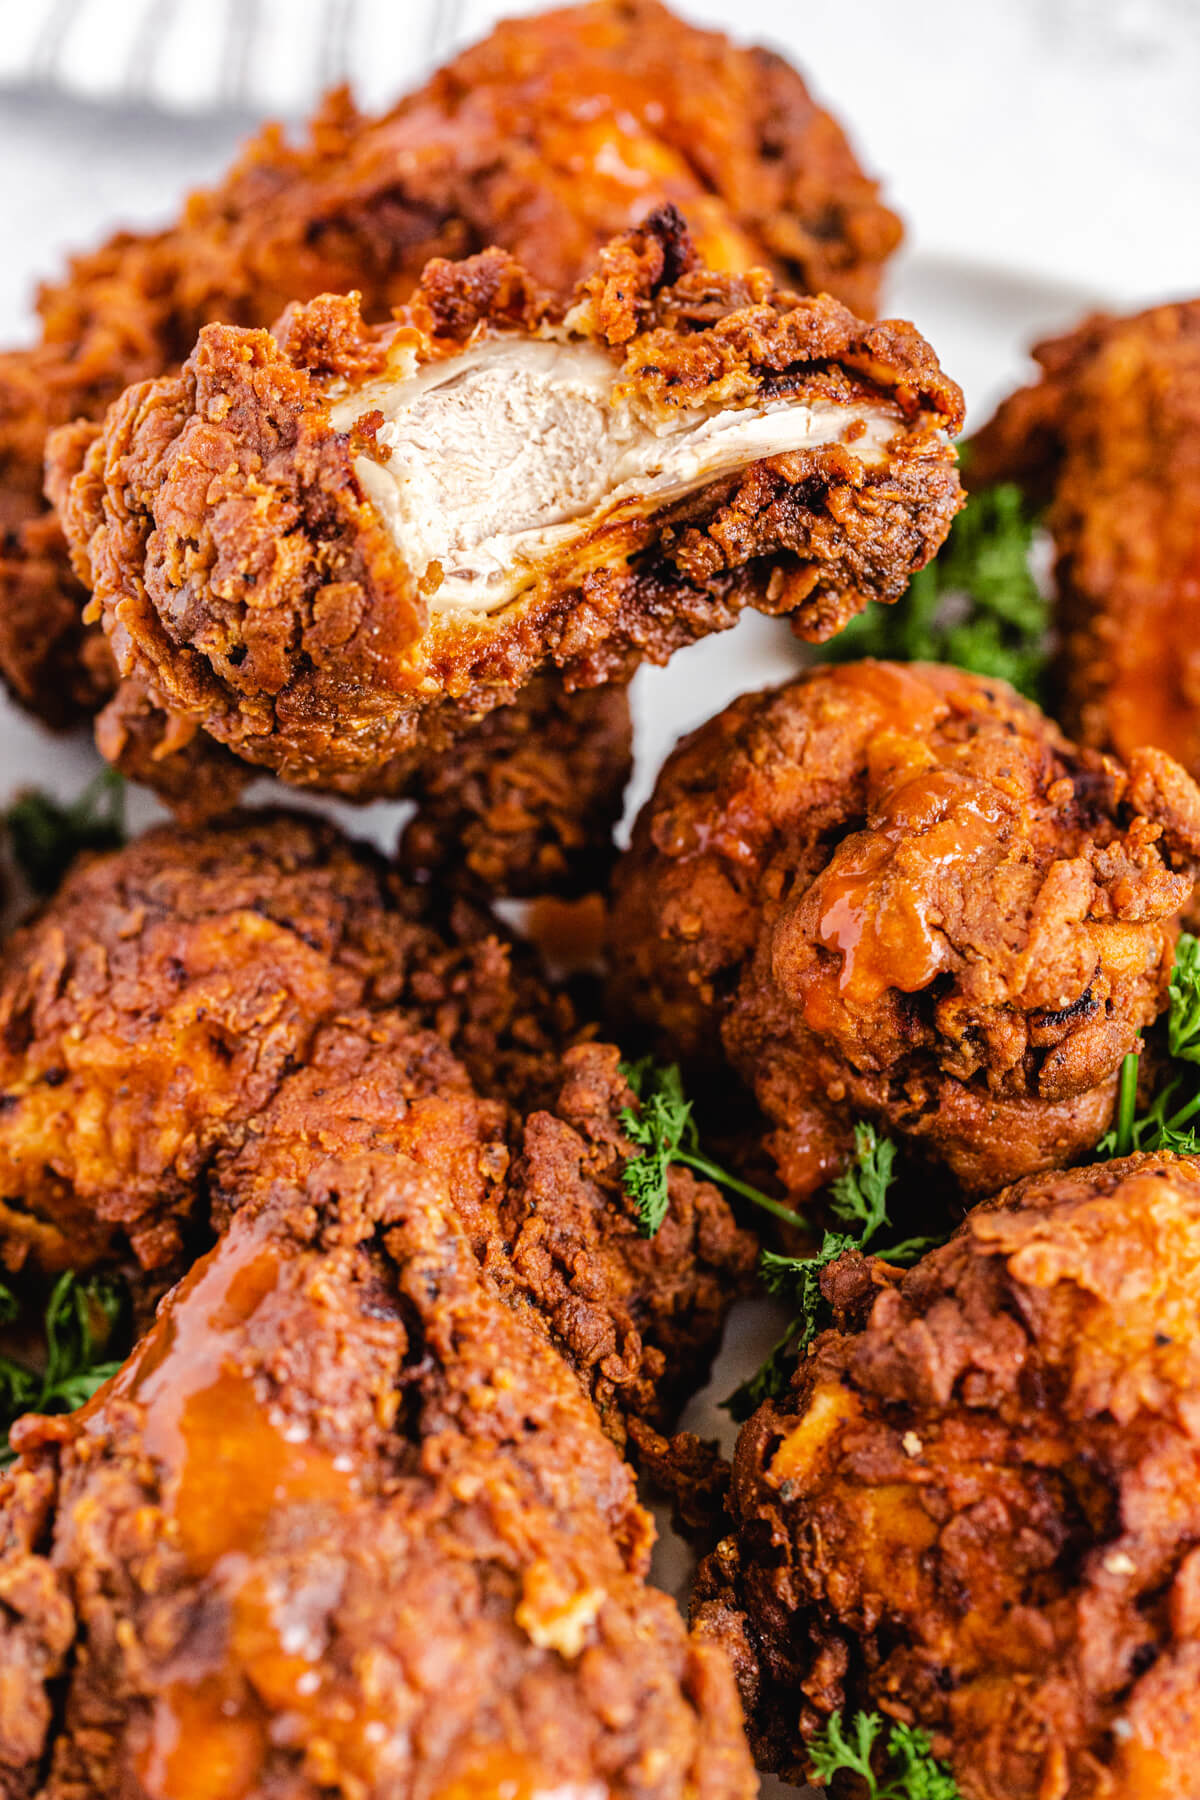
I also mentioned in the recipe that the internal temperature needs to be 160F, which you need a probe thermometer to check. I'm gonna be totally honest, I didn't use one. Luckily for me my chicken came out perfectly cooked inside and out.
If you don't have a probe thermometer, just cut the chicken open to make sure it's no longer pink. If it is, though, do NOT return it to the oil. Just put it on a foil lined baking sheet and heat it in a 350F oven and allow it to cook all the way through.
Now it's time to fry!
Here comes the intimidating part — frying the chicken. If your pot is right, oil is right, temperature is right, this should go pretty smoothly. Place a wire rack on a baking sheet that has been lined with paper towels to transfer the chicken onto after it's done cooking. If you're brave, you can pick up the chicken and place it into the oil with your hands, if not, use tongs.
The oil should sound like heavy rainfall when the chicken is added. If it's popping, turn the temperature down. Use the thermometer to adjust the temperature to make sure the oil remains at 350F.
The cooking time depends on the size of the chicken and the type of meat. For instance, the small chicken wings took around 7 minutes to fry, while the larger pieces took around 13-16 minutes. Also dark meat takes longer to fry than white meat. The white meat took 13 minutes for me, while the dark meat took 16 minutes.
Once the chicken has finished frying, remove from the oil using a slotted metal spoon or a clean pair of tongs. Place on the wire rack to cool for 10 minutes before serving.
Holy Moly this was a long post, but I wanted to make sure I shared every last lesson I learned from my previous mistakes so your first time can go smoother than mine.
Now go off and fry up your own batch of the crispiest, spiciest and juiciest fried chicken ever! Look at the perfection!
Make an entire meal! Serve this chicken with these recipes:
- Cajun Shrimp and Crab Mac and Cheese
- Homemade Cheddar Biscuits
- Homemade Garlic Butter Breadsticks
- Fluffy and Soft Dinner Rolls
- Creamy Mashed Potatoes
- Penne Alla Vodka Pasta
SHARE YOUR PICS!
Follow me on Instagram and tag #queensleeappetit so I can see and share all of your Queenslee Appétit creations in my stories and the QA Newsletter!
>>PIN ME FOR LATER<<
FOLLOW QUEENSLEE APPÉTIT
Like what you see? Make sure you‘re following Queenslee Appétit for more tasty recipes!
Pinterest | Instagram | Facebook | Twitter |
Have any questions about the recipe? Contact me here, and I’ll be happy to help!
SWEETEN UP YOUR INBOX!
SUBSCRIBE to the Queenslee Appétit Newsletter to recieve new recipe notifications, monthly baking tips, sneak peeks to upcoming recipes, exclusive recipes and more!
Let's get frying!

Spicy Buttermilk Fried Chicken
This Spicy Buttermilk Fried Chicken is crispy, juicy and seasoned to perfection. Everyone needs a favourite go-to fried chicken recipe, and once you try this one, I'm sure it'll be yours!
Ingredients
Buttermilk Marinade:
- 2 quarts (8 cups) full-fat buttermilk
- 1 large onion, thinly sliced
- 5 cloves garlic, thinly sliced
- ½ cup hot sauce
- 3-4 tablespoon Kosher salt
- 3 tablespoon black peppercorns
- 1 (3 and ½ - 4 lbs) whole chicken, cut into 10-12 pieces
Seasoning Blend:
- 1 tablespoon Kosher salt
- 1 tablespoon garlic powder
- 1 tablespoon onion powder
- 1 tablespoon smoked paprika
- 1 tablespoon ground cayenne pepper
- 1 tablespoon white pepper
- 2 teaspoon freshly ground black pepper
- 2 teaspoon chili powder
- 2 teaspoon celery salt
- 1 teaspoon dried oregano
- 1 teaspoon dried basil
- 1 teaspoon dried thyme
Flour Coating:
- 3 cups all purpose flour
- 1 tablespoon baking powder
- ½ of the seasoning blend (above)
Buttermilk Egg Wash:
- 3 large eggs
- ½ cup buttermilk
- ½ cup hot sauce
- 1 teaspoon garlic powder
For Frying:
- 2 and ½ quarts cooking oil, for frying
Instructions
For the Buttermilk Marinade:
- In a large resealable bag, combine the buttermilk, sliced onions, sliced garlic, hot sauce, salt and black peppercorns.
- Add the chicken pieces and seal the bag while pressing the air out and rub the marinade into the chicken making sure all the chicken is submerged. Transfer to the refrigerator to marinate for 6-12 hours or overnight.
For the Seasoning Blend:
- In a small bowl add all of the spices and mix everything together until well combined.
- Remove chicken from the refrigerator and from the marinade, shake off (or rinse) the excess and place onto a baking sheet. Sprinkle half of the seasoning blend on both sides of the chicken pieces.
- In a large bowl, add the flour, baking powder and the remaining half of seasoning blend and mix until well combined.
- Pour the flour mixture into an extra-large resealable bag or an extra large paper bag and place all the chicken pieces inside. Seal the bag and shake well to coat all the chicken. Remove chicken pieces from bag and place back onto the baking sheet.
For the Buttermilk Egg Wash:
- In a medium bowl, beat the eggs together until completely pale. Add the buttermilk and hot sauce and beat until well combined. Mix in garlic powder.
- Dip each piece of chicken into the egg mixture, shake off the excess then place back into the flour bag.
- Seal the bag and once again shake until all the chicken is well coated. Remove chicken from the bag and place onto a plate or baking sheet.
For Frying:
- Pour your oil into a deep dutch oven pot, clipping a frying/candy thermometer to the side of your pot (making sure it's not touching the bottom) and heat until the oil reaches 350F. If you don't have a thermometer, test a piece of the flour and if it begins to fry gently, the oil is ready.
- Line a large baking sheet with paper towels and place a cooling rack on top. Set aside.
- Add the chicken to the oil, working in batches (fry dark meat together and white meat together). Fry the chicken for 13-16 minutes (16-20 minutes for dark meat) ~SEE NOTES~ The internal temperature should read 160 degrees F. If it's not, do not return to oil, just preheat your oven to 350F and bake the chicken until it reaches the correct internal temperature. You can also cut the chicken open to make sure it's no longer pink.
- When the chicken is done frying, place onto the cooling rack and let the chicken drain. Heat the oil back to 350F and repeat until all chicken is cooked.
- Let the chicken sit for 10 minutes before serving. Enjoy!
Notes
- If your pan isn't large enough to hold enough oil to completely cover the chicken, fry the white meat for 6-8 minutes (8-10 minutes for dark meat) on one side, then turn the pieces and fry for another 6-8 minutes or 8-10 minutes on the other side.
- Store leftover chicken in a paper towel lined airtight container in the refrigerator for up to a week. Re-heat in the oven to maintain the crispy coating.
Recommended Products
As an Amazon Associate and member of other affiliate programs, I earn from qualifying purchases.

Nutrition Information:
Yield: 10 Serving Size: 1Amount Per Serving: Calories: 799Total Fat: 59gSaturated Fat: 7gTrans Fat: 0gUnsaturated Fat: 48gCholesterol: 138mgSodium: 10300mgCarbohydrates: 39gFiber: 3gSugar: 4gProtein: 29g
BON APPÉTIT!
Love, Dedra
©QUEENSLEE APPÉTIT. All images & content are copyright protected. Please do not use my images without prior permission. If you want to republish this recipe, please re-write the recipe in your own words, or link back to this post for the recipe.
Aditi C.
Absolutely loved this recipe!! Made the best fried chicken I've had!
I changed it up a bit by adding a bit more heat to the seasoning mix, more aromatics to the buttermilk brine (ginger, scotch bonnets). I also strained the buttermilk brine and used it instead of fresh buttermilk for the buttermilk egg wash. I also reduced the frying temp to ~300 (initially pre-heating the oil to 325). This worked better for me, and produced beautifully golden brown and juicy dark meat in about 15 minutes.