
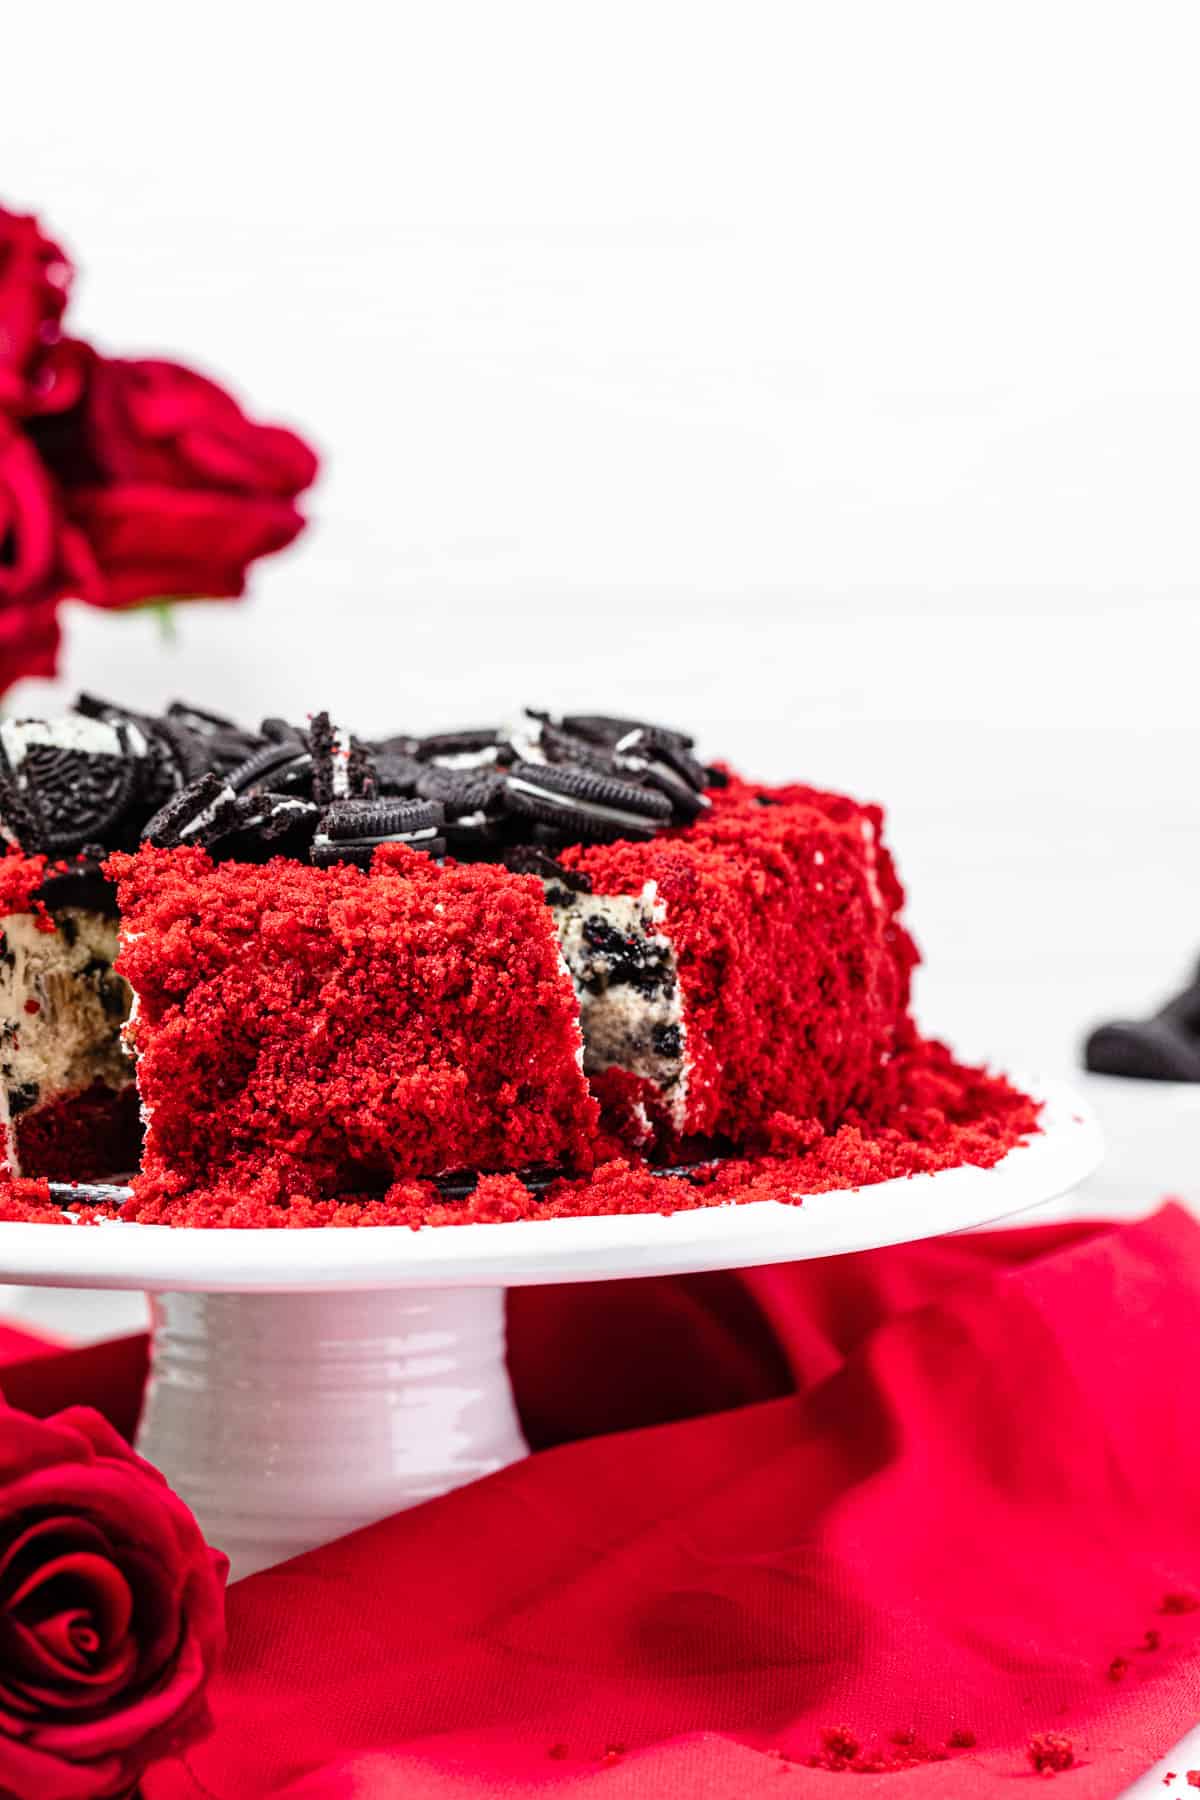
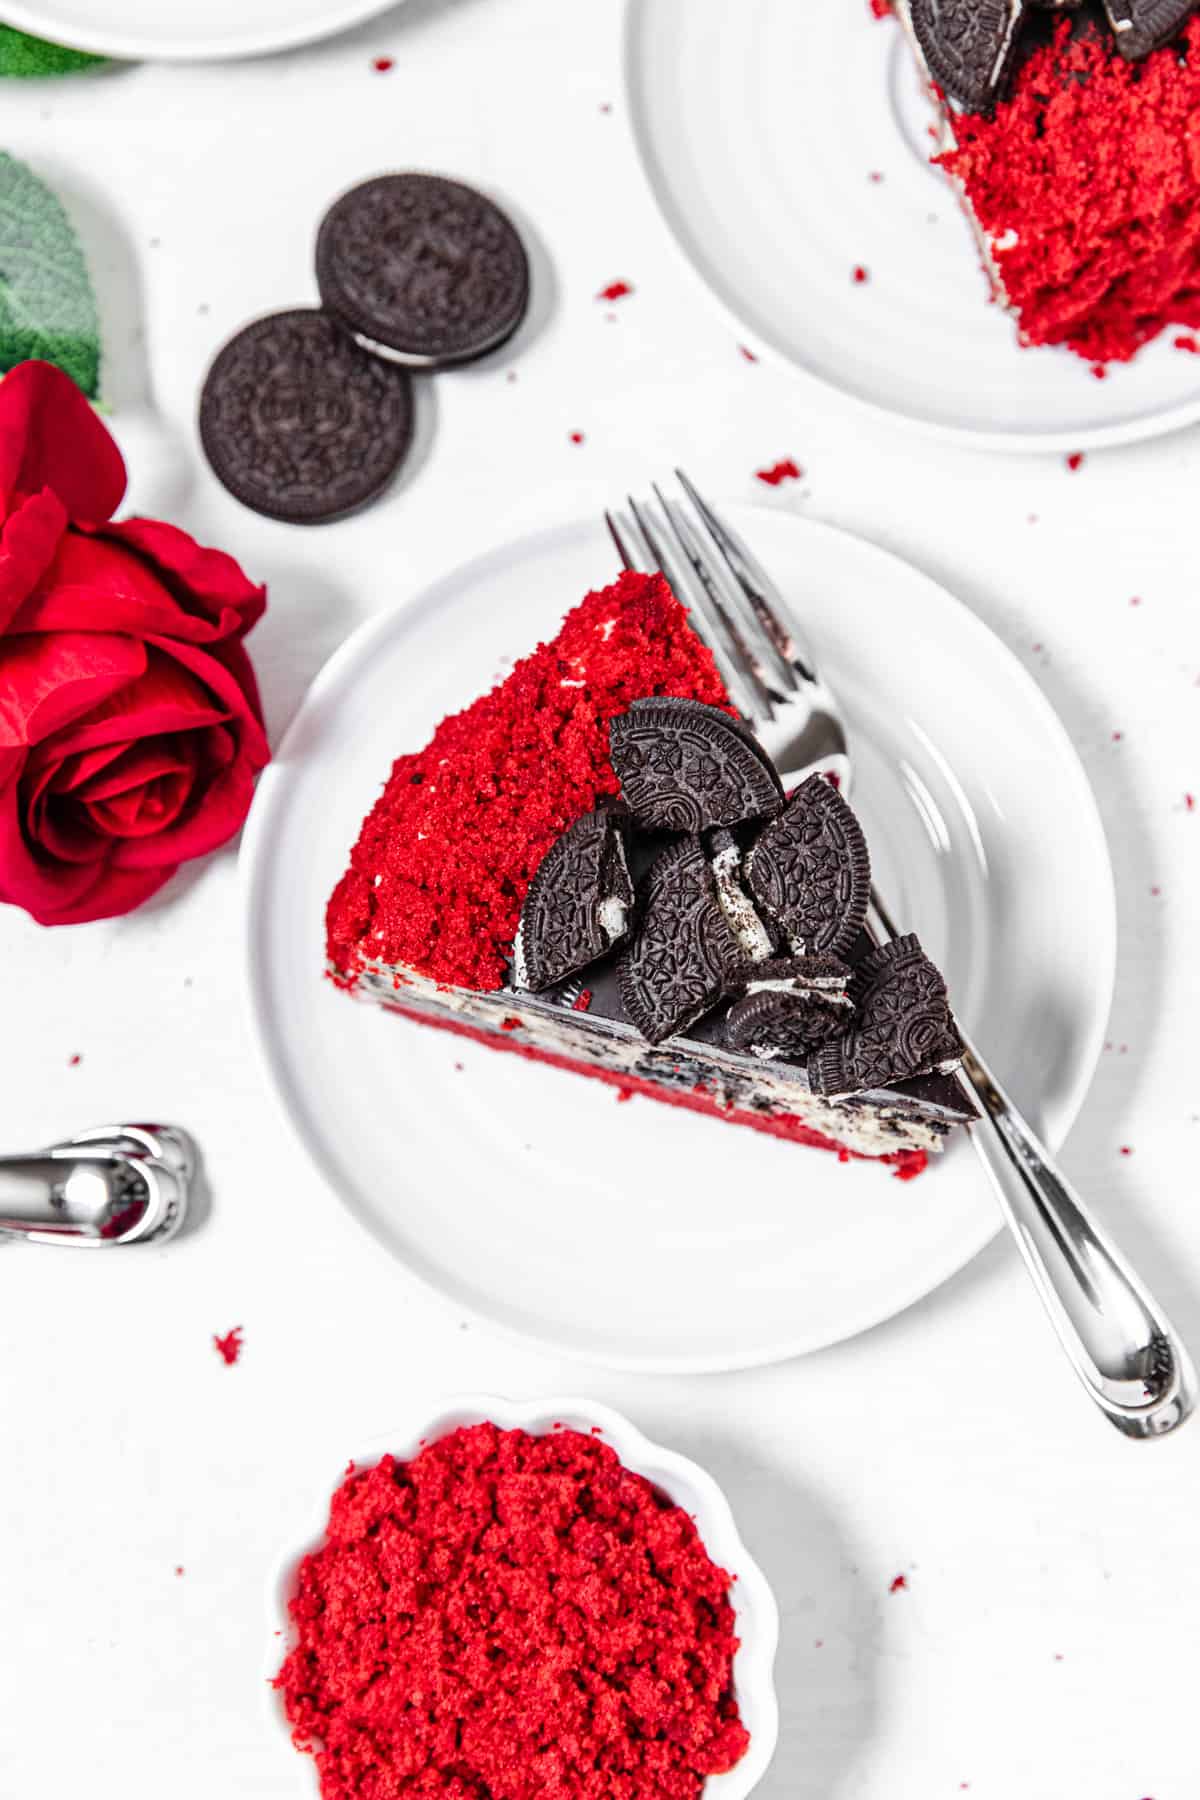
This Red Velvet Oreo Cheesecake starts with a red velvet cake base and a creamy Oreo cheesecake filling that’s topped with ganache, chopped Oreos and surrounded by moist red velvet cake crumbs! This cheesecake is a real triple threat that’ll surely impress!
This post may contain affiliate links. As an Amazon Associate I earn from qualifying purchases. This in no way affects my opinion of those products and services. All opinions expressed on this site are my own. Please see my full disclosure policy for details.
Guys, I think I just created the greatest dessert ever! This is probably the most evily delicious idea I’ve ever come up with, and I only thought of it 2 weeks ago!
After creating this insane Strawberry Champagne Cheesecake with a Pink Champagne Cake Bottom, I just HAD to make another cake-based cheesecake. Since Valentines Day is right around the corner, I figured now was the best time, so I decided to make a cheesecake with a red velvet cake bottom!
BUT! I didn’t want to do a plain cheesecake with red velvet cake (not yet, anyway) because that’s been done before. I suddenly remembered these adorable and over the top Oreo Cookie Dough Stuffed Red Velvet Cupcakes I made last year for Valentine’s Day, and I just knew I had to pair the classic cake flavour with those classic cookies again.
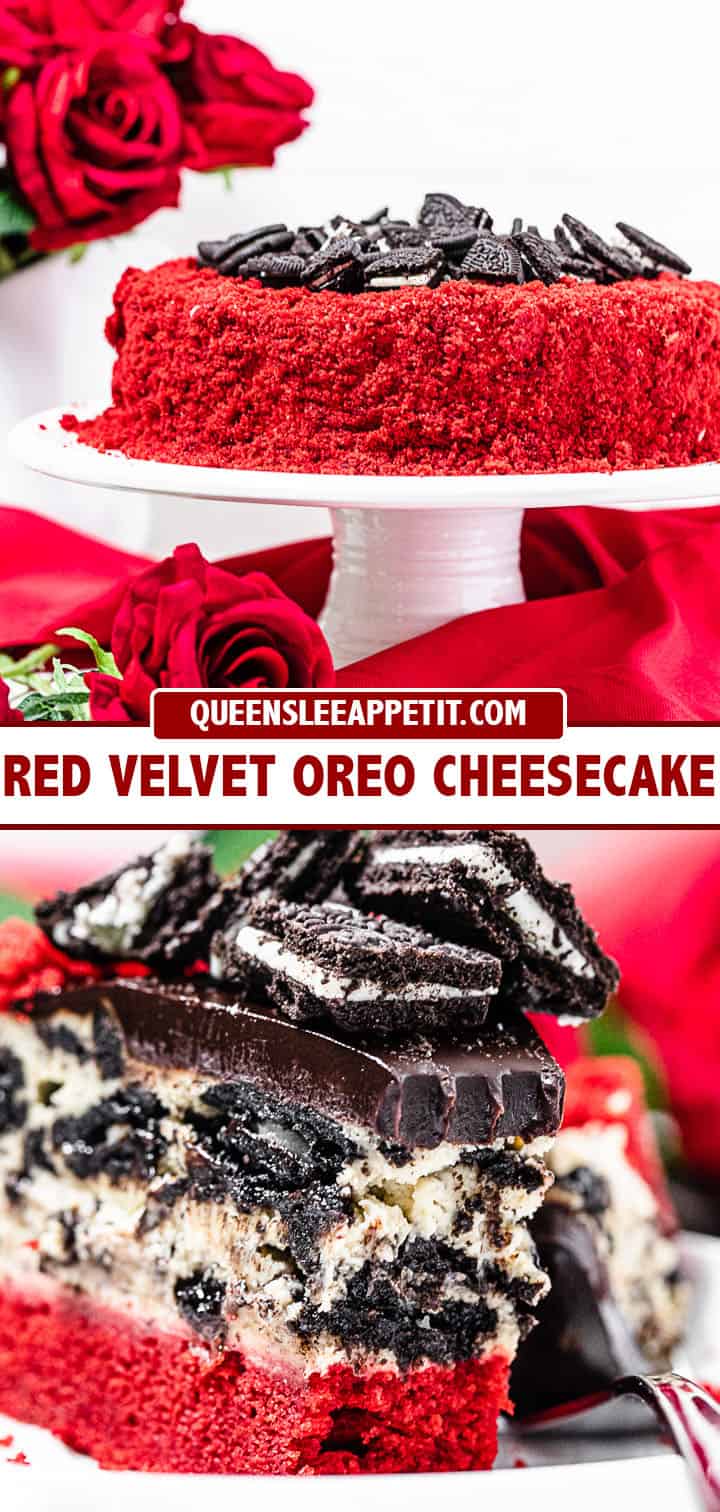
Introducing the Red Velvet Oreo Cheesecake:
What to Find in this Cheesecake
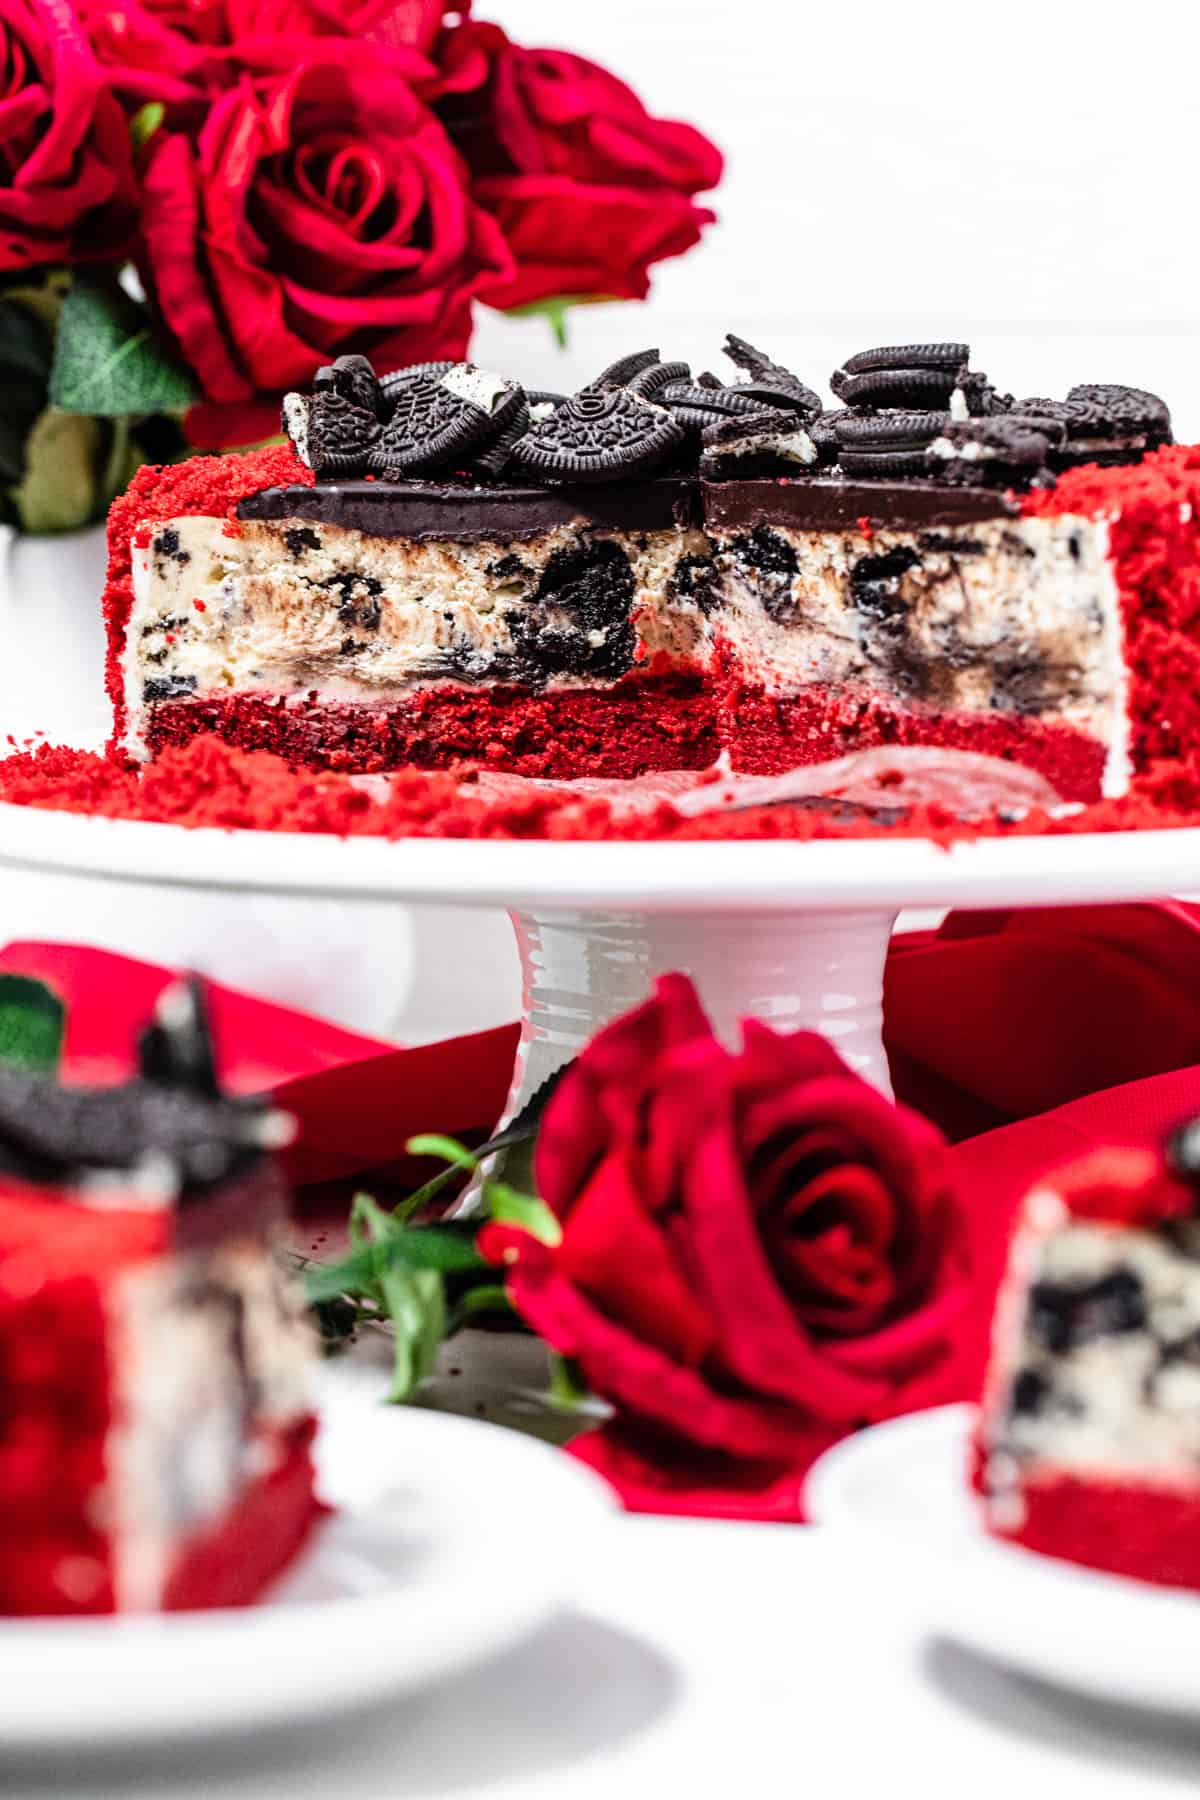
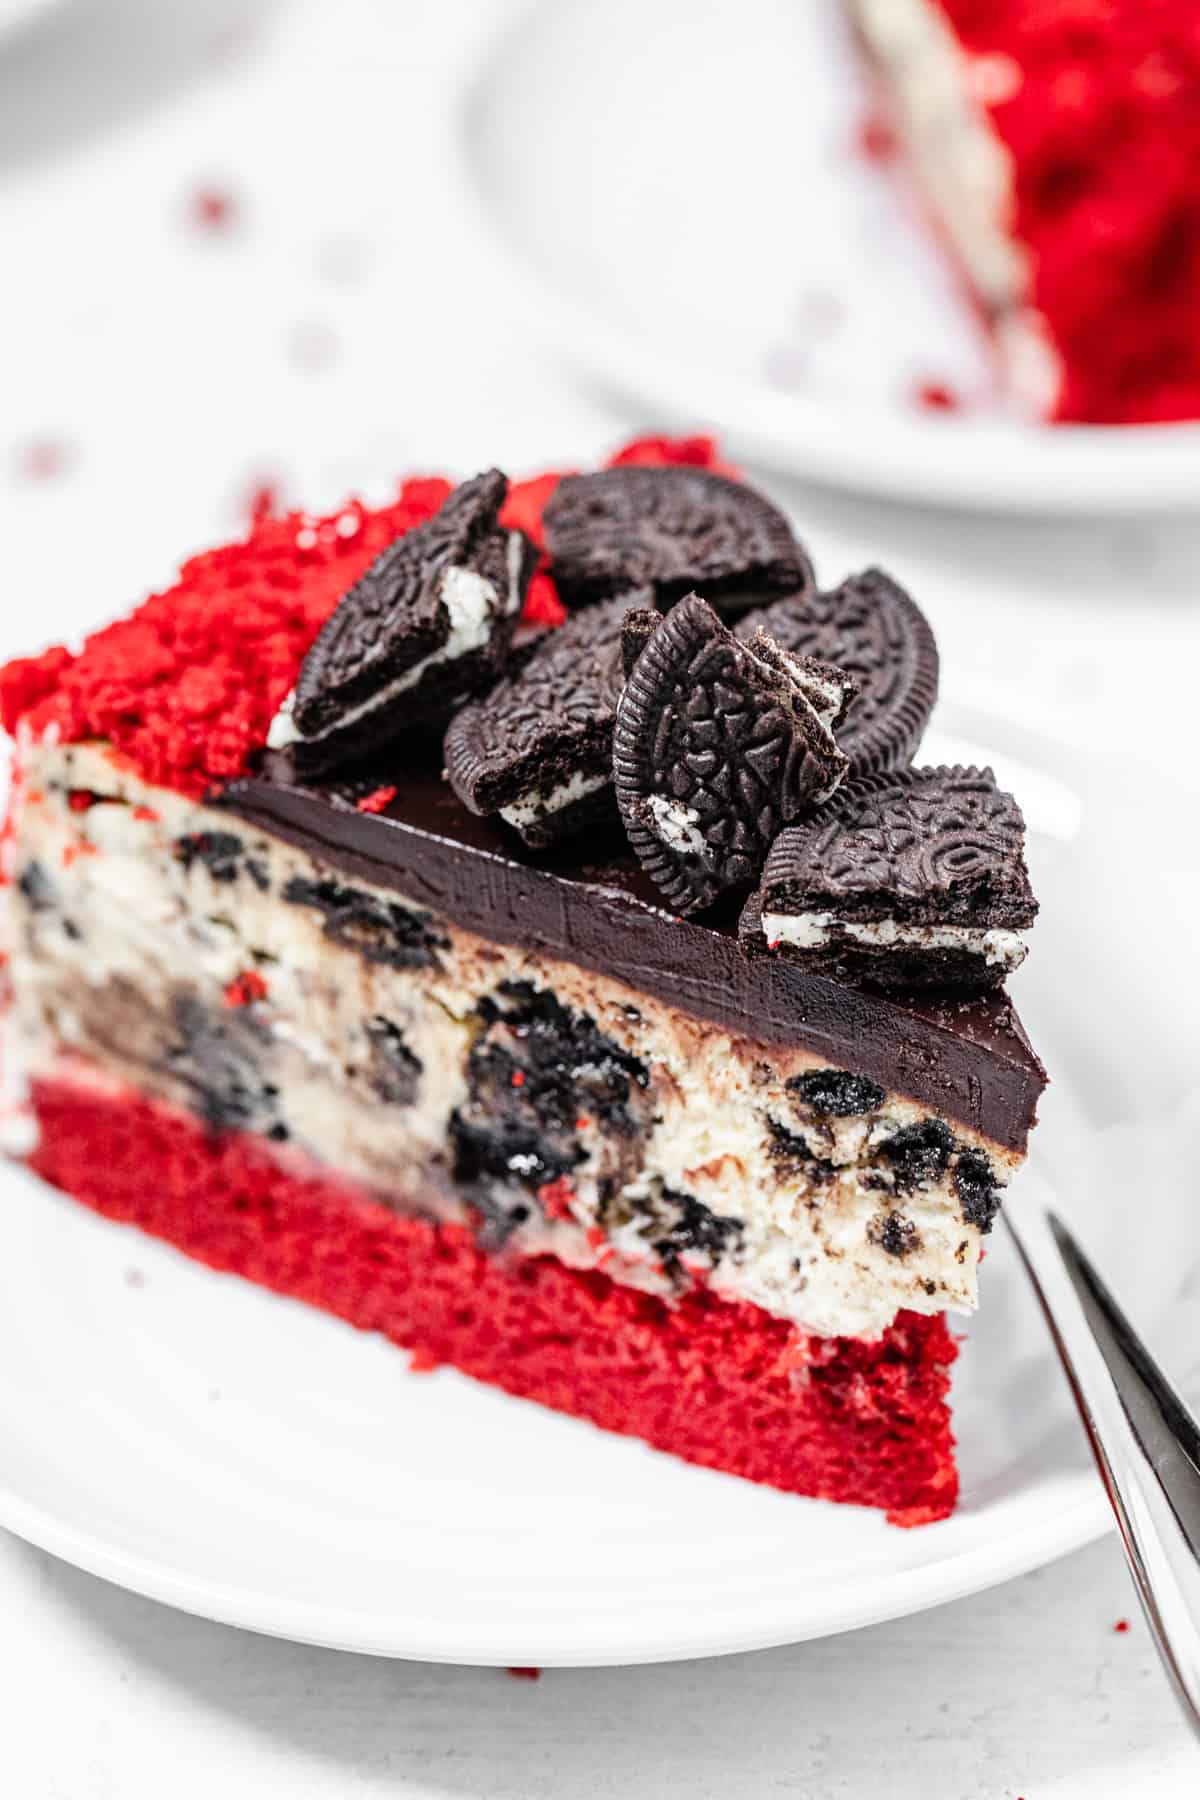
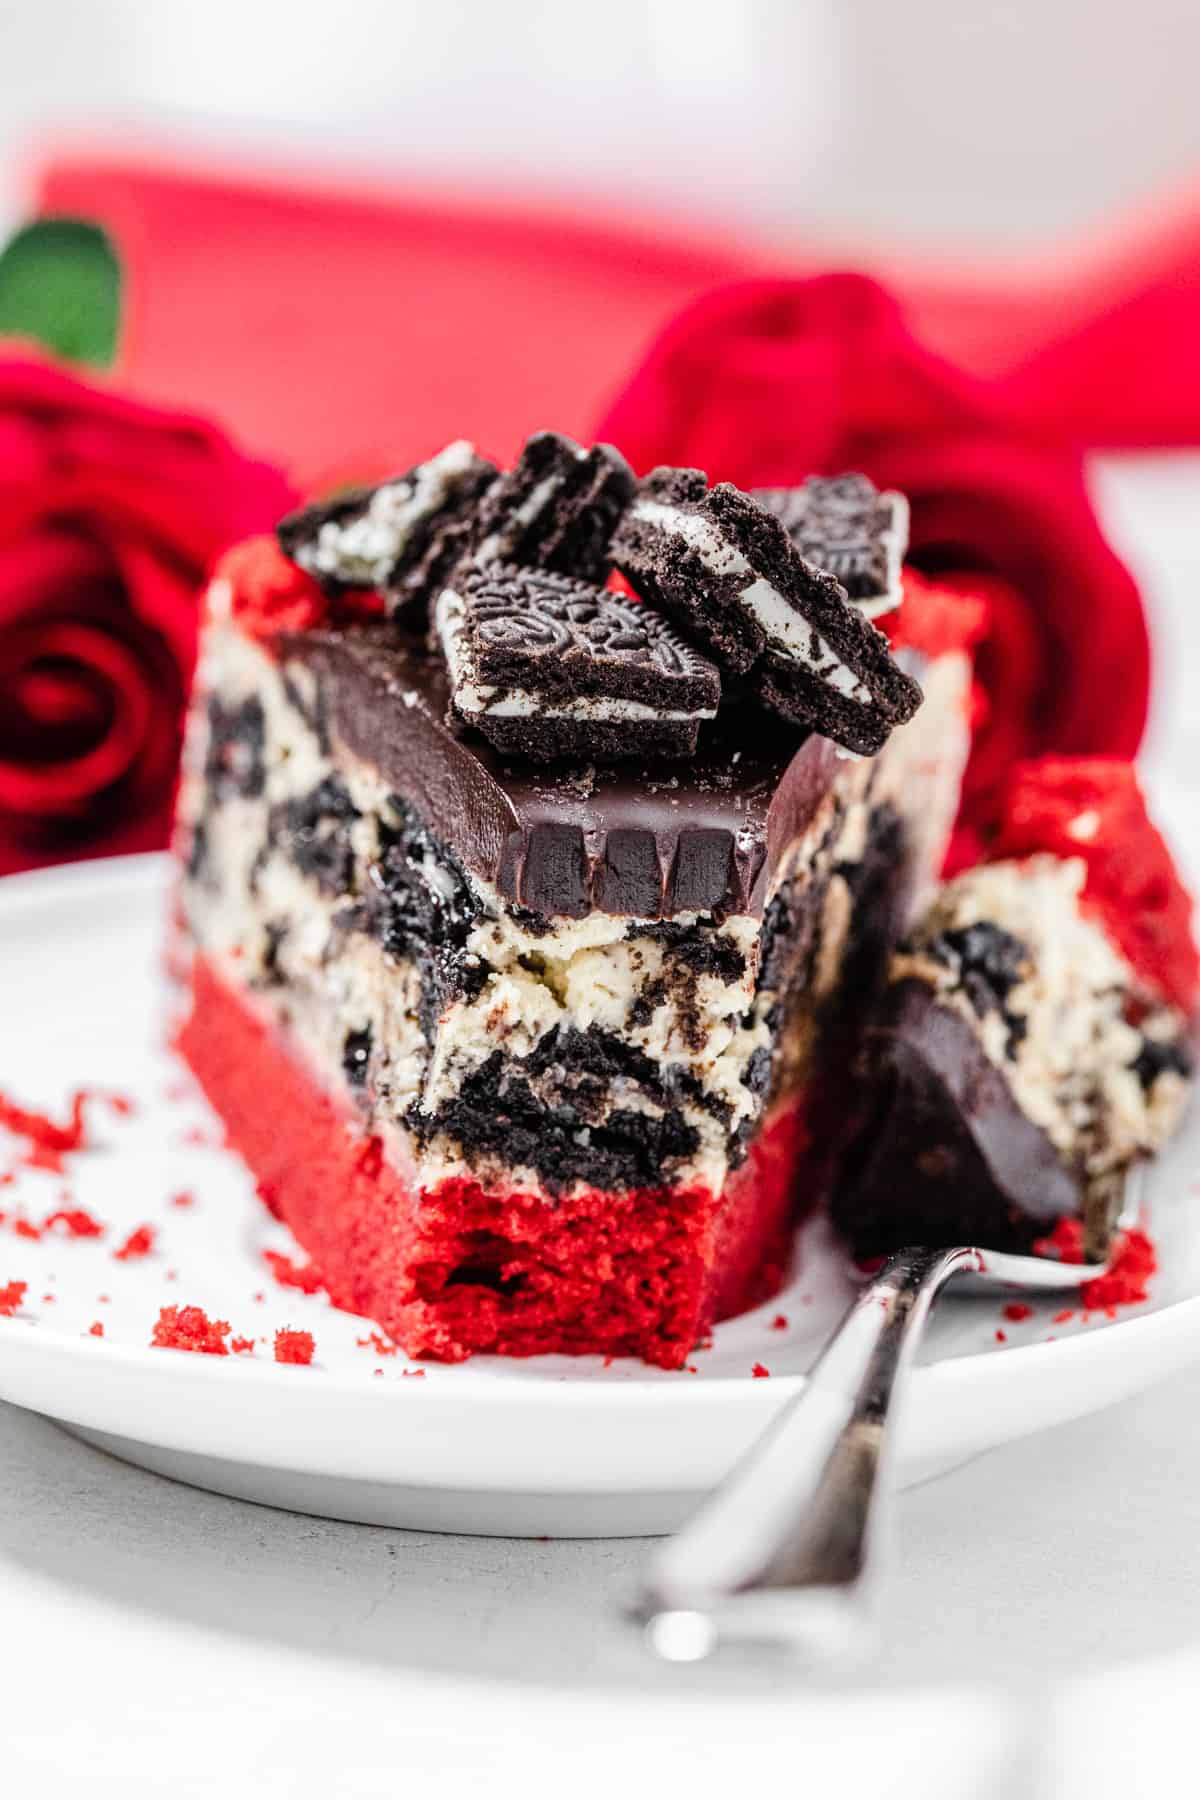
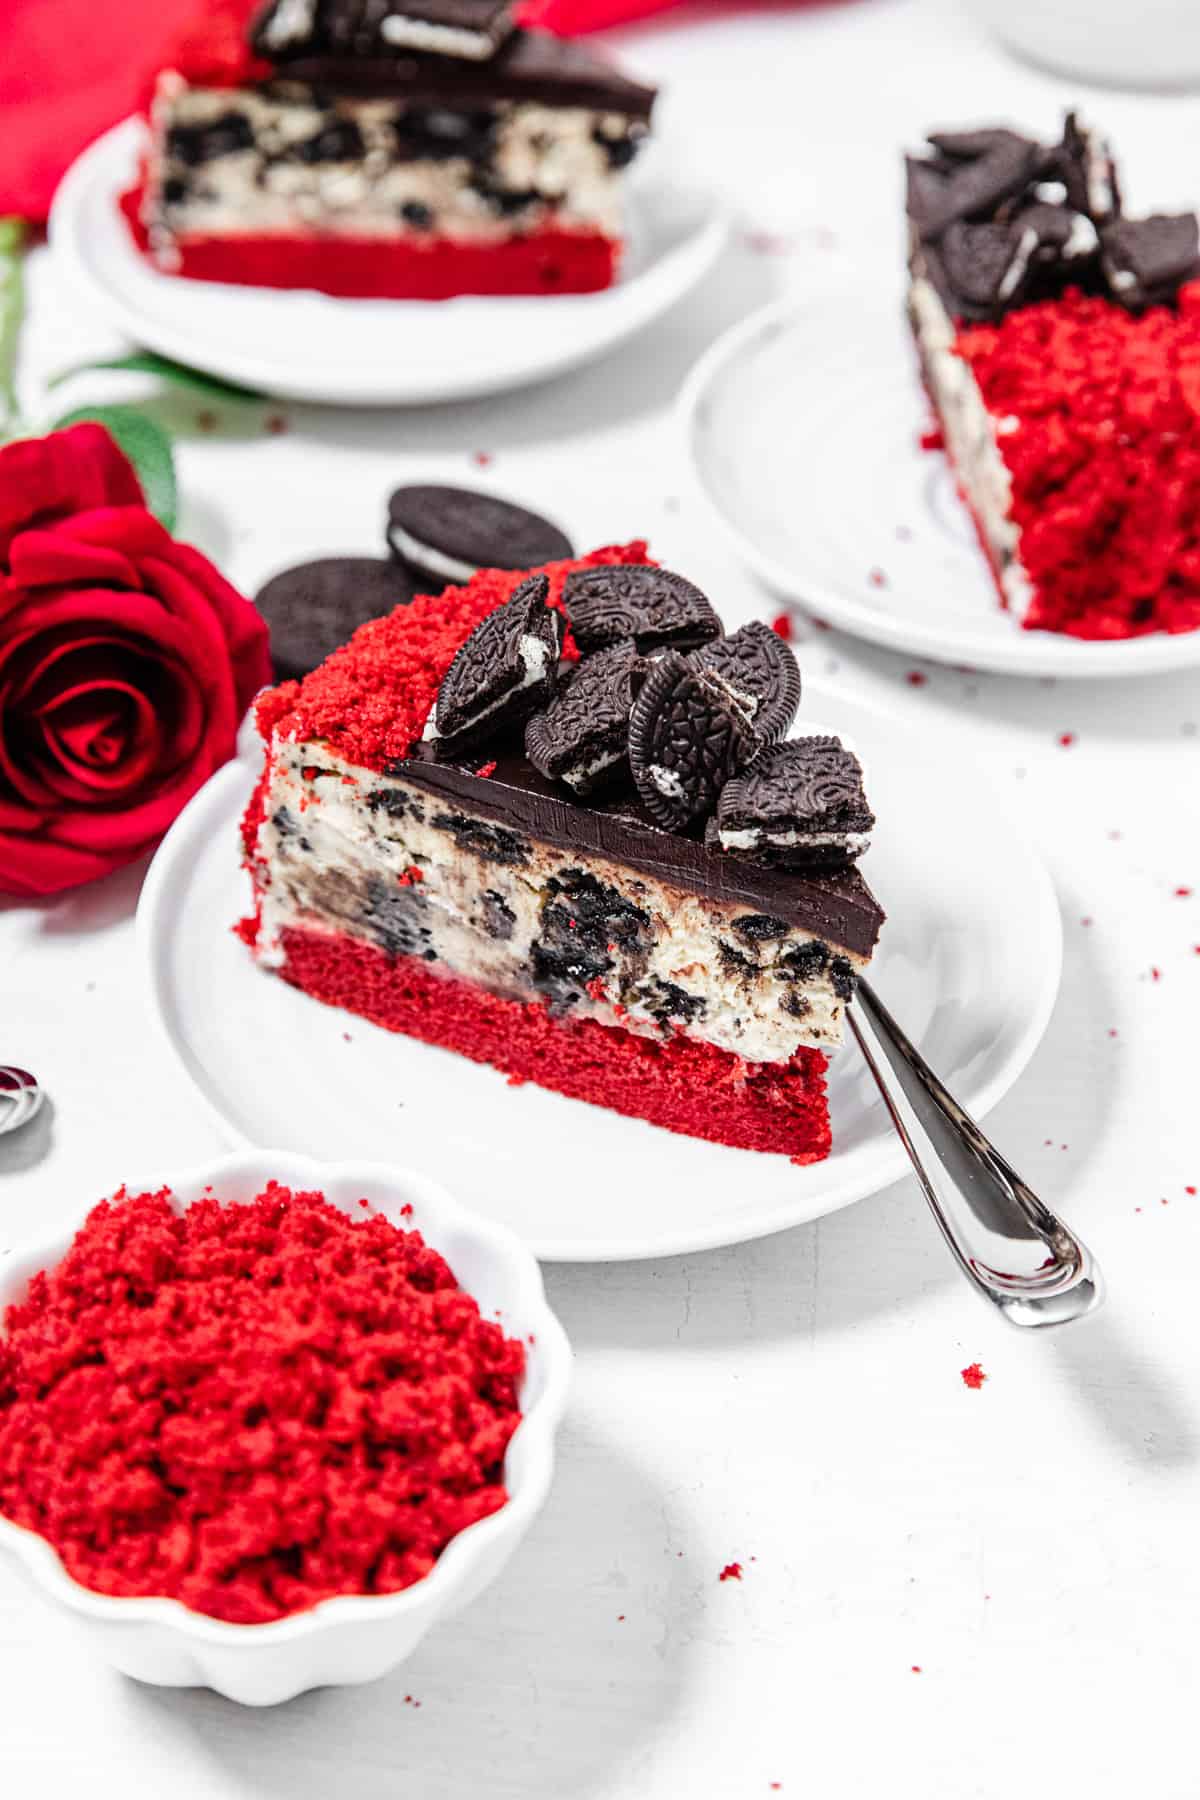
Red Velvet Cake: at the bottom and sides of this cheesecake is a perfectly fluffy red velvet cake!
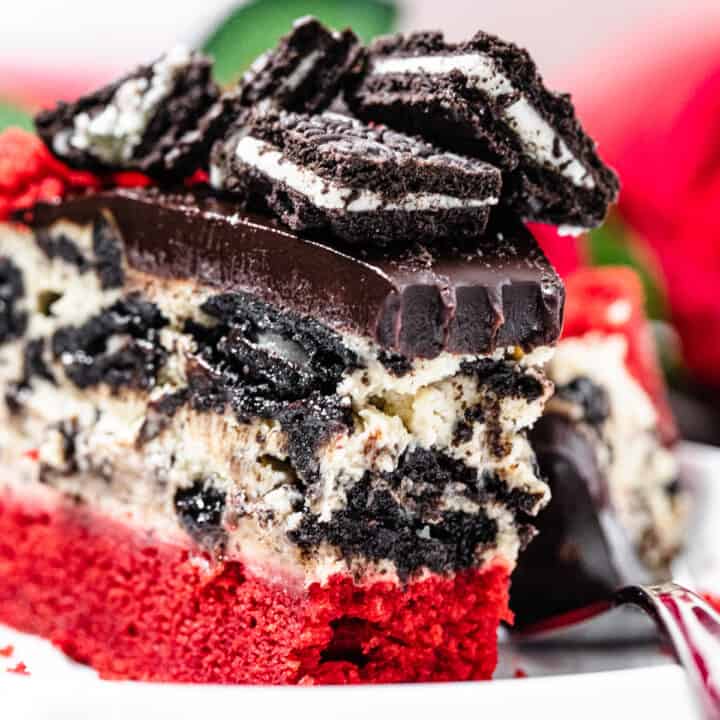
Oreo Cheesecake: on top of the red velvet cake is the most DELICIOUS oreo cheesecake! I’ve upgraded this recipe from the previous one. That means creamier cheesecake, wayyyyy more oreos and better flavour (oreo cream filling mixed right into the base!).
Ganache: a simple 2-ingredient ganache topping ties the flavours together perfectly!
Red Velvet Cake Base & Crumbs
When you think “red velvet oreo cheesecake” you probably think of a red velvet cheesecake with an oreo crust. As you already know, we’re doing things differently (as usual here on Queenslee Appétit).
So we will actually be incorporating red velvet cake into this cheesecake in the form of a “crust” and a beautiful crumb coating!
The red velvet cake bottom recipe was adapted from my pink champagne cake bottom in the cheesecake recipe I linked above and my red velvet cupcakes. I only used two teaspoons of cocoa in this recipe because I wanted the red colour to really pop. However, if you want a deeper chocolate flavour, add 2 tablespoons of cocoa and a really good quality red food colouring like Americolor Super Red.
In the previous version of this recipe, I only made a recipe for the cake base and used a box mix for the crumb coating. This time I doubled my red velvet cake recipe and spread half into a springform pan, then half into an 8-inch cake pan.
For the cake in the 8-inch cake pan, I cut it up and put the chunks into a bowl. Then I used my fingers to crumble it all up. Don’t do this until the day you plan to decorate the cake, because the crumbs may dry out.
Loaded Oreo Cheesecake
I seriously need to make a separate post for my oreo cheesecake already because this recipe is the TRUTH! Y’all when I make oreo desserts, I go ALL. OUT! There isn’t a lack of oreo flavour in any of them, and this cheesecake is no different!
To start, I mixed up some cream cheese. I forgot to do this in the video, but I usually mix the cream cheese and oreo cream filling together at the same time.
Speaking of which, before you start this, go ahead and separate 10 oreo cookies. Scrape out the cream filling and add both filling and wafers to two small bowls. The filling will go into the cheesecake.
For the oreo wafers, you can do many things. Either crush them in your hands, add them to a ziploc bag and smash them with a rolling pin, or crush them in a food processor if you want fine crumbs in your cheesecake filling.
Add the cookie crumbs to the cheesecake batter along with an extra 15 chopped oreos.
Oreo galore!

The Perfect Water Bath
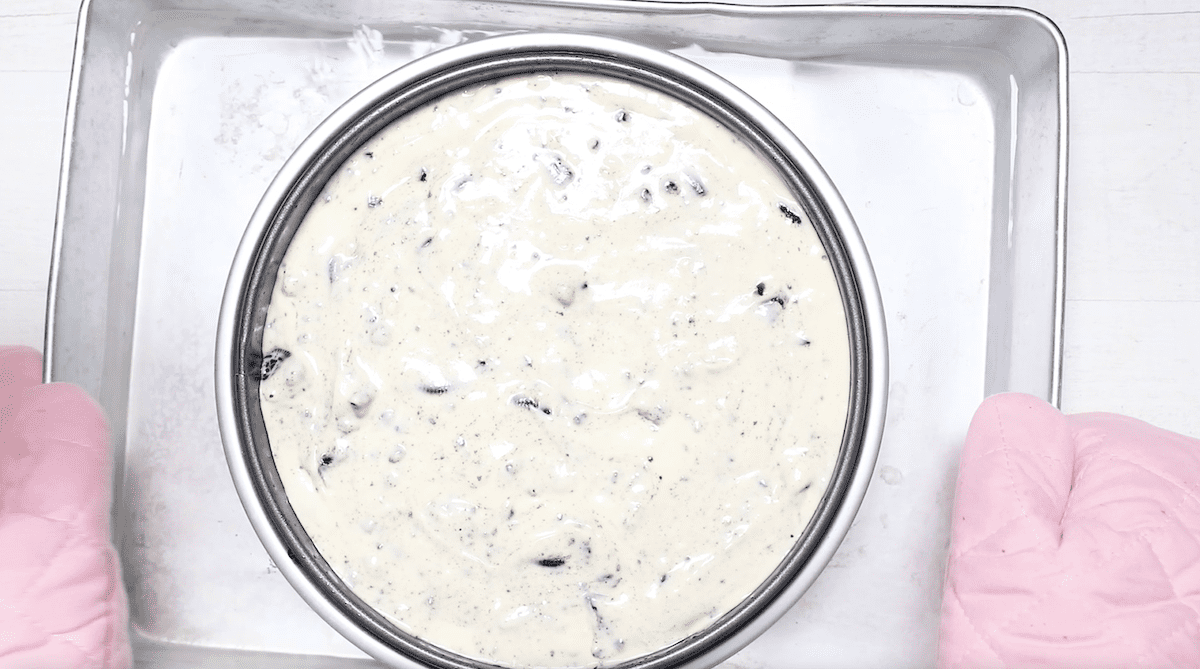
Pour the cheesecake mixture on top of the red velvet cake in your springform pan, then spread it into an even layer. Tap it on the counter a few times to remove any air bubbles, then set it aside.
To prepare our simple water bath you’re gonna need 3 things:
- A large rectangle or round pan (I use an 11x15-inch cake pan)
- A 10-11 inch round cake pan: this takes the place of the foil people usually use, which is why it needs to only be about an inch bigger than our cheesecake pan.
- Boiling water: about 6 cups of boiling water. Not enough to fill the pan completely, but enough to go up half of the springform pan.
Place the 10 inch pan into the large rectangle pan, then place the cheesecake pan into the 10 inch pan. Pour the boiling water into the larger pan, then carefully transfer everything to the oven. This method has been a huge success for me and I will never ever have to worry about water leaking into my cheesecake again!
Ganache Topping
Once the cheesecake has baked and cooled, you’ll make the silky ganache topping! Making ganache is so simple and you only need 2 ingredients: chocolate and heavy cream.
I know the normal method for ganache is pouring hot heavy cream on top of chocolate, letting it sit, then stirring slowly. However, the same results can be achieved with just a microwave!
So I pop my chocolate/cream into the microwave for 30 seconds, stir slowly, throw it in for another 30 seconds, then continue to stir until the chocolate has melted and the 2 ingredients combine to make a smooth and rich ganache!
Now spread the luscious ganache on top of the cheesecake, but leave some space around the edges clear. You can do this the night before, or you can do it a couple hours before serving so the ganache can set.
You want the ganache to be completely chilled, that way when you slice into the cheesecake you’ll get nice clean slices and the ganache will stay in place.
How to Coat the Cheesecake
As messy as this step is, it’s actually quite simple! First, spread some cream cheese frosting around the sides of the cheesecake. You can find a can of pre-made cream cheese frosting at your local grocery store.
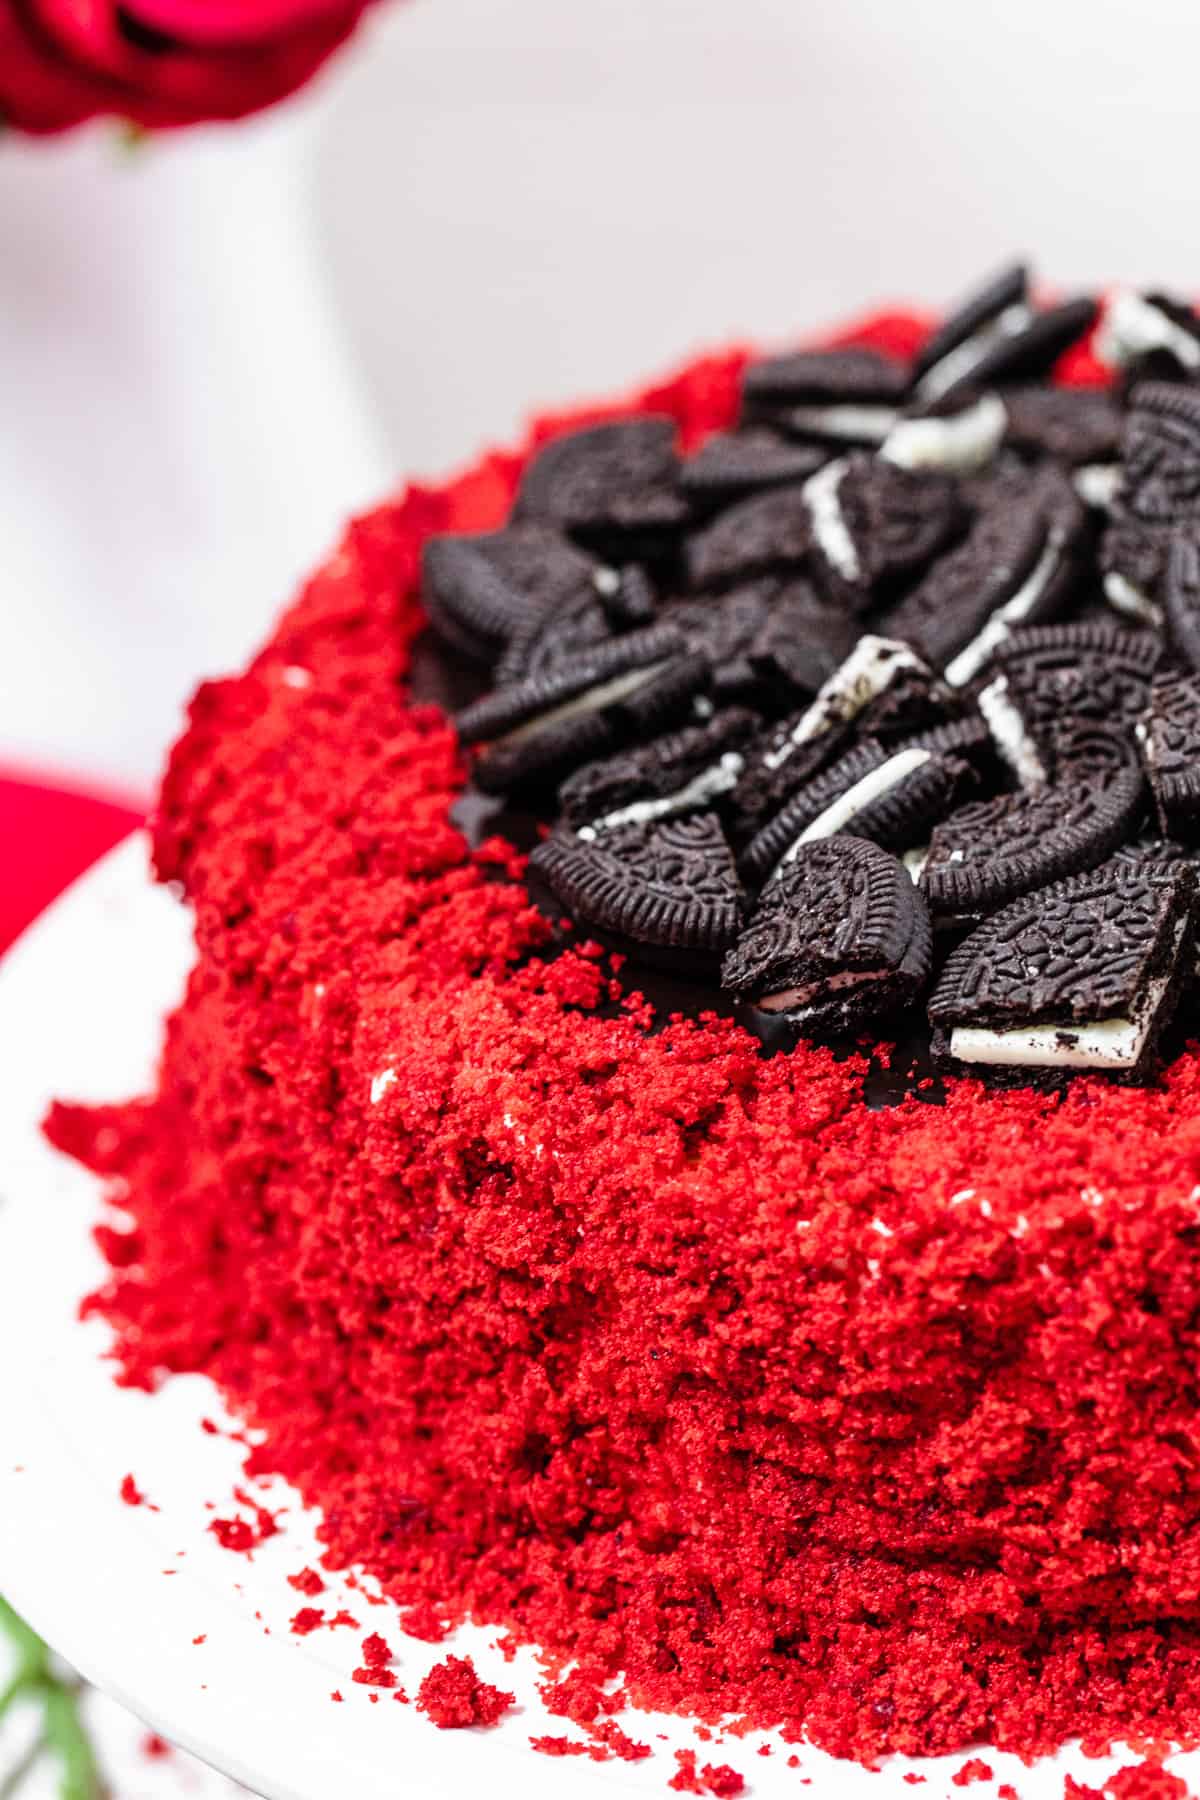
Then grab handfuls of red velvet cake crumbs and press them to the sides. Keep something under your cheesecake to catch the crumbs that fall off. You’ll have plenty of crumbs to go around the cheesecake, then go back and fill in the empty spits. The cake is moist so when you pack and press it into the frosting it should stick perfectly.
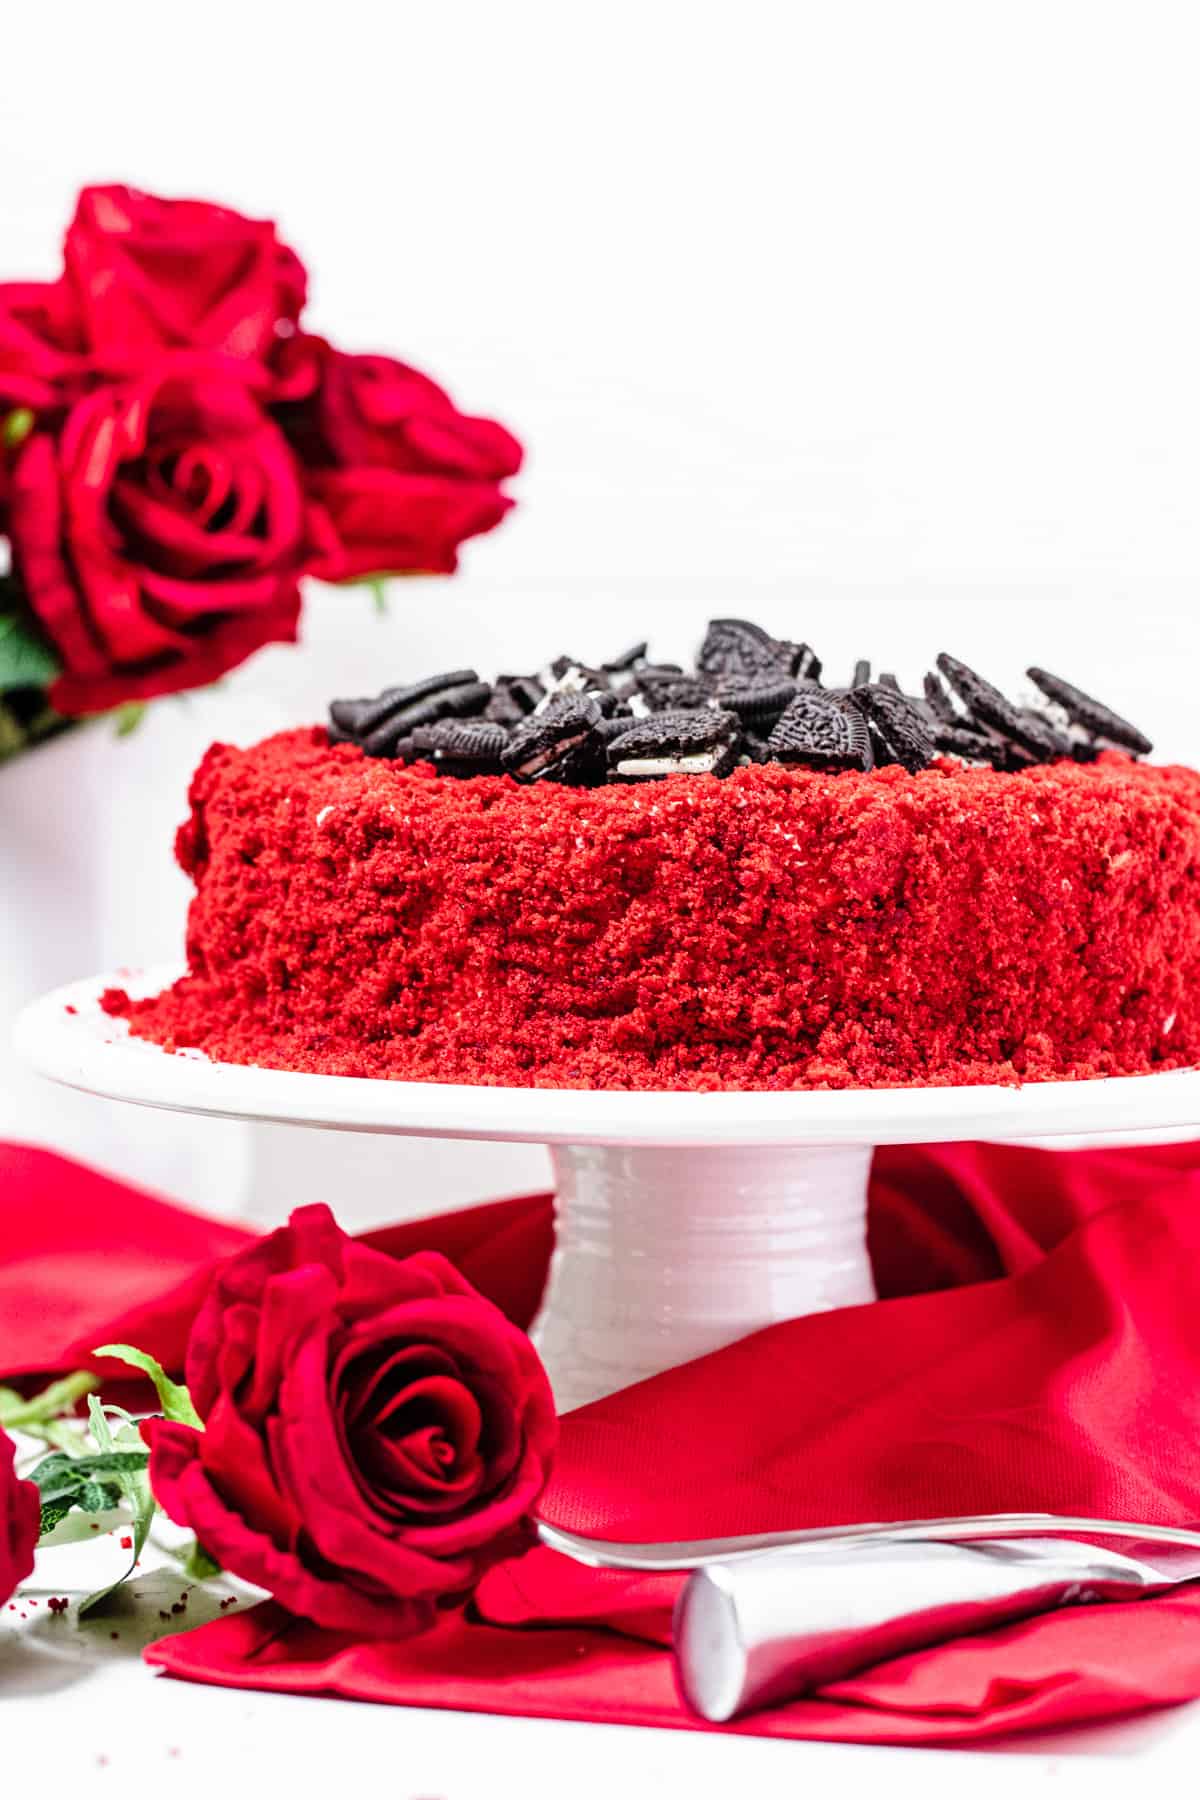
For the top of the cheesecake, sprinkle some more crumbs on the edges we left empty earlier. Another decoration idea would be to pipe on a whipped cream border!
Just check out my cheesecake category to find a good whipped cream recipe, then use a piping bag fitted with a tip of your choice to pipe on a border. I’d recommend you pipe a simple rope border like I did for this cheesecake, or you can see my border piping tutorial for more ideas!
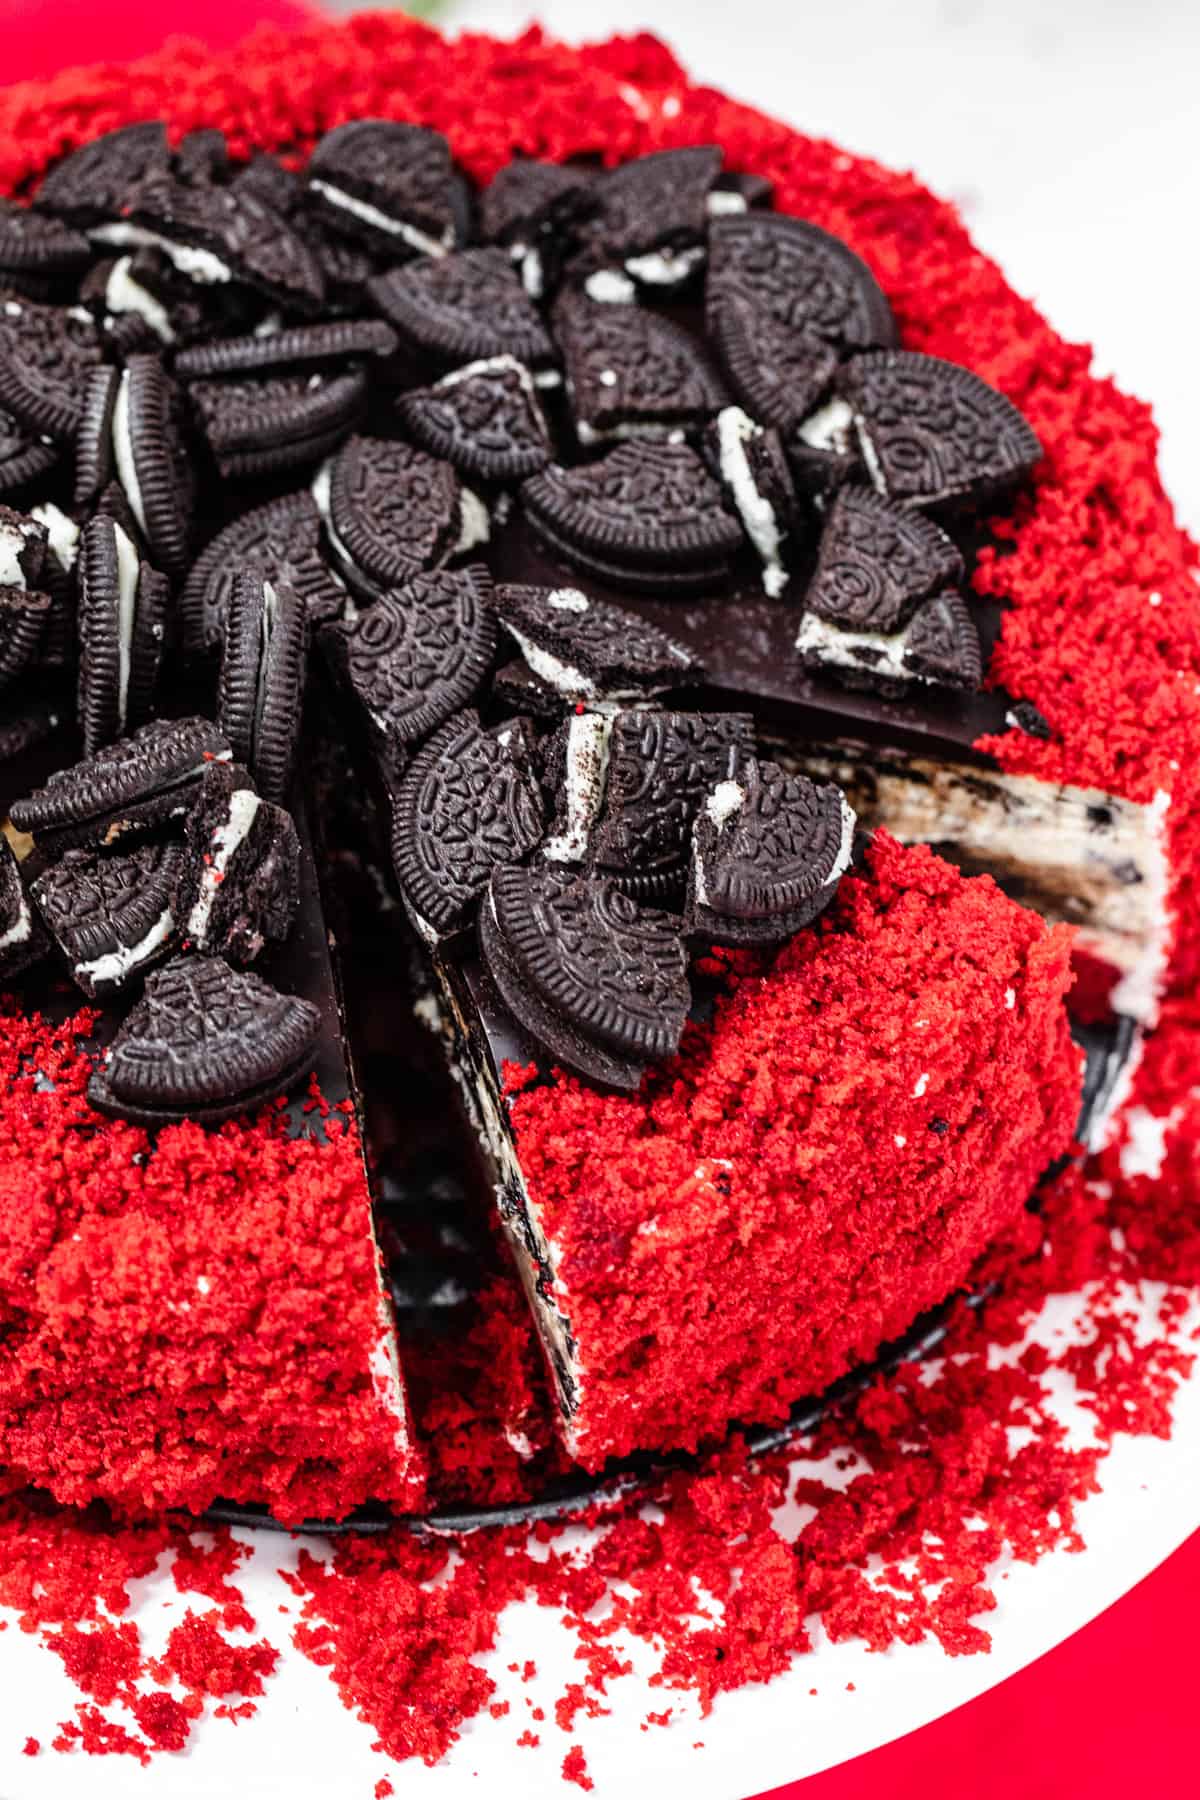
Cover the top of the ganache centre with more chopped oreos, just to let people know what flavours are going on inside all this red velvet goodness.
Now grab a slice and enjoy all of your red velvet, oreo and cheesecake dreams come together in one incredibly decadent dessert!
Watch the Full Video Tutorial on YouTube
More Red Velvet Desserts:
- No-Bake Red Velvet Cookie Dough Cheesecake
- White Chocolate Fudge Red Velvet Brownies
- White Chocolate Chip Red Velvet Cookies
SHARE YOUR PICS!
Follow me on Instagram and tag #queensleeappetit so I can see and share all of your Queenslee Appétit creations in my stories and the QA Newsletter!
FOLLOW QUEENSLEE APPÉTIT
Like what you see? Make sure you‘re following Queenslee Appétit for more tasty recipes!
Pinterest | Instagram | Facebook | YouTube
Have any questions about the recipe? Contact me here, and I’ll be happy to help!
SWEETEN UP YOUR INBOX!
SUBSCRIBE to the Queenslee Appétit Newsletter to recieve new recipe notifications, monthly baking tips, sneak peeks to upcoming recipes, exclusive recipes and more!
Let’s get baking!
Red Velvet Oreo Cheesecake
This Red Velvet Oreo Cheesecake starts with a red velvet cake base and a creamy Oreo cheesecake filling that’s topped with ganache, chopped Oreos and surrounded by moist red velvet cake crumbs!
Ingredients
Red Velvet Cake Bottom/Crumbs:
- 1 and ½ cups all purpose flour
- 2 teaspoons unsweetened cocoa powder
- ½ teaspoon salt
- ½ cup unsalted butter, softened to room temperature
- 1 cup granulated sugar
- ½ cup sour cream, room temperature
- ¼ cup vegetable oil
- 2 teaspoons pure vanilla extract
- 2 large eggs, room temperature
- 4 teaspoons red food colouring
- ⅔ cup buttermilk, room temperature
- 1 teaspoon baking soda
- 1 teaspoon white vinegar
Oreo Cheesecake Filling:
- 10 Oreos, filling removed (crushed)
- 3 (8-ounce) packages (24 oz) full-fat cream cheese, room temperature
- Oreo filling (above)
- 1 cup granulated sugar
- 1 Tablespoon cornstarch (or 3 Tbsp. all purpose flour)
- 1 cup sour cream, room temperature
- 1 Tablespoon pure vanilla extract
- 3 large eggs, room temperature
- 1 large egg yolk
- 15 Oreos, chopped
Ganache Topping:
- 1 cup dark chocolate chips
- ½ cup heavy cream
To Decorate:
- 1 can store bought cream cheese frosting
- 8 Oreos, chopped
Instructions
For the Red Velvet Cake Bottom:
- Preheat the oven to 350°F (180°C). Grab a 9-inch springform pan and an 8-inch round cake pan.
- Line the bottom of the springform pan with parchment paper, and spray the sides with non-stick spray. Set aside.
- Add flour, cocoa and salt to a medium bowl. Whisk to combine. Set aside.
- In the bowl of a stand mixer fitted with the paddle attachment, or in a large bowl using a hand mixer, cream the butter and sugar together on medium-high speed until light and fluffy (about 3-5 minutes).
- Add sour cream, oil and vanilla and continue to mix until combined.
- Add the eggs, one at a time, mixing after each addition. Add a few drops of the red food colouring and continue to mix until batter is completely coloured.
- Scrape down the sides of the bowl. Add ⅓ of the dry ingredients to the bow and mix until combined.
- Pour in half of the buttermilk and mix until well incorporated.
- Add ½ of the remaining dry ingredients and continue to mix until well combined. Repeat with the remaining buttermilk, then the remaining dry ingredients.
- In a small bowl, combine the baking soda and vinegar. Add to the batter and gently fold until combined. Do not overmix.
- Pour half of the batter into the prepared springform pan and spread into an even layer. Pour the other half into the 8 inch cake pan and spread into an even layer.
- Bake both cakes for 18-20 minutes or until a toothpick inserted into the centre of the cake comes out with a few moist crumbs.
- Allow them to cool completely in the pan on a wire rack. Cover the 8-inch cake with plastic wrap and set aside. Lower the oven temperature to 300°F.
For the Oreo Cheesecake:
- Scrape the filling out of 10 Oreos and place cream filling and wafers into separate bowls. Set filling aside.
- Place Oreo wafers into a food processor and pulse until very fine crumbs form. Alternatively, you can place Oreos in a large ziploc bag and beat with a rolling pin to crush them up into big or small chunks. Set aside.
- In the bowl of an electric mixer fitted with the paddle attachment, or in a large bowl using a handheld mixer, beat the cream cheese and reserved Oreo filling together on low speed until creamy, about 2-3 minutes.
- Scrape down the sides of the bowl and add sugar and cornstarch. Beat until smooth and combined.
- Add the the sour cream and vanilla extract. Continue beating until smooth.
- Scrape down the sides and bottom of the bowl and continue to beat until everything is combined.
- Add eggs and yolk one at a time, beating slowly until just combined, do not overbeat.
- Scrape sides and bottom of the bowl with a rubber spatula to make sure everything is combined. Add crushed Oreo wafers and chopped Oreos, then fold to combine.
- Pour the cheesecake onto the cooled cake base and spread into an even layer.
- For the water bath: grab a large rectangle cake pan. Place a 10-11 inch round pan or pot inside. Place your springform pan inside this pot. Set everything aside.
- Bring a few cups of water to a boil and carefully pour into the larger pan. The water should only be a few inches up the sides of the pan. Do not go over the top.
- Bake at 300°F for about 1 hour and 30 minutes. The cheesecake is done when the edges are set and the center jiggles just slightly.
- Turn off oven and leave the cheesecake inside to cool for 30 minutes. After 30 minutes, crack the door open and continue cooling the cheesecake for another 30 minutes. This slow cooling process helps prevent cracking.
- After an hour, remove cheesecake from waterbath. Run a knife around the edge of the pan so it's not sticking to the sides and allow to cool to room temperature on a rack for 1 hour, then let it chill in the refrigerator for 6-8 hours or preferably overnight.
For the Ganache Topping:
- Put the chocolate chips and heavy cream into a medium bowl.
- Microwave for 30 seconds.
- Stir them together slowly before microwaving for another 30 seconds.
- Stir ganache slowly until everything comes together.
- Pour some of the ganache into the centre of the cheesecake and spread around to create a circle. Don’t go all the way to the edges.
- Slowly pour on more ganache and spread it around, keeping it centred. Chill the cheesecake for another hour to allow the ganache to set.
To Decorate:
- Use a butterknife to cut the red velvet cake out of the 8-inch cake pan. Place the pieces into a medium bowl.
- Pick up the chunks of cake, then rub the pieces between your fingers to create fine crumbs. Set aside.
- Remove chilled cheesecake from the refrigerator and spread some cream cheese frosting around the edges.
- Grab a handful of crumbs and spread it up the sides of the cheesecake. I recommend doing this on your serving plate or having another pan underneath to catch any crumbs. Make sure you gently press the cake crumbs onto the cheesecake so they can stick.
- Once you’ve gotten the cake crumbs onto the sides, sprinkle some around the top edges of the cheesecake. Then garnish the centre with the chopped Oreos. Slice, serve and enjoy!
Notes
- MAKE AHEAD: both red velvet cakes can be made a day or two ahead of time and stored at room temperature or in the refrigerator for up to 4 days. Ganache can be made ahead of time and stored covered in the refrigerator. Microwave for another 20-30 seconds to loosen it back up.
- TOOLS I USED: 9-inch springform pan | 8-inch round cake pan | cordless hand mixer | mixing bowl set | rubber spatula | red gel food colouring | parchment rounds | small angled spatula | 11x15-inch cake pan | 10-inch round cake pan | straight spatula |
- COCOA POWDER: I wanted to keep the chocolate mild in this red velvet cake, but if you want a deeper chocolate flavour, add up to 2 tablespoons of cocoa powder.
- OREOS: feel free to add less oreos if you don’t want the cheesecake to be absolutely packed with them!
- CHILLING THE CHEESECAKE: when a cheesecake chills in the refrigerator, it usually starts to “sweat” on top. So instead of covering it with a lid or plastic wrap, I usually just place a large sheet of paper towel on top.
- STORAGE: store the cheesecake in an airtight container in the refrigerator for up to 3 days.
- RED VELVET CRUMBS: the red velvet cake crumbs will harden in the refrigerator, so don’t add them to the cheesecake until the day you plan to serve. I recommend wrapping the sides in plastic wrap to keep them from drying out in the refrigerator.
Nutrition Information:
Yield: 12 Serving Size: 1Amount Per Serving: Calories: 658Total Fat: 37gSaturated Fat: 17gTrans Fat: 0gUnsaturated Fat: 13gCholesterol: 161mgSodium: 420mgCarbohydrates: 76gFiber: 2gSugar: 58gProtein: 7g
BON APPÉTIT!
Love, Dedra
©QUEENSLEE APPÉTIT. All images & content are copyright protected. Please do not use my images without prior permission. If you want to republish this recipe, please re-write the recipe in your own words, or link back to this post for the recipe.
Carol
I have been making this recipe for my granddaughter for her birthday for 5 years. It always turns out Great! It is a fantastic center piece at the birthday table.
Bakir Ali
Hey dedra... Thanks for the recipe.. i made it perfectly same with exact measurements and turned out awesome... Thanks again for the great recipe..
Dedra | QueensleeAppetit
That’s amazing to hear! You’re very welcome <3