
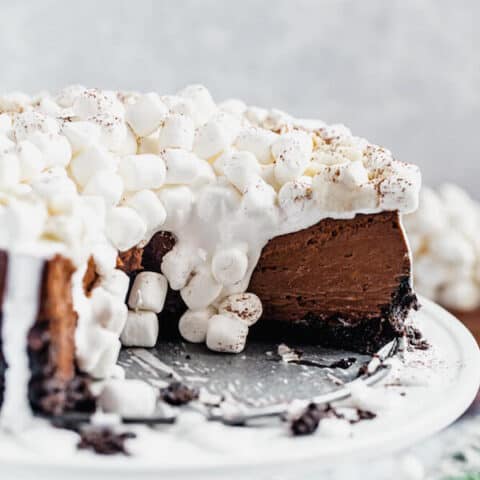
Ever wanted to drink your hot chocolate and eat it too? Well now you can, in cheesecake form! This decadent Hot Chocolate Cheesecake tastes like pure holiday greatness! A simple oreo crust with the creamiest marshmallow filled chocolate cheesecake and a gooey marshmallow topping!

This post may contain affiliate links. As an Amazon Associate I earn from qualifying purchases. Please see my full disclosure policy for details.
Hot Chocolate Cheesecake
I know it’s kinda late, but I just had to squeeze in this final Christmas recipe. A few days ago I shared a recipe for hot chocolate cupcakes, and today I’d like to introduce you to it’s older, crazier sister: Hot Chocolate Cheesecake!


4 Parts to this Hot Chocolate Cheesecake
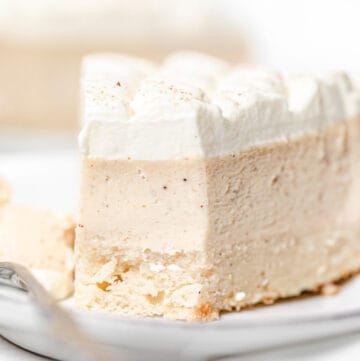
There are 4 awesome layers of goodness in this hot chocolate cheesecake:
- Oreo Crust
- Rich Chocolate Cheesecake (with a surprise)
- Marshmallow Fluff Drip
- Sweetened Whipped Cream
Plus we’ve got a LOAD of marshmallows piled on top, because it wouldn’t be a hot chocolate dessert without ‘em!


Oreo Crust
I was gonna get real extra and make a brownie base, but in the end I decided to keep things simple. Never imagined I’d say that 2 years ago, but I’ve grown to understand that sometimes simple is better.
That being said, I still have a few crazy recipe ideas swirling around in my head that’ll be coming in the New Year.
But for now, let’s talk about that Oreo crust. Crush some Oreo cookies into fine crumbs, then combine it with melted butter to help the crust hold together. Press it into your pan, pre-bake, then set it aside to cool while you make the cheesecake.

The Best Chocolate Cheesecake with a Little Surprise!
My favourite chocolate cheesecake is making a comeback! I’ve made a mini version of this cheesecake, along with a s’mores version and a chocolate lover’s version (my fave!) and every variation of this decadent chocolate cheesecake brings me to my knees.
There’s a few things that contribute to the great flavour of this cheesecake. A bit of brown sugar to enhance the flavour, some cocoa, a full cup of sour cream etc. But the thing that takes this chocolate cheesecake to the next level is the 12 ounces of pure melted dark chocolate that we pour in!
So what’s the surprise? Sitting between the crust and the cheesecake is a layer of mini marshmallows!
You may notice some bumps on the surface of the cheesecake after it’s done baking. At least, that’s what happened to me and it’s because 2 marshmallows floated to the top, which was totally fine. Aside from that, the rest of them stayed in their place and thanks to our waterbath, there was no cracking!

Whipped Cream + Marshmallow Topping
Remember that marshmallow fluff drip on top of my Hot Chocolate Cupcakes? We’re bringing it back for this cheesecake! The steps are the same, heat up some marshmallow fluff with a bit of water to loosen it up and make it pourable consistency. I dripped some off the sides of the cheesecake first, then poured the rest on top.

I kinda flubbed the whipped cream topping by piping the border too far in the middle, so I had to add a row of mini marshmallows around the edges then piled some in the middle.
You can also leave the whipped cream border off and just layer rows of mini marshmallows on top. You can dust the marshmallows with cocoa powder or even toast them with a blowtorch!

As everyone knows, cheesecake is best enjoyed cold. However, this means the marshmallows won’t be very gooey and melty! So, if that’s what you want, I suggest microwaving your slice of cheesecake for about 15 seconds to give the marshmallows that stretch gooey texture and taste!
Each bite of this hot chocolate cheesecake is loaded with heavenly marshmallow goodness!


Did you make this Hot Chocolate Cheesecake? Let me know how they turned out in the comments below! And don’t forget to leave a rating!
>>PIN RECIPE FOR LATER<<

FOLLOW QUEENSLEE APPÉTIT
Like what you see? Make sure you‘re following Queenslee Appétit for more tasty recipes!
Pinterest | Instagram | Facebook | Twitter |
Have any questions about the recipe? Contact me here, and I’ll be happy to help!
SHARE YOUR PICS!
Tag me on Instagram @queensleeappetit or use the hashtag #queensleeappetit so I could see your gorgeous creations!
Let’s get baking!
Hot Chocolate Cheesecake
Ever wanted to drink your hot chocolate and eat it too? Well now you can, in cheesecake form! This decadent Hot Chocolate Cheesecake tastes like pure holiday greatness! A simple oreo crust with the creamiest marshmallow filled chocolate cheesecake and a gooey marshmallow topping!
Ingredients
Crust:
- 3 cups Oreo crumbs (about 36 whole Oreos)
- 6 tablespoon unsalted butter, melted
Chocolate Cheesecake:
- 1 and ½ cups mini marshmallows
- 12 oz. Bittersweet or semisweet chocolate, melted and cooled
- 3 (8oz) packages cream cheese (24 oz), softened to room temperature
- ¾ cup granulated sugar
- ¼ cup light brown sugar, packed
- 2 tablespoon unsweetened cocoa powder, sifted
- 1 Tbsp. cornstarch (or 3 Tbsp. all purpose flour)
- 1 cup sour cream, room temperature
- ½ cup heavy cream, room temperature
- 2 teaspoon pure vanilla extract
- 3 large eggs, room temperature
- 1 large egg yolk
Marshmallow Drip:
- 3 cups marshmallow fluff
- 2 tablespoon water
Sweetened Whipped Cream:
- 1 cup heavy whipping cream, chilled
- 10 Tbsp. powdered sugar
- ½ tsp. pure vanilla extract
- Cocoa powder, for dusting (optional)
Topping:
- 3 cups mini marshmallows
Instructions
For the Crust:
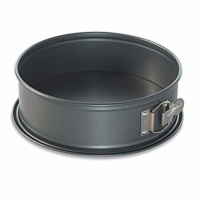
- Preheat oven to 325°F. Grease sides and bottom of one 9-inch springform pan with cooking spray and line with parchment rounds.
- In a food processor, crush Oreos into fine crumbs-you should have about 3 cups.
- Pour Oreo crumbs into a medium bowl and mix in melted butter using a fork until all the crumbs are coated.
- Transfer mixture to the greased 9-inch springform pan and, using the flat bottom of a glass or measuring cup, press into the pan.
- Bake crust in preheated oven for 10-12 minutes. Remove from the oven and reduce the temperature to 300°F.
- Spread the mini marshmallows onto the crust. Set aside.
For the Chocolate Cheesecake:
- Take 1 extra large piece of aluminum foil that’s bigger than your springform pan. Place springform pan in the centre and fold aluminum up to the sides to cover the outside of the pan. This ensures that no water seeps into the pan during the water bath. Alternatively, I placed my pan in a slightly larger pot to completely protect my crust from the water.
- Place chopped chocolate in a large heat-safe bowl over a saucepan of simmering water. Stir constantly until the chocolate is melted and smooth. Remove bowl from heat and set aside to cool.
- In the bowl of a stand mixer fitted with the paddle attachment, or in a large bowl using a handheld mixer, beat the cream cheese on low speed until smooth and creamy.
- Add both sugars, cocoa and cornstarch and continue to beat on low speed until completely combined and smooth.
- Scrape down the sides of the bowl and add sour cream, heavy cream and vanilla and continue beating until smooth. Add melted chocolate and mix on low speed to combine.
- Add eggs and yolk one at a time, beating slowly until just combined, do not overbeat. Scrape sides and bottom of the bowl with a rubber spatula to make sure everything is fully combined. Forcefully tap bowl on the counter a few times to release any air bubbles. Pour into prepared pan, over marshmallows and place into a larger pan.
- Bring a few cups of water to a boil and carefully pour into the larger pan. The water should only be a few inches up the sides of the pan. Do not go over the top.
- Bake at 300°F for about 1 hour and 20 minutes to 1 hour and 30 minutes. The cheesecake is done when the edges are set and the center jiggles just slightly.
- Turn off oven and leave the cheesecake to cool for 30 minutes. After 30 minutes, crack the door open and continue cooling the cheesecake for another 30 minutes. This slow cooling helps prevent cracking.
- After an hour, remove cheesecake from waterbath and aluminum foil or pot. Run a knife around the edge of the pan so the cheesecake is not sticking to the sides and allow to cool completely on a rack.
- Loosely cover with plastic wrap and refrigerate until firm and chilled, about 8 hours or preferably overnight. If the cheesecake begins to “sweat” pat dry with some paper towel.
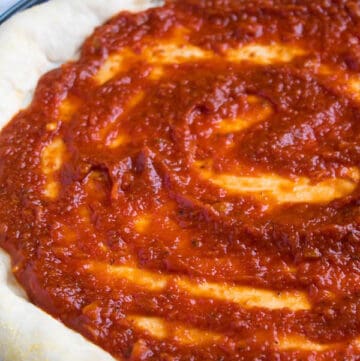
For the Marshmallow Drip:
- Add marshmallow fluff and 2 tablespoons of water to a microwave safe bowl or a nonstick saucepan.
- Heat in the microwave for 30 seconds, or heat over medium heat, stirring constantly until the fluff loosens up and becomes pourable.
- Pour fluff over the cheesecake, and spread to the edges.
For the Sweetemed Whipped Cream:
- Whip the chilled cream, powdered sugar, and vanilla until it reaches stiff peaks, about 3-4 minutes.
- Scoop into a piping bag fitted with a large star tip and pipe a border around the cheesecake. Pile mini marshmallows in the centre and dust top with cocoa powder, if desired. Enjoy!
Notes
- Cheesecake is best stored for 3-4 days.
Recommended Products
As an Amazon Associate and member of other affiliate programs, I earn from qualifying purchases.
-
 Ateco Plastic Coated Decorating Bag, 18-Inch
 -
Wilton 402-2110 1M Open Star Piping Tip
-
Food Processor 12-Cup, Aicok Food Processor Blender, Multi-Function Food Processor, 1.8L, 3 Speed Options, 2 Chopping Blades & 1 Disc, Safety Interlocking Design, 500W
-
KANA Parchment Paper Baking Circles - 100 Pre-cut 9 Inch Round Parchment Sheets for Baking Cakes, Cooking, Dutch Oven, Air Fryer, Cheesecakes, Tortilla Press
-
KitchenAid KSM150PSER Artisan Tilt-Head Stand Mixer with Pouring Shield, 5-Quart, Empire Red
-
Nordic Ware Leakproof Springform Pan, 10 Cup, 9 Inch

Nutrition Information:
Yield: 14 Serving Size: 1Amount Per Serving: Calories: 587Total Fat: 31gSaturated Fat: 17gTrans Fat: 0gUnsaturated Fat: 11gCholesterol: 120mgSodium: 142mgCarbohydrates: 78gFiber: 2gSugar: 61gProtein: 6g
BON APPÉTIT!
Love, Dedra

©QUEENSLEE APPÉTIT. All images & content are copyright protected. Please do not use my images without prior permission. If you want to republish this recipe, please re-write the recipe in your own words, or link back to this post for the recipe.
Leave a Reply