
Homemade Apple Pie – Fresh apples, tossed with sugar and spices, and baked into a buttery flaky crust!

This post may contain affiliate links. As an Amazon Associate I earn from qualifying purchases. Please see my full disclosure policy for details.
Some photos were updated on 11/26/19
I finally did it! I made my own apple pie completely from scratch! Just a reminder that I'm 100% self-taught, so little things like being able to master the greatness that is homemade apple pie is a huge accomplishment for me.

The BEST Homemade Apple Pie
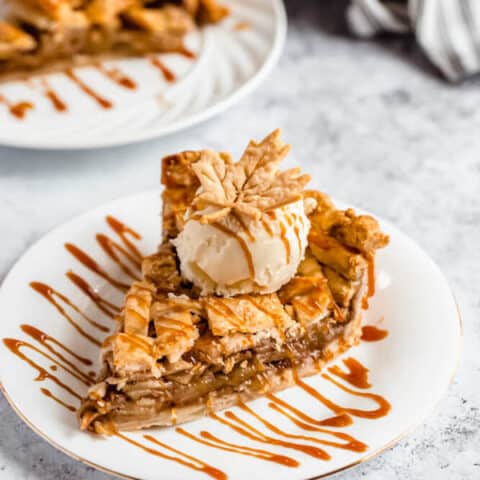
I would say this is "the only apple pie recipe you'll ever need" but there are plenty of great apple pie recipes out there. This just happens to be my favourite out of every apple pie I've tried! The warm and sweet apple filling baked inside my buttery flaky perfect pie crust, topped with a dollop of ice cream and a drizzle of caramel sauce is pure perfection!

How to Make Homemade Apple Pie
Making homemade apple pie, or any kind of pie from scratch may seem intimidating, so let me break down the process for my fellow amateurs out there.
Let's begin with the crust. A few days ago, I posted a very long 2,000+ word tutorial explaining almost everything you could possibly know about making the perfect pie crust. If you don't want to read that monster of a post, I'll summarize everything right here.

How to Make Your Own Pie Crust
It only takes a few simple ingredients to make your own pie crust - flour, sugar, salt, fat and ice water. The sugar is optional, but it makes for a more tender pie crust, adds flavour, and helps the crust brown.
The ice water helps the crust hold together. If you don’t add enough water, the crust won’t hold together and will break while rolling. You want to add enough water for your dough to come together and easily shape into a ball.
The crust can be made using all butter or all shortening, although I prefer to use both. Why? Well, shortening creates a tender and flaky crust that’s perfect for creating beautiful crimped edges. Meanwhile the butter creates a flaky crust that has a tasty buttery flavour and melts in your mouth. Put them together and you have a tender, flaky crust that’s easy to shape and is packed with flavour!
Make sure the fat is COLD: It is very important to chill the fat beforehand. Soft butter and shortening will blend into the flour, which won’t give us a good rise in the oven. You don’t want the fat to melt while preparing the dough. Instead, you want the fat to melt when the crust is in the oven. This will create multiple layers of pure flakiness.
For more information, see my step-by-step visual tutorial.

Apple Pie Filling
You can make the pie dough a day ahead, like I did, and keep it in the refrigerator. The next day, make the apple filling. The apples are tossed with lemon zest, lemon juice, brown and white sugar and flour. Then they're spiced with cinnamon, nutmeg and cloves for maximum flavour.

For the apples, I suggest using a variety of apples. I used Gala and Granny Smith for the perfect balance of sweet and tart. Using a mixture really boosts the flavour, making your apple pie taste even better!
Another thing, make sure your apples are thinly sliced. Try your best to make sure every slice is the same size. If the slices are too thick, they won't soften, so you'll be biting into hard and soft apples in each bite. Bleh. You also don't want them to be too thin and mushy. The apples should still have their crunch, but also be soft enough to melt in your mouth.

Now, when you're adding the apple filling to the dough, you want to pack the apples tightly. Don't pour all the apples in at once, because some will just spill out. What I did was add the apples a large spoonful at a time, and pretty much created layers.


By this time the crust would've warmed up, so pop that sucker back in the refrigerator with the filling while you roll out the second crust.
You can top the pie any way you want. You can cover the entire pie with the second crust and cut out slits like a traditional apple pie, or you can make a lattice crust.
I chose to go with a lattice crust, because in my opinion it's way more attractive than the classic double crust.

How to Make a Lattice Pie Crust
To make the lattice crust design, I used a sharp pairing knife to cut the edges of the dough off to create a rectangle. I then cut out 10 1-inch strips, using a ruler to get perfectly straight lines. Then I cut 4 of those strips in half to make 8 ½-inch strips.
Place 5 strips (three 1" thick and two ½" thick) facing one way. Then carefully thread the next 5 strips over and under the strips you layed down to create a basket weave.


Use a pastry brush to brush the top and edges of the crust with the egg wash, then sprinkle with a generous amount of coarse sugar.


Now throw it in the oven (not literally), and sit back and enjoy the sweet smell of warm apple pie wafting throughout your home.

Here comes the difficult part. The pie needs to cool for 4 hours. This is a must as the filling needs to set and the juices need to thicken. If you cut the pie right away, the filling will just spill out.
This drove me insane because the sun was going down, which means I couldn't take photos, which means I couldn't have a slice until the next day! Obviously if you aren't a food blogger you'll be lucky enough to enjoy your pie the same day - can you feel my jealousy through the screen?

The Best Way to Enjoy Apple Pie
I like to top my slice of pie with a large scoop of vanilla ice cream and a drizzle of caramel sauce. I used my Homemade recipe, but you can use store-bought caramel sauce. You can even top it with some Homemade Salted Caramel Sauce for an amazing salty and sweet flavour in every bite!

If you love apple pie, I highly recommend you give this recipe a try. I guarantee it'll be your go-to apple pie recipe from now on! Make it apart of your Thanksgiving or Christmas dinner, or anytime of the year. Enjoy!

>>PIN ME FOR LATER<<

FOLLOW QUEENSLEE APPÉTIT
Like what you see? Make sure you‘re following Queenslee Appétit for more tasty recipes!
Pinterest | Instagram | Facebook | Twitter |
Have any questions about the recipe? Contact me here, and I’ll be happy to help!
SHARE YOUR PICS!
Tag me on Instagram @queensleeappetit or use the hashtag #queensleeappetit so I could see your gorgeous creations!
More Apple Recipes:
Let's get baking!
The BEST Homemade Apple Pie
Homemade Apple Pie – Fresh apples, tossed with sugar and spices, and baked into a buttery flaky crust!
Ingredients
Pie Crust:
Apple Filling:
- 5-6 large apples, peeled, cored and thinly sliced (about 10 cups - You can use Granny Smith, Honey Crisp or Gala or a variety)
- 2 teaspoon finely grated lemon zest
- 3 tablespoon lemon juice
- ½ cup light brown sugar, packed
- ½ cup granulated sugar
- ¼ cup all purpose flour
- 1 and ½ teaspoon ground cinnamon
- ¼ teaspoon ground nutmeg
- ¼ teaspoon ground cloves
- ¼ teaspoon salt
- 1 egg yolk + 1 tablespoon water, for brushing
- Coarse white sugar, for topping
To Serve:
- Vanilla Ice Cream
- Caramel Sauce, for drizzling
Instructions
For the Pie Crust:
- Make one recipe of my Perfect Pie Crust. Tightly wrap both disks in plastic wrap and refrigerate for at least 1-2 hours, or overnight
For the Apple Filling:
- Place the thinly sliced apples in a large bowl and add the lemon zest, lemon juice, brown sugar and granulated sugar and toss to combine.
- In a small bowl, combine flour, cinnamon, nutmeg, cloves and salt. Sprinkle over the apple mixture and toss to combine. Cover bowl with plastic wrap and refrigerate while you roll out your crust.
Assembly of the Apple Pie:
- Once dough is chilled, remove one disk from the refrigerator and place onto a floured work surface. Using a floured rolling pin, roll dough out into a 12" inch circle. Allow the dough to rest for 5 minutes.
- Carefully roll the dough over the rolling pin, lift it up and un-roll it over a 9"inch pie dish.
- Press the dough into the bottom and sides of the dish. Use a sharp knife or kitchen scissors to trim off the overhang. Use your fingers to crimp the rim.
- Wrap crust in plastic wrap and freeze for 15-30 minutes. The crust needs to be chilled to prevent it from shrinking while baking.
- Once crust is chilled, preheat the oven to 400F. Remove the crust from freezer and spoon in the apple filling, packing tightly. Wrap in plastic wrap and place back into the refrigerator while you roll out the second disk.
To Make the Lattice Crust:
- Remove the second disk of dough from the refrigerator and roll into a 12-inch circle. Using a pastry wheel, pizza cutter or a sharp pairing knife, cut the edges of the dough off to create a rectangle.
- Cut out 10 1-inch strips, using a clean ruler to get perfectly straight lines. Then cut 4 of those strips in half to make 8 ½-inch strips.
- Place 5 strips (three 1" thick and two ½" thick) facing one way, spacing them 1-inch apart. Then carefully thread the next 5 strips over and under the strips you layed down to create a basket weave.
- Use a sharp knife to trim off the excess on the strips. Crimp the edges with a fork or your fingers.
Baking the Pie:
- In a small bowl, beat together the egg yolk and 1 tablespoon of water. Use a pastry brush to lightly brush the egg wash over the top of the crust. Sprinkle with coarse sugar.
- Place pie onto a baking sheet to catch any spills and bake in preheated oven for 20 minutes, then turn the heat down to 375F and bake for an additional 45-50 minutes or until the crust is golden brown and filling is bubbling.
- Allow the pie to cool for about 3 to 4 hours before slicing, to let the filling thicken.
- Slice and serve with a scoop of vanilla ice cream and a drizzle of caramel sauce. Delicious!
Notes
- After wrapping the dough in plastic, feel free to freeze for up to 3 months. Allow dough to thaw in the refrigerator overnight before using.
Recommended Products
As an Amazon Associate and member of other affiliate programs, I earn from qualifying purchases.
-
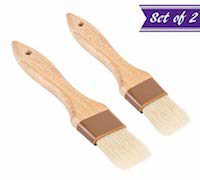
 Set of 2 Pastry Brushes, 1-Inch and 1 ½-Inch Width Natural Boar Bristle Pastry Brushes, Lacquered Hardwood Basting Brushes, Cooking / Baking Brushes
 -
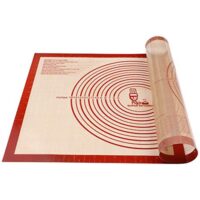
Non-slip Silicone Pastry Mat Extra Large with Measurements 28''By 20'' for Silicone Baking Mat, Counter Mat, Dough Rolling Mat,Oven Liner,Fondant/Pie Crust Mat By Folksy Super Kitchen (2028, red)
-
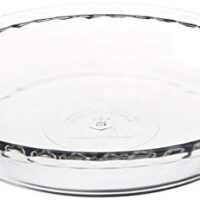
Anchor Hocking 77886 Fire-King Deep Pie Baking Dish, Glass, 9.5-Inch
Nutrition Information:
Yield: 10 Serving Size: 1Amount Per Serving: Calories: 226Total Fat: 4gSaturated Fat: 2gTrans Fat: 0gUnsaturated Fat: 2gCholesterol: 25mgSodium: 158mgCarbohydrates: 49gFiber: 4gSugar: 39gProtein: 2g
BON APPÉTIT!
Love, Dedra
©QUEENSLEE APPÉTIT. All images & content are copyright protected. Please do not use my images without prior permission. If you want to republish this recipe, please re-write the recipe in your own words, or link back to this post for the recipe.
Sania
Hey, same person from the pie crust post, just wanted to say I also used this recipe to make the rest of the pie and it was great! (I'm still in school and this was for a project for Civics lol). Thanks!
Dedra | QueensleeAppetit
Awesome! Glad you liked it <3