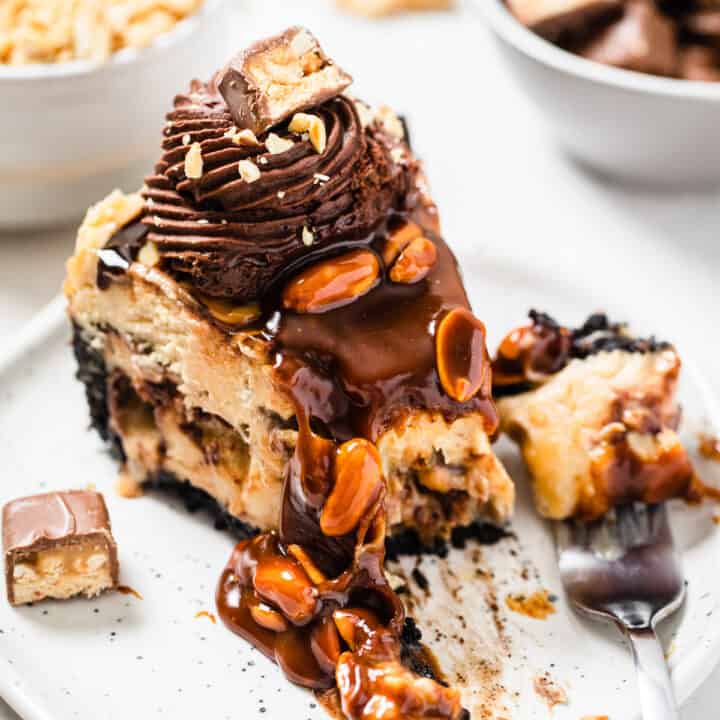
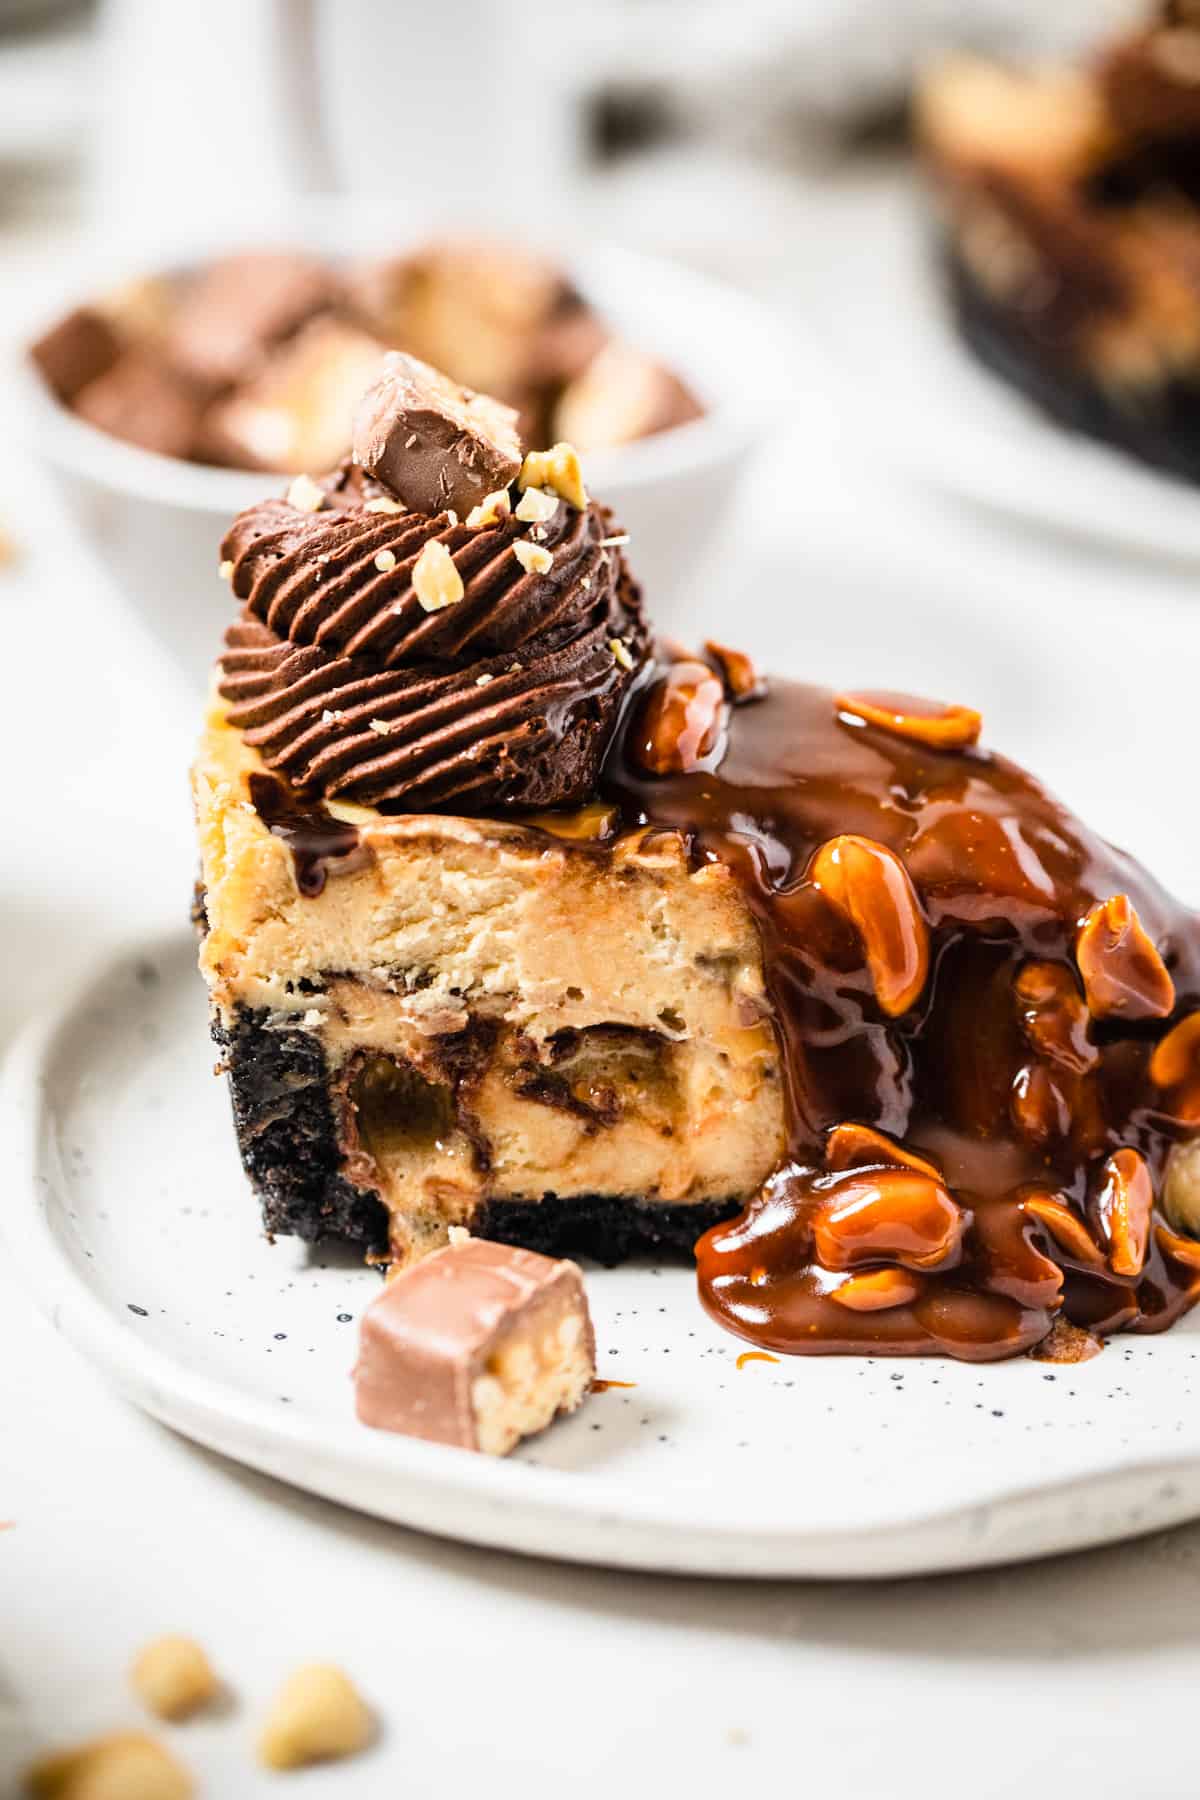
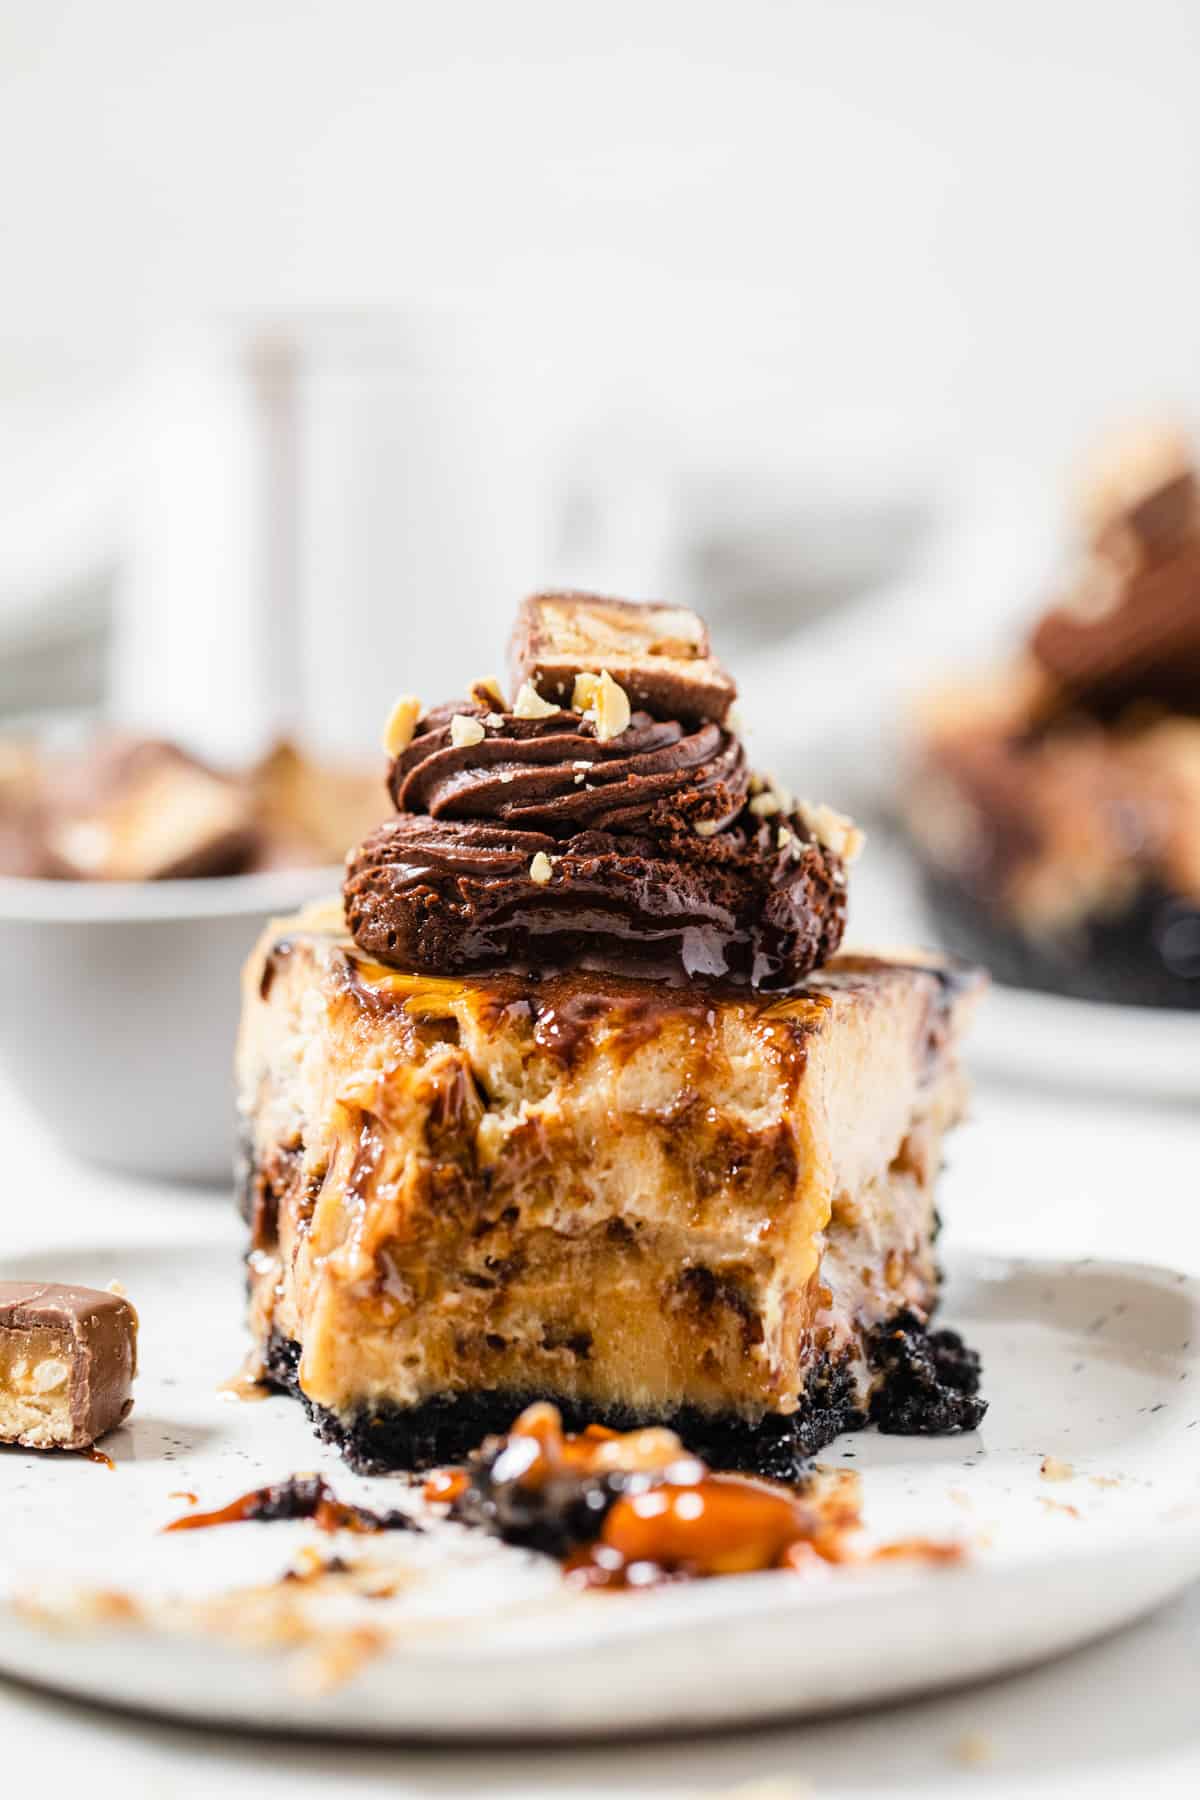
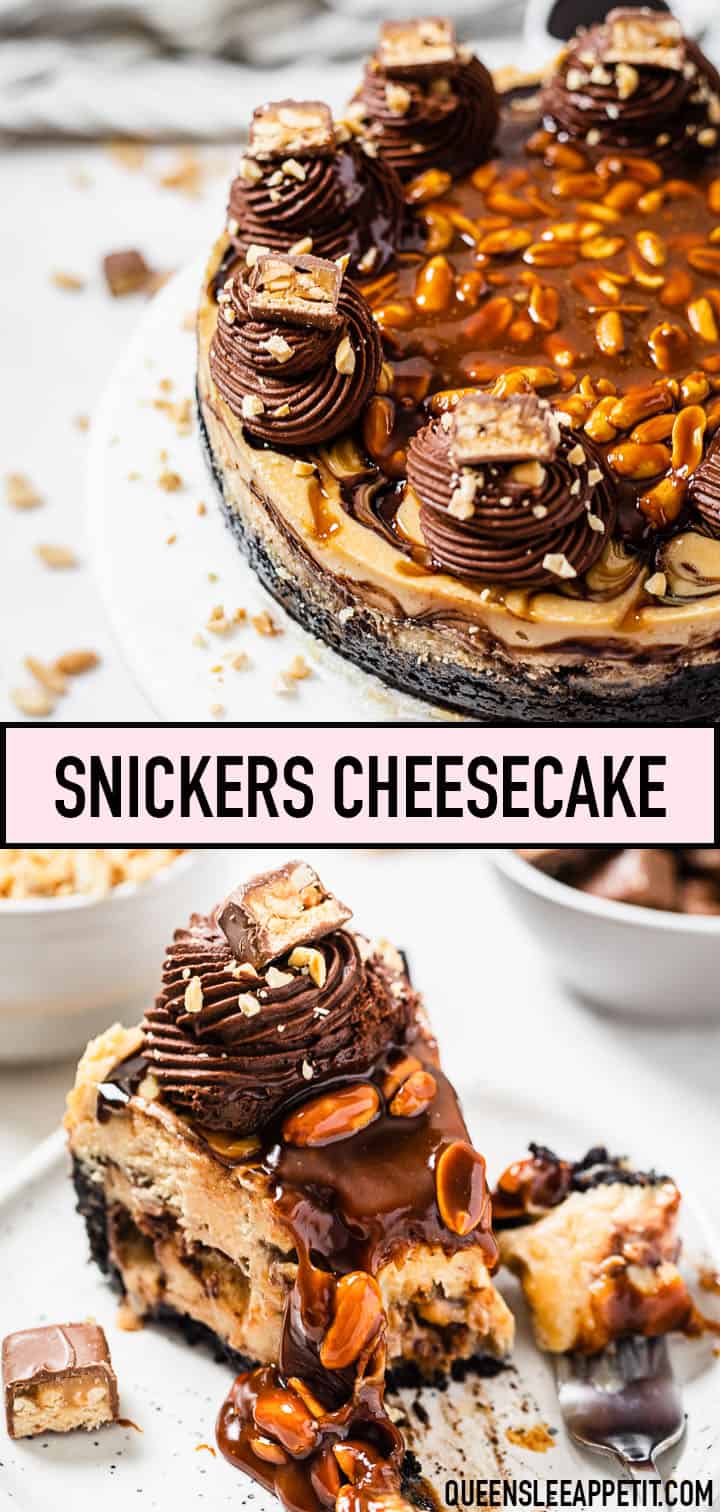
This Snickers Cheesecake recipe includes a creamy peanut butter cheesecake loaded with chopped Snickers bars and swirled with chocolate and caramel sauce! Topped with a silky caramel peanut topping that’s secured with a thick rope of chocolate ganache frosting, this decadent dessert is perfect for all special occasions!
This post may contain affiliate links. As an Amazon Associate I earn from qualifying purchases. This in no way affects my opinion of those products and services. All opinions expressed on this site are my own. Please see my full disclosure policy for details.
We’re keeping things extra sweet today with this snickers cheesecake recipe! Whether you’re a snickers lover or not, I guarantee the mere sight of this cheesecake will make anyone’s mouth water!
First, let me make things clear. This cheesecake is NOT diet-friendly. I’m so sorry, but I’ve been wanting to make a snickers flavoured cheesecake for years now, so I had to go all out!
This is the type of cheesecake you find at The Cheesecake Factory. You know, the one decadent slice of pure sweetness that takes you a day or two to finish because you need breaks in between every few bites? That’s how it is for me, anyways.
But even though this dessert is loaded with all things sa-WEET, I’ve been getting nothing but rave reviews from everyone that’s had a slice! A few of my taste testers even said it was the best cheesecake they’ve ever tasted!
Maybe just maybe, you’ll feel the same way!
What You’ll Find in This Cheesecake
This is the goodness you’re in for if you try this cheesecake:
- Oreo Cookie Crust
- Peanut Butter Cheesecake
- Chopped Snickers inside the cheesecake
- Caramel and Chocolate Sauce Swirl
- Peanut Caramel Sauce Topping
- Whipped Ganache Border
- More Chopped Peanuts and Snickers on top
As you can see, a whole lot is going on here! This is the type of cheesecake that needs to be served in thin slices so you’re able to finish a slice in one sitting without passing out. Perfection!
Oreo Crust
Let’s start with the simple oreo crust. You CAN substitute with a graham cracker crust, but since there’s quite a bit of chocolate in this cheesecake, I believe oreo is the best option!
Throw about 27-30 whole oreo cookies into a food processor and pulse until you have fine crumbs. Pour in some melted butter, then mix until all the crumbs are coated.
Now just pour your crumbs into a prepared springform pan, and use the bottom of a measuring cup to press the crumbs into the bottom and up the sides of the pan. Pre-bake for 10 minutes so the crust can hold together.
Snickers Cheesecake Filling
In my opinion, a proper snickers cheesecake should be more than a plain cheesecake with a few candy bars mixed in. I wanted to actually incorporate the flavour of snickers throughout the entire cheesecake!
So, what’s in a snickers bar?
- Nougat
- Peanuts
- Caramel
- Chocolate
Alright, well I didn’t really want to make any homemade nougat to throw into this cheesecake, so let’s cut that part out. Moving on to the peanuts! Aside from the chopped peanuts on top of the cheesecake, I incorporated this flavour by adding peanut butter to the cheesecake batter!
To make the cheesecake itself, you’ll need a few simple ingredients like cream cheese, peanut butter, sugar, cornstarch, sour cream, vanilla extract and eggs.
Make sure all the ingredients are at room temperature and mix them on low speed. I know it may be tempting to go up to medium speed, but mixing everything slowly helps us avoid incorporating air bubbles that causes cracking.
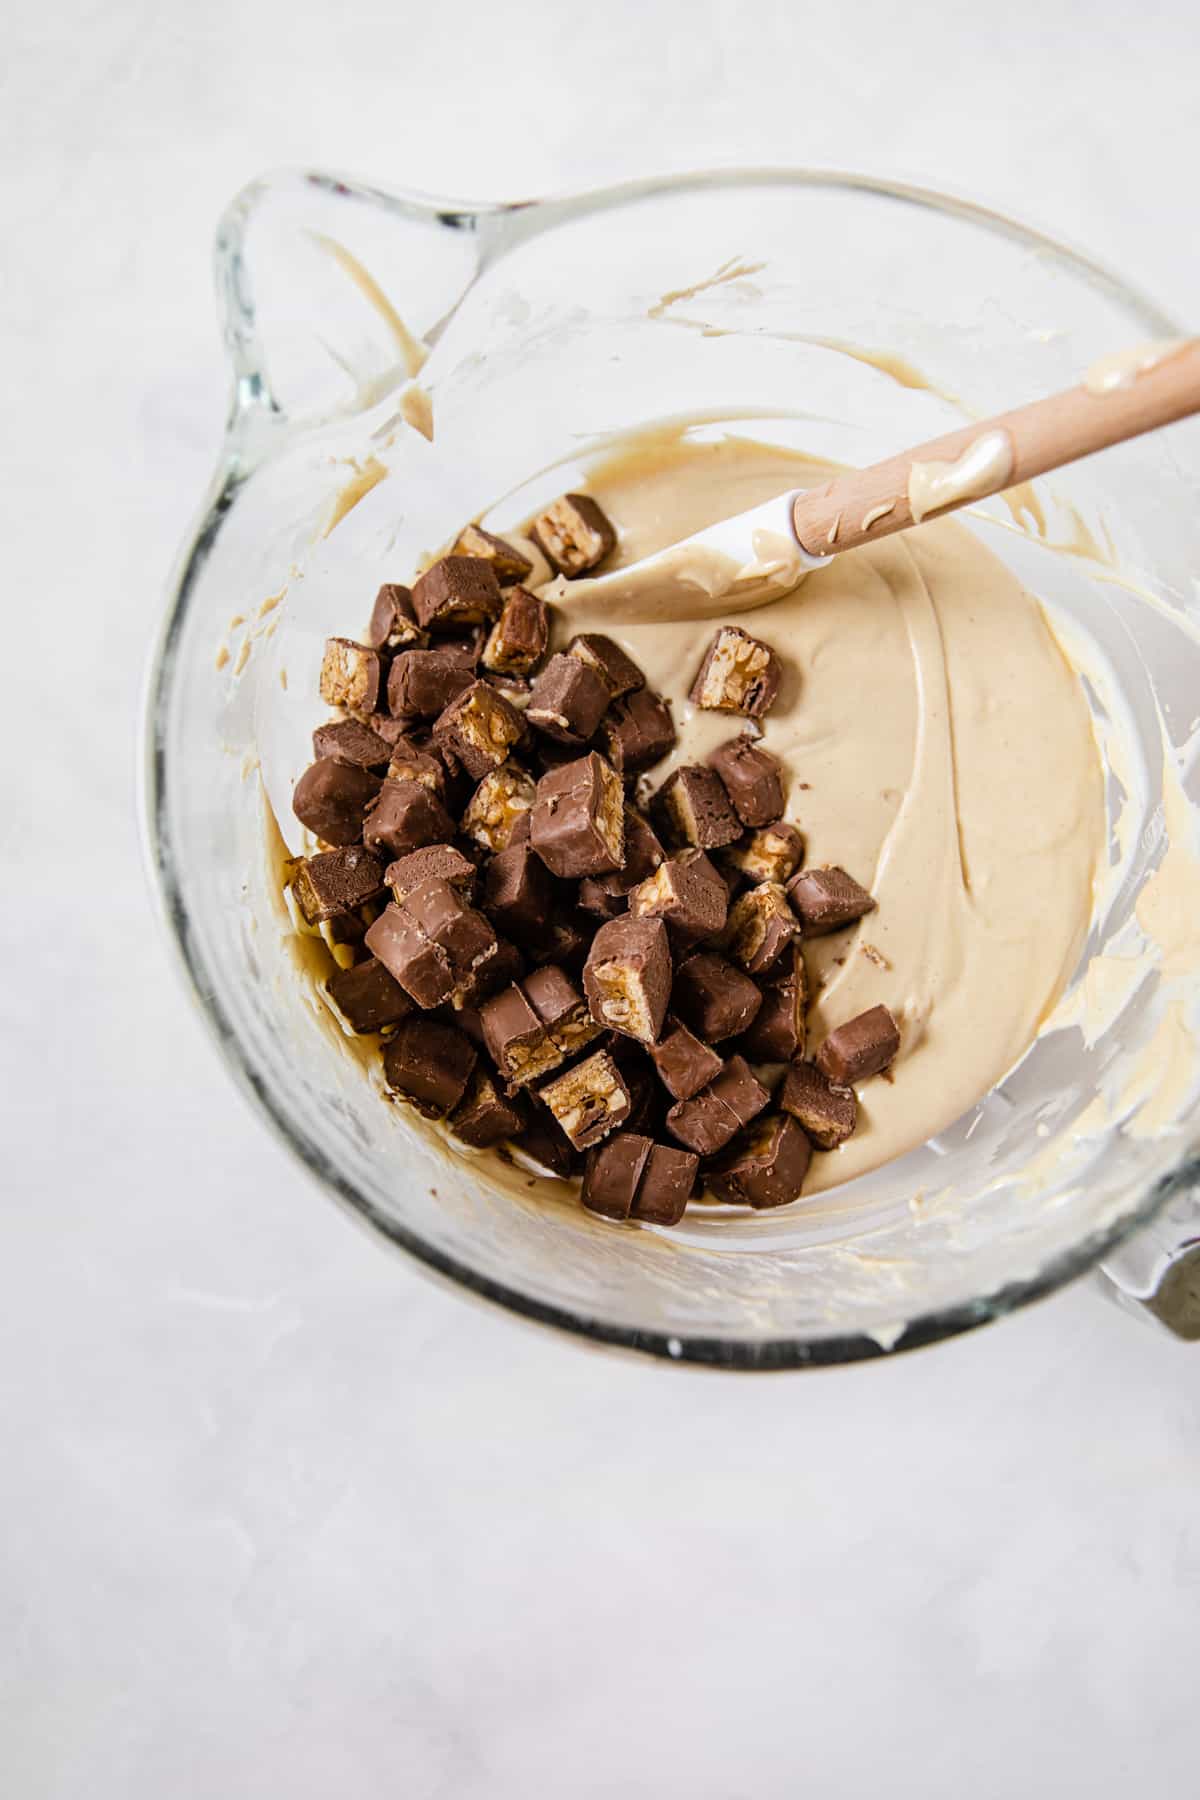
Obviously you can’t have a snickers flavoured cheesecake without including the actual chocolate bars, so chop some up and add it to the batter!
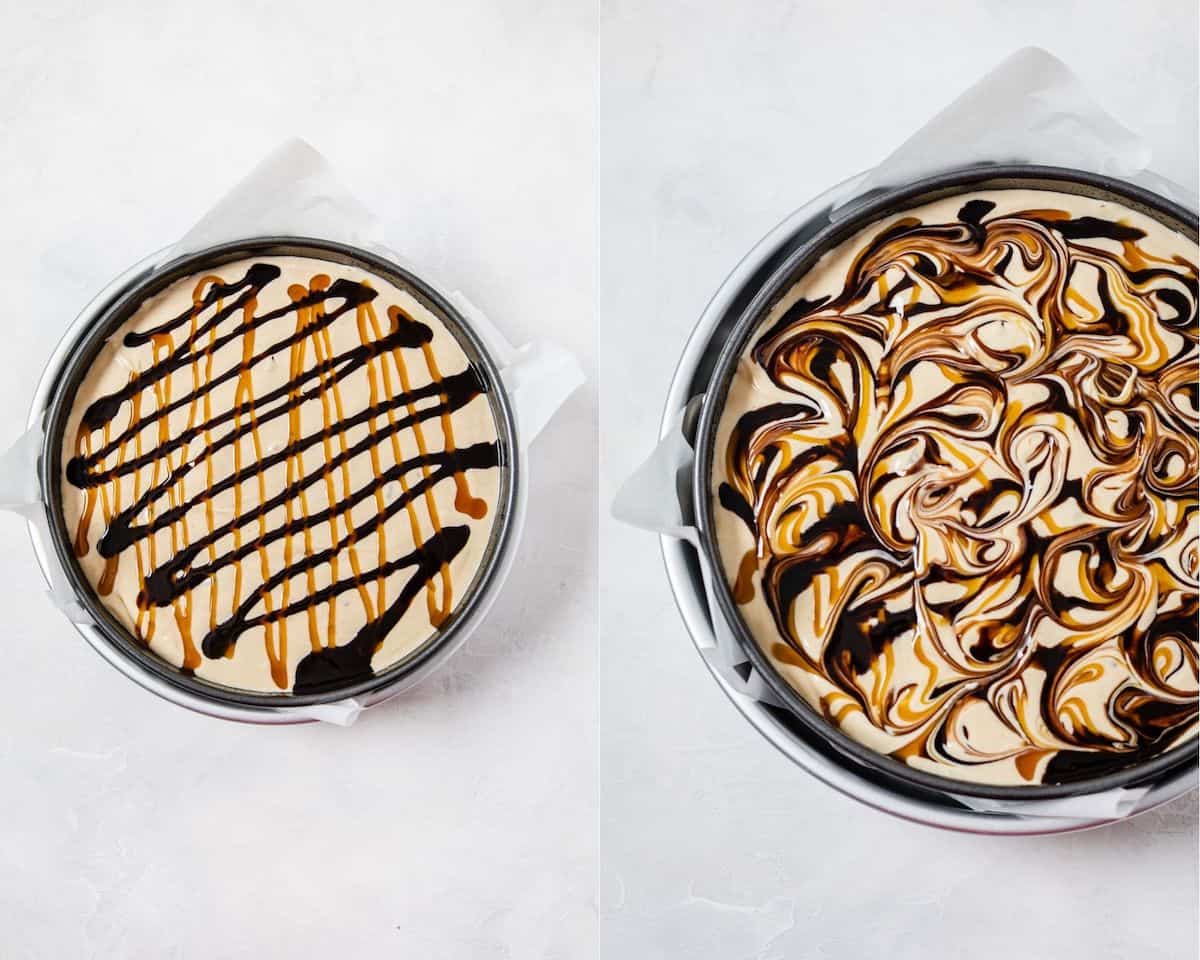
For the last two flavours: caramel and chocolate, I swirled both caramel and chocolate sauce throughout the cheesecake! To do this, pour half of the batter into the pan, then drizzle both on top.
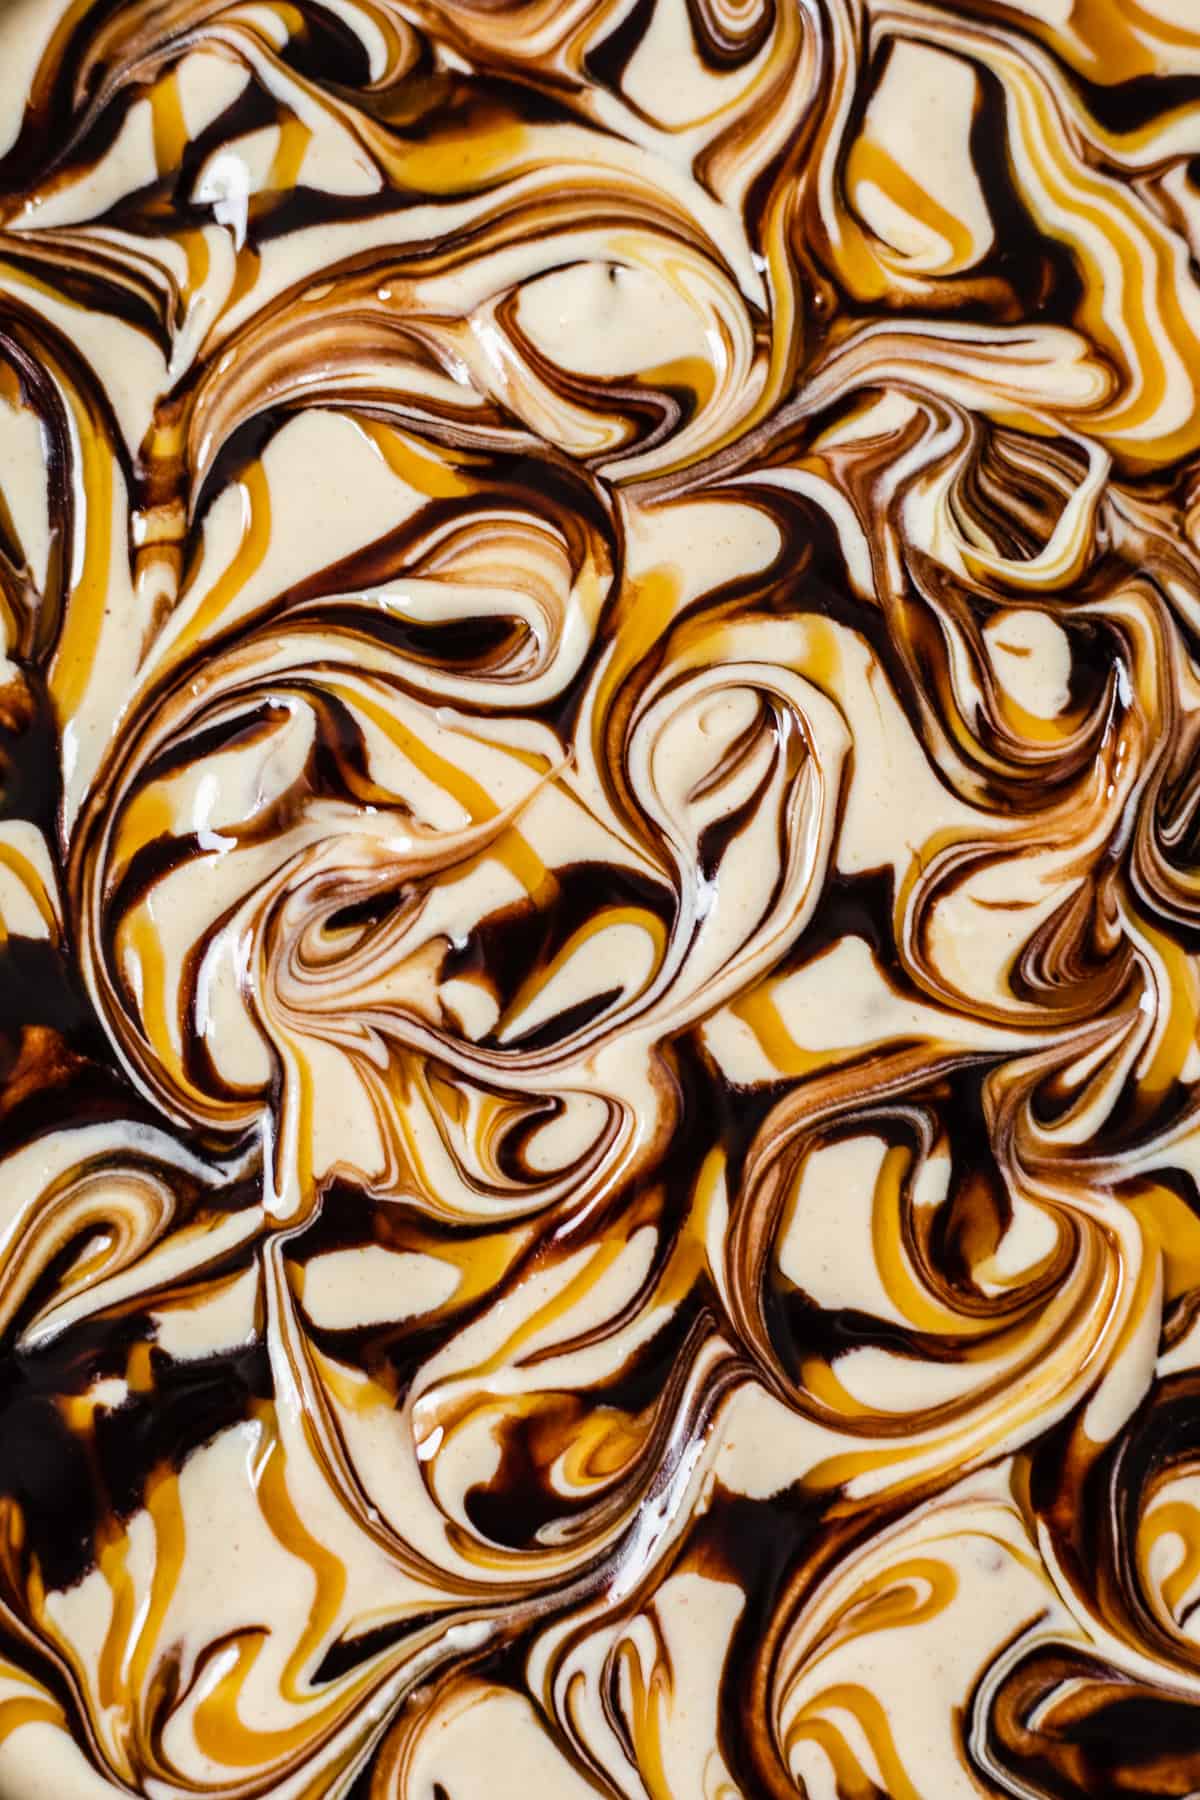
Use a butterknife to swirl both sauces together. Then pour remaining batter on top and swirl more chocolate an caramel sauce.
How gorgeous does this look?
Baking the Cheesecake
To bake the cheesecake, we’re gonna need to prepare a water bath. If you’re an amateur baker, the thought of having to bake a cheesecake in a water bath may make you extremely nervous. Luckily you’ve found someone who’s cracked the code to a perfect leak-proof water bath each time!
Instead of wrapping my pan in aluminum foil and praying to God no water leaks through while the cheesecake bakes, I just put my 9-inch springform pan into a 10-inch cake pan! You can also put it in a slightly larger pot, just make sure it’s close enough for the hot water to still be in close contact with your cheesecake.
Now put the cake pan into a BIGGER pan, I use a large 11x15-inch rectangle pan. Boil some water and pour it into the larger pan. Super easy leak-proof water bath!
Bake cheesecake for about 1 hour and 20 minutes, or until it jiggles slightly. Turn the oven off and keep the oven door closed for 30 minutes so it could cool slowly, then crack the door open and cool for another 30 minutes. Slow cool = 0 cracks!
Time to Decorate!
With those chocolate and caramel swirls on top, this cheesecake is beautiful enough as it is! However, I still wanted to spruce things up a little bit.
Whipped Ganache Border: for the border, I started by making a simple 2-ingredient chocolate ganache. A lot of people heat the cream on the stove and add it to the chocolate, but I simply heat everything up in the microwave and it works perfectly. Chill the ganache in the refrigerator for about an hour, or until the ganache is a firm spreadable consistency. Keep checking every 20 minutes.
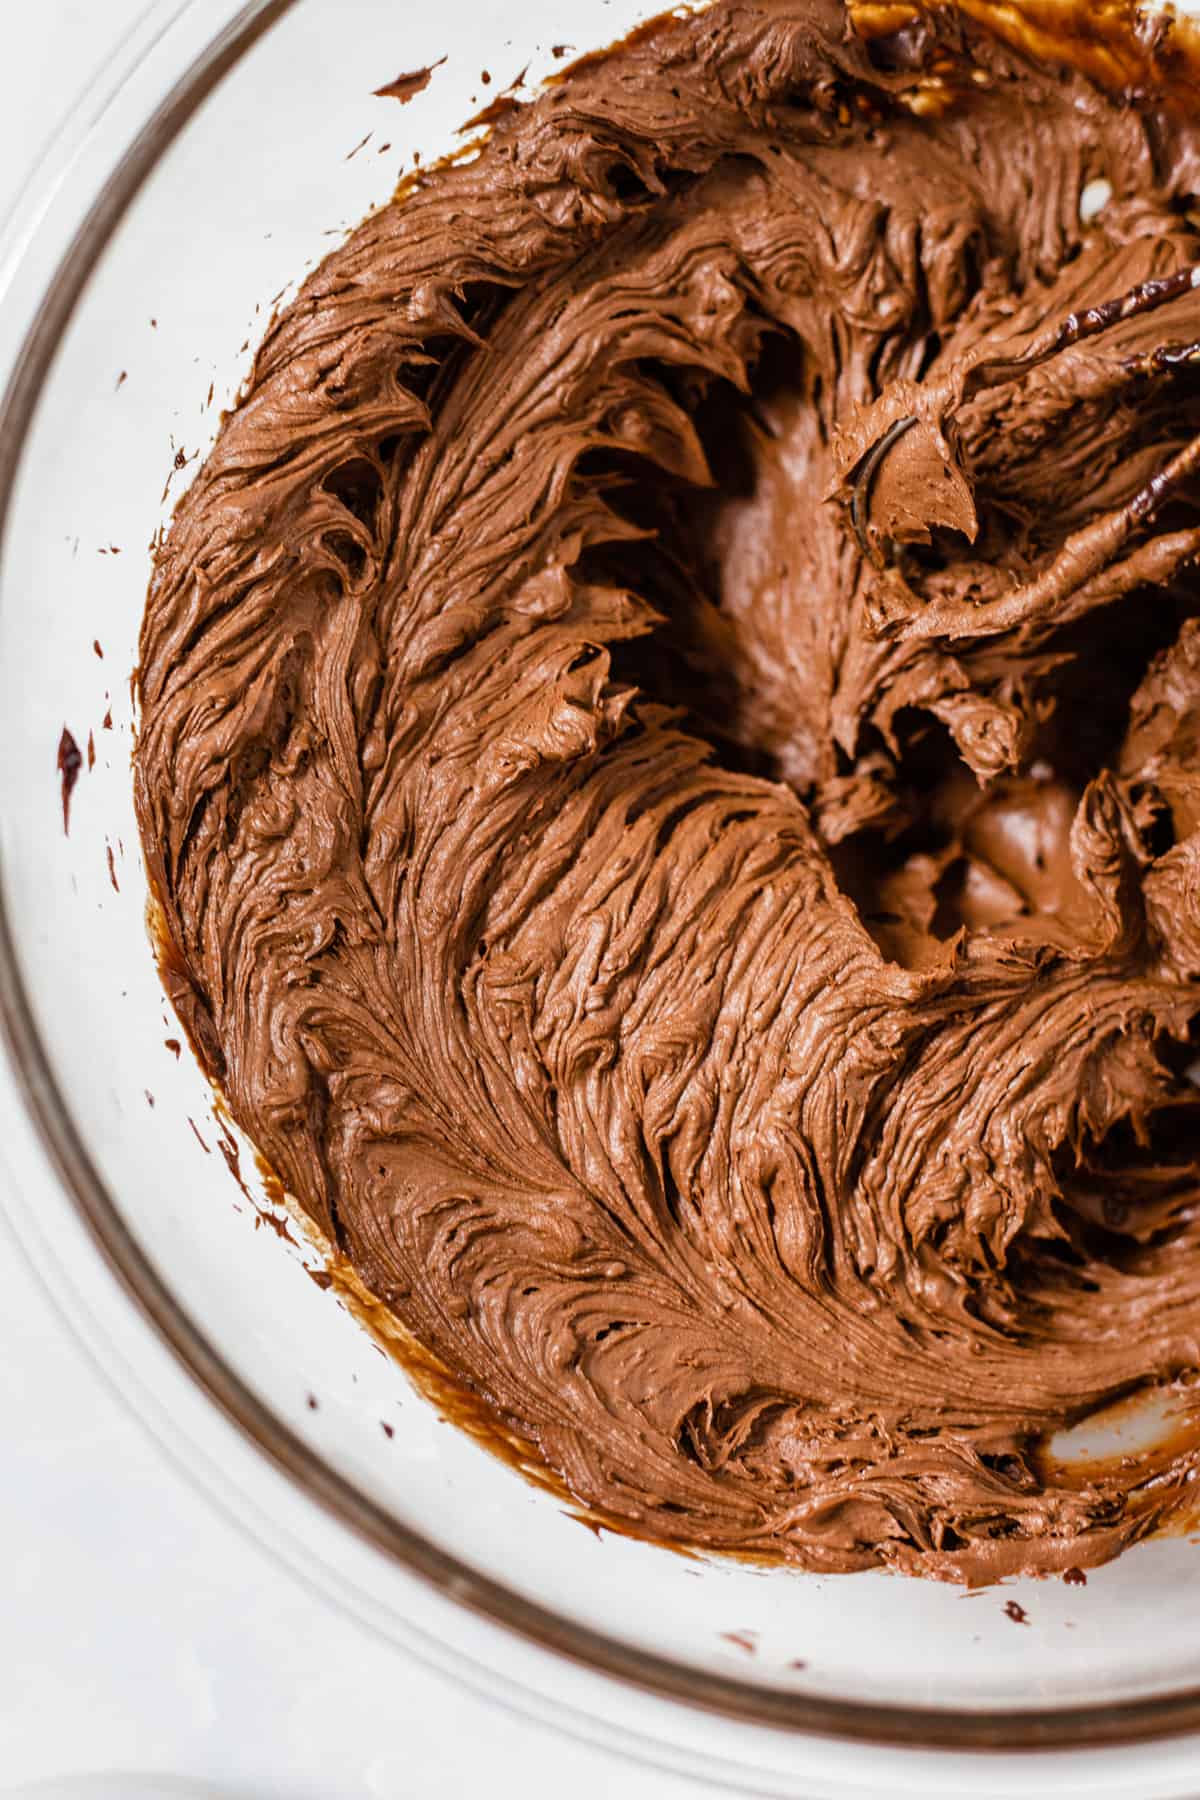
Scoop the ganache into a large bowl and use a handheld electric mixer to beat the ganache until it’s fluffy.
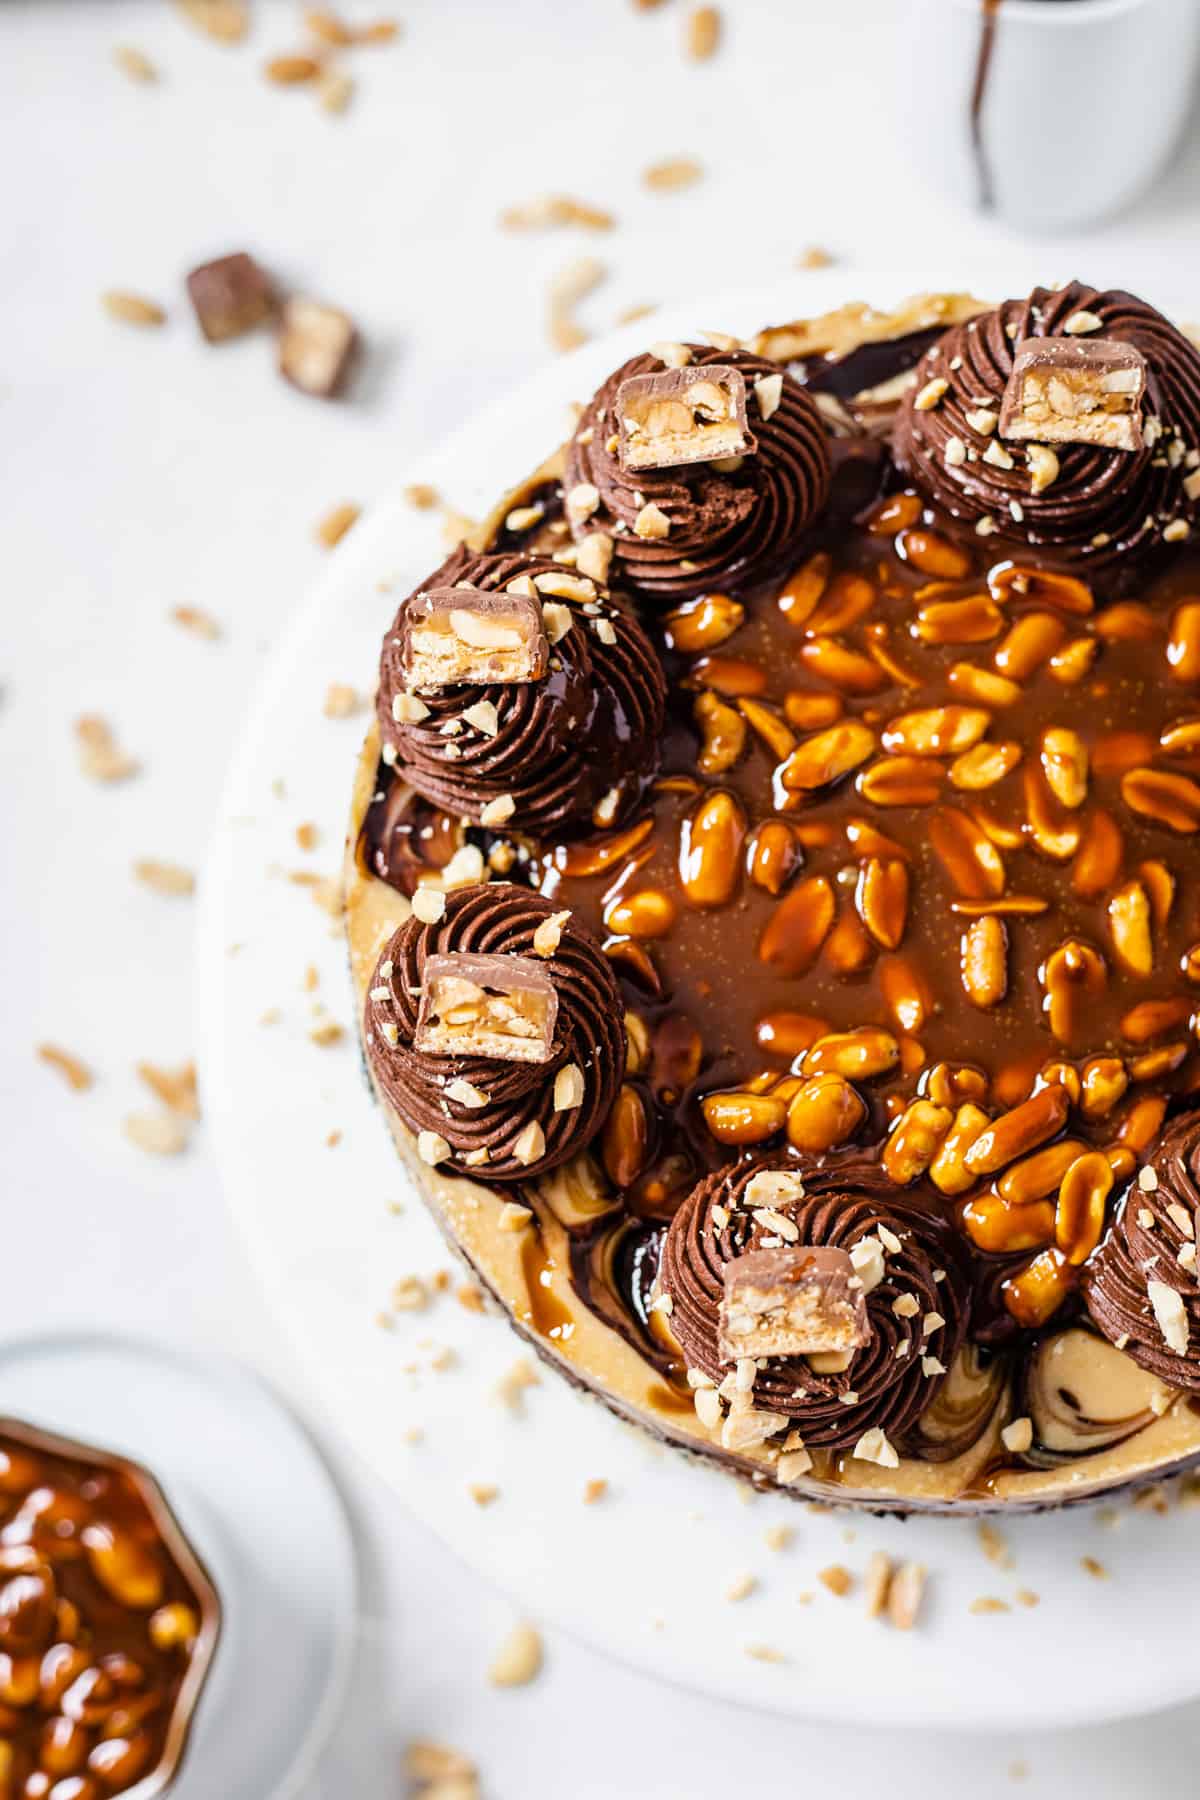
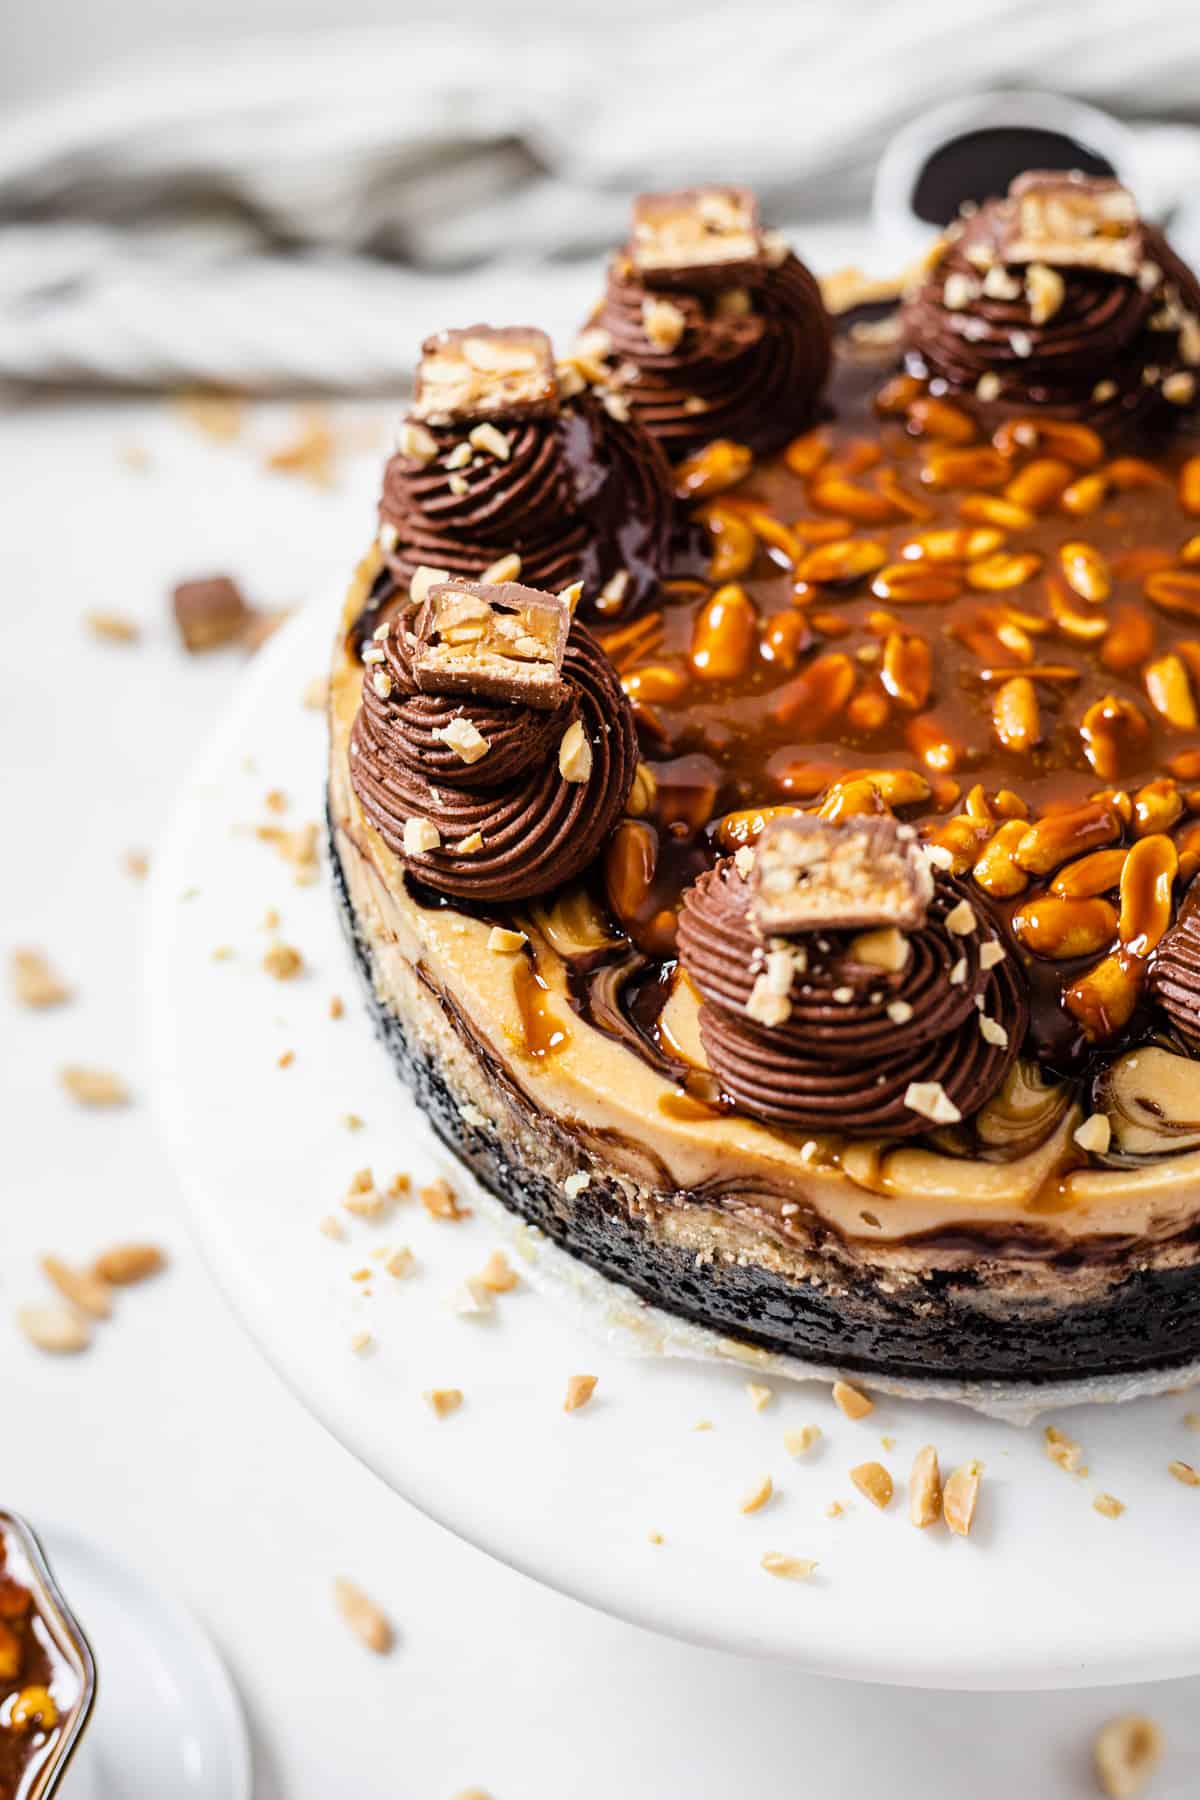
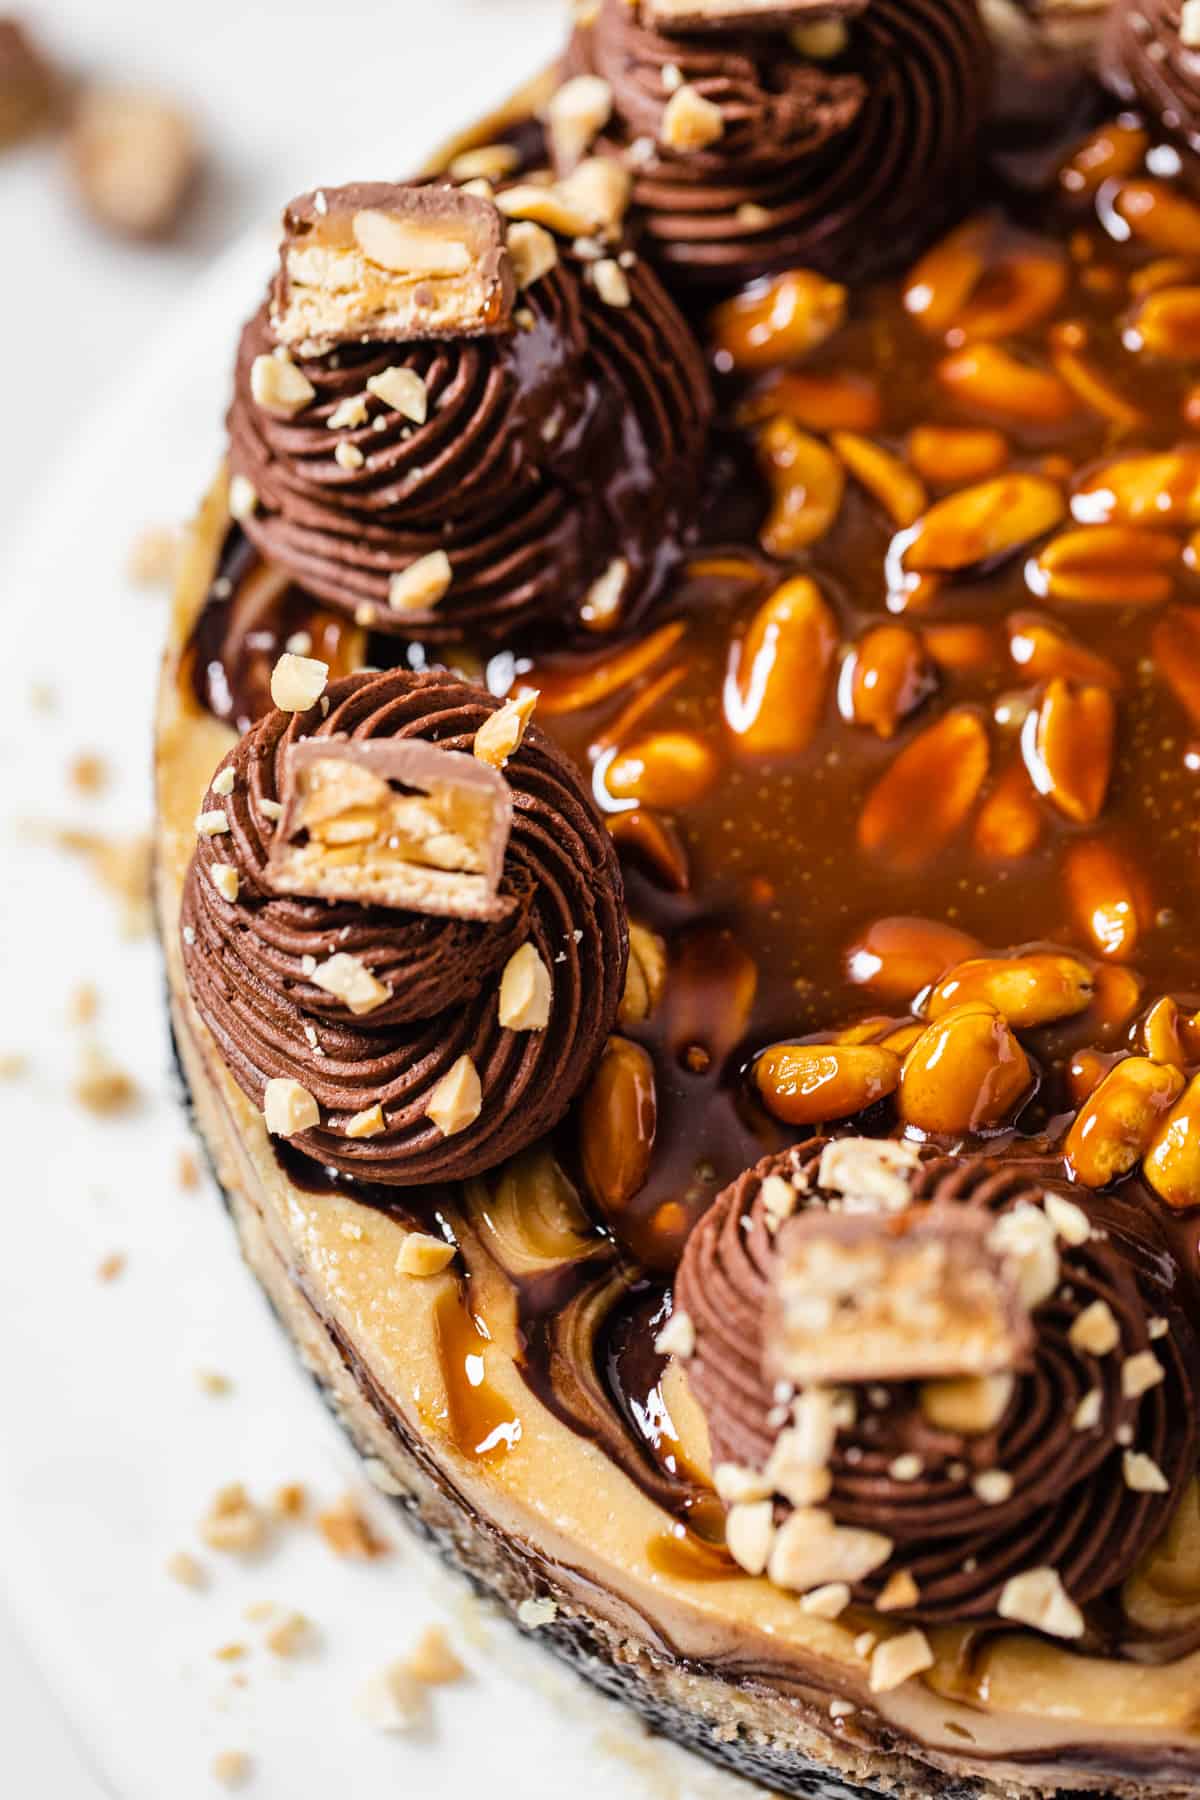
Scoop the whipped ganache into a piping bag and pipe swirls around the cheesecake. Top these swirls with some chopped peanuts and halved snickers! You can even add a little caramel or chocolate drizzle on top.
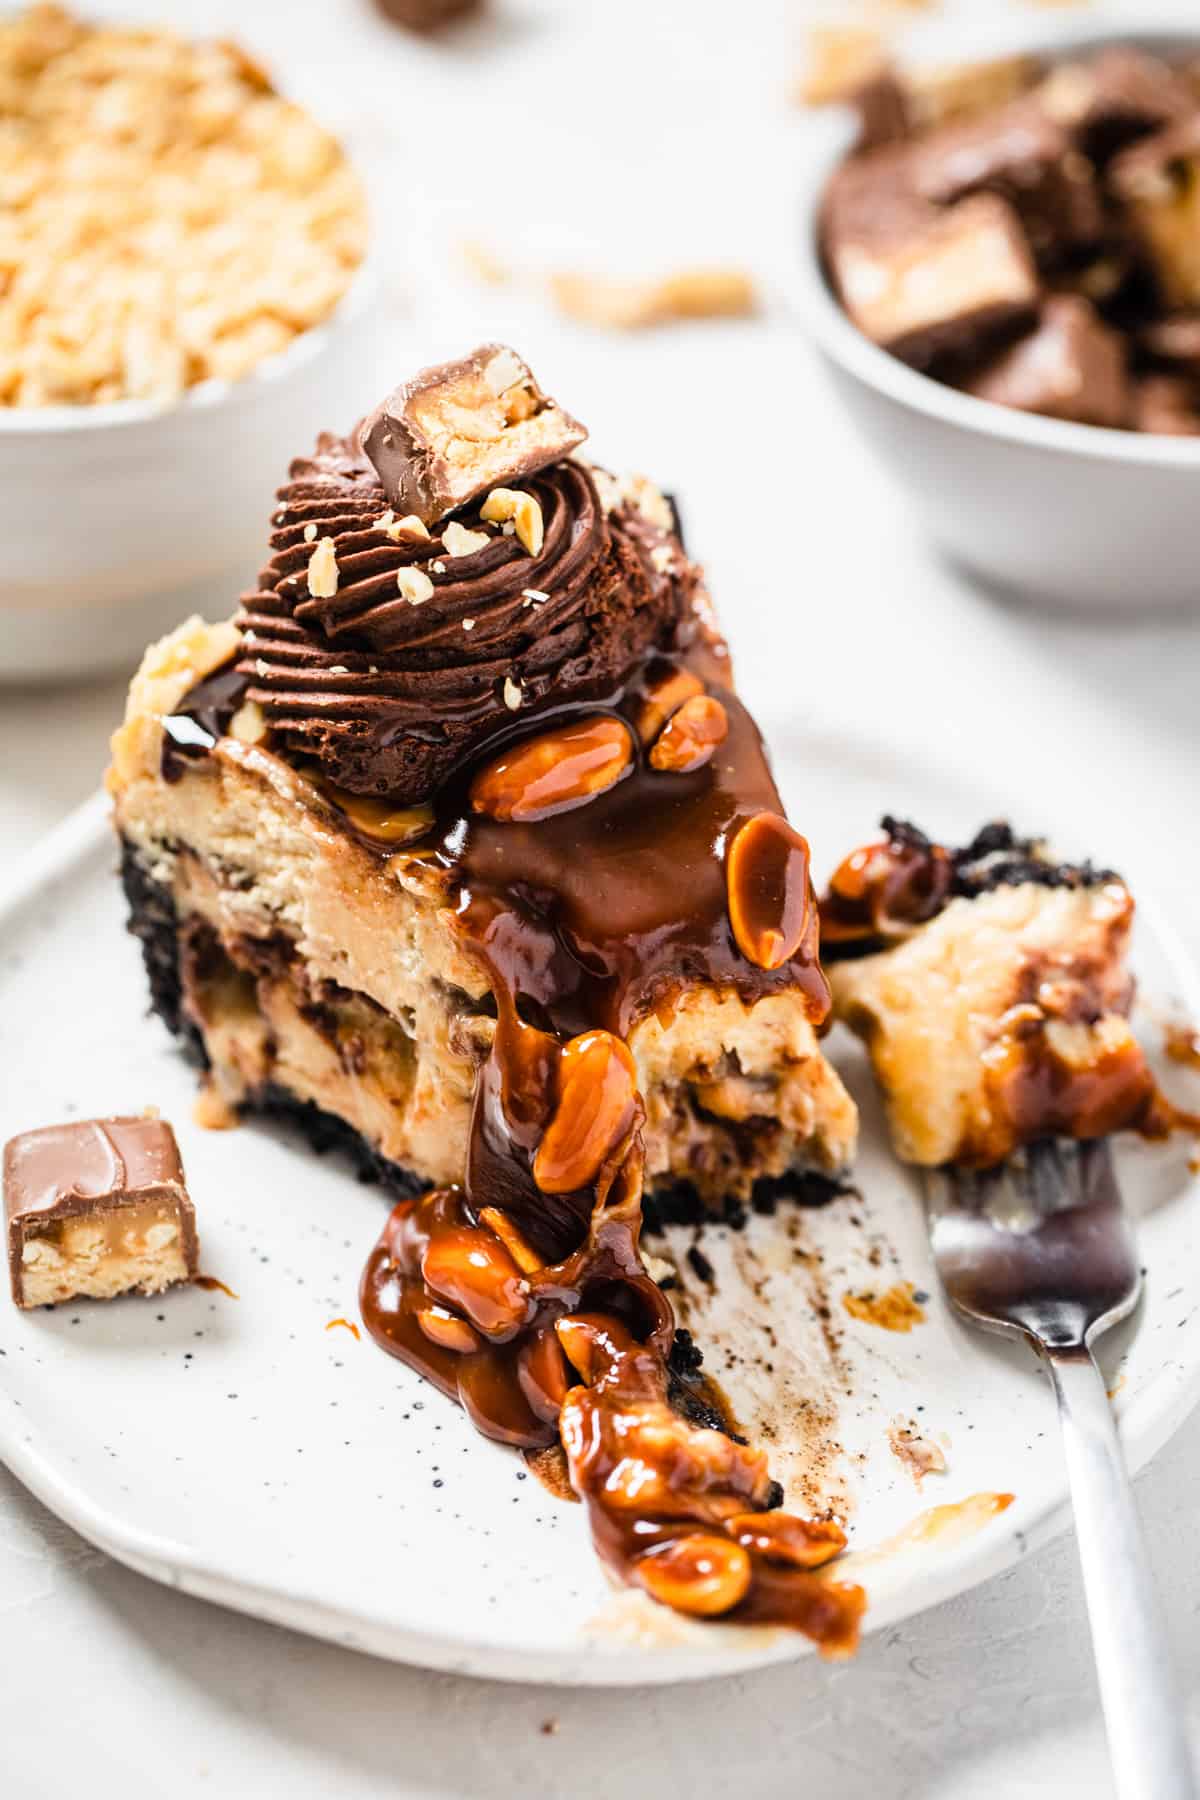
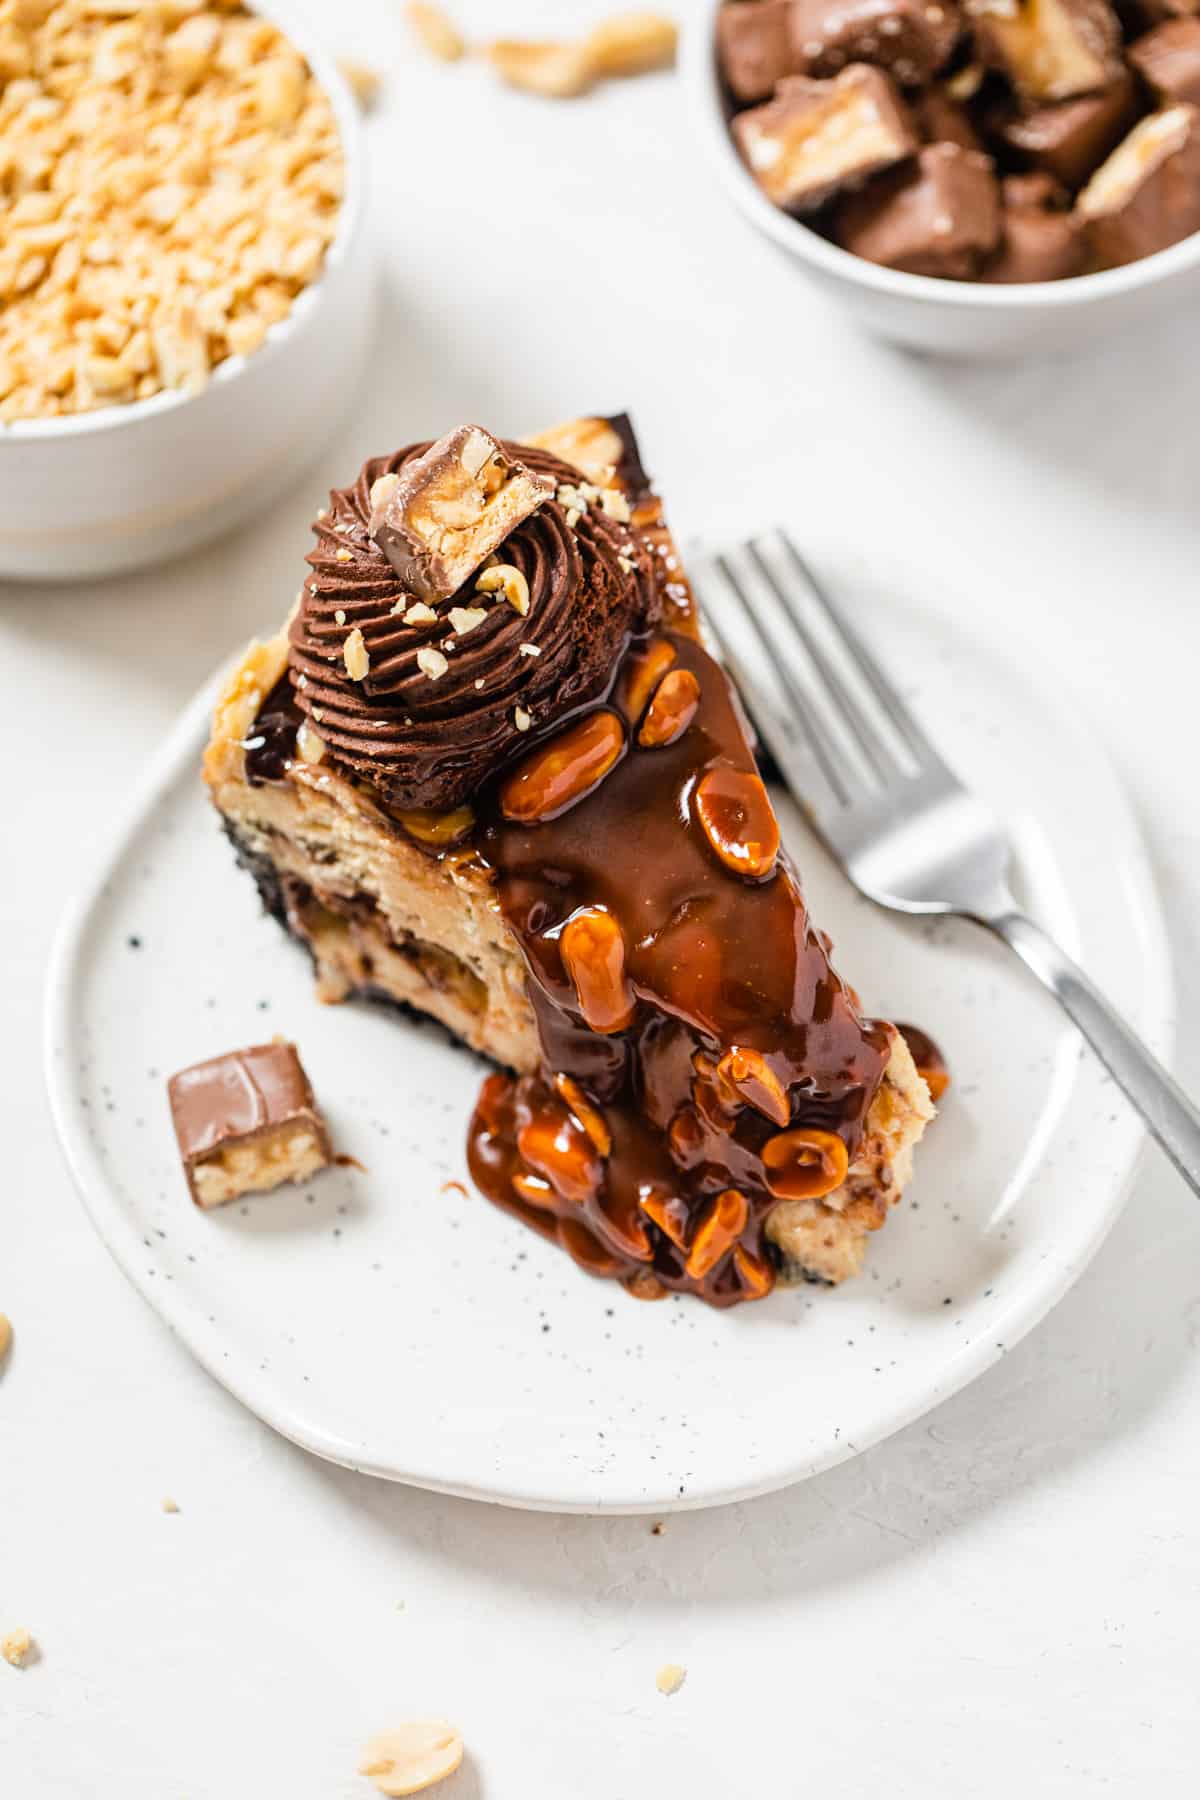
Caramel Peanut Topping: ok so this didn’t work exactly how I imagined. As you can see in some photos, I initially poured this on top of the whole cheesecake. I didn’t realize that after taking photos, the caramel topping would harden completely! This made the cheesecake hard to cut, so I suggest pouring the sauce on top of individual slices before serving.
More Snickers Desserts:
SHARE YOUR PICS!
Follow me on Instagram and tag #queensleeappetit so I can see and share all of your Queenslee Appétit creations in my stories and the QA Newsletter!
FOLLOW QUEENSLEE APPÉTIT
Like what you see? Make sure you‘re following Queenslee Appétit for more tasty recipes!
Pinterest | Instagram | Facebook |
Have any questions about the recipe? Contact me here, and I’ll be happy to help!
SWEETEN UP YOUR INBOX!
SUBSCRIBE to the Queenslee Appétit Newsletter to recieve new recipe notifications, monthly baking tips, sneak peeks to upcoming recipes, exclusive recipes and more!
Let’s get baking!
Snickers Cheesecake
This Snickers Cheesecake recipe includes a creamy peanut butter cheesecake loaded with chopped Snickers bars and swirled with chocolate and caramel sauce! Topped with a silky caramel peanut topping that’s secured with a thick rope of chocolate ganache frosting, this decadent dessert is perfect for all special occasions!
Ingredients
Oreo Crust:
- 2 and ¼ cups (about 27-30 cookies) Oreo crumbs
- 6 Tablespoons Unsalted Butter, melted
Snickers Cheesecake:
- 3 (8-ounce) packages (2 pounds) full-fat cream cheese, room temperature
- 1 cup creamy peanut butter
- 1 cup granulated sugar
- 1 Tablespoon cornstarch (or 3 Tablespoons all purpose flour)
- 1 cup sour cream, room temperature
- 2 teaspoons pure vanilla extract
- 3 large eggs, room temperature
- 1 large egg yolk
- 26 mini Snickers bars, chopped
- Chocolate sauce
- Caramel Sauce
Whipped Ganache Frosting Border:
- 2 cups dark or semisweet chocolate chips
- 1 cup heavy cream
Caramel Peanut Topping:
- 1 batch of my Homemade Salted Caramel Sauce recipe
- 1 cup unsalted peanuts, whole or chopped
Garnish:
- Chopped peanuts
- Mini Snickers, chopped
Instructions
For the Crust:
- Preheat oven to 325°F. Grease sides and bottom of one 9-inch springform pan with cooking spray and line the bottom with parchment rounds.
- In a food processor, crush Oreos into fine crumbs-you should have a little more than 2 cups.
- Pour Oreo crumbs into a medium bowl and mix in melted butter using a fork until all the crumbs are coated.
- Transfer mixture to the greased 9-inch springform pan and, using the flat bottom of a glass or measuring cup, press into the bottom and up the sides of the pan.
- Bake crust in preheated oven for 10 minutes. Remove from the oven and reduce the temperature to 300°F.
For the Snickers Cheesecake:
- Prepare Water Bath: Take 1 extra large piece of aluminum foil that’s bigger than your springform pan. Place springform pan in the centre and fold aluminum up to the sides to cover the outside of the pan. This ensures that no water seeps into the pan during the water bath. Alternatively, I placed my pan in a slightly larger round pot to completely protect my crust from the water. Place the pan into a larger pan big enough to hold the water.
- Make the Cheesecake: In the bowl of an electric mixer fitted with the paddle attachment, or in a large bowl using a handheld mixer, beat the cream cheese and peanut butter together on low speed until creamy, about 2-3 minutes.
- Scrape down the sides of the bowl and add sugar and cornstarch. Beat until smooth and combined.
- Add sour cream and vanilla. Continue beating until smooth.
- Scrape down the sides and bottom of the bowl and continue to beat until everything is combined.
- Add eggs and yolk one at a time, beating slowly after each addition until just combined, do not overbeat. Scrape sides and bottom of the bowl with a rubber spatula to make sure everything is combined. Fold in chopped snickers.
- For the Chocolate and Caramel Swirls: Pour half of the cheesecake batter onto the cooled crust. Drizzle both caramel and chocolate sauce over the top (don’t go overboard, see photos above for how it should look). Use a butterknife to swirl the sauces into the cheesecake. Repeat with pouring on the remaining batter and swirling some more chocolate and caramel on top.
- Bring 6 cups of water to a boil, then carefully pour into the larger pan. The water should only be a few inches up the sides of the pan. Do not go over the top.
- Baking the Cheesecake: Bake at 300°F for about 1 hour and 25 minutes. The cheesecake is done when the edges are set and the center jiggles just slightly.
- Cooling the Cheesecake: Turn off oven and leave the cheesecake to cool for 30 minutes. After 30 minutes, crack the door open and continue cooling the cheesecake for another 30 minutes. This helps prevent cracking.
- After an hour, remove cheesecake from waterbath and aluminum foil. Run a knife around the edge of the pan so it's not sticking to the sides and allow to cool completely on a rack.
- Chill in the refrigerator for about 8 hours or preferably overnight. I like to just place a layer of paper towel on top to cover, so if the cheesecake “sweats” I can just dab it off.
For the Whipped Ganache Frosting Border:
- Add the chocolate and cream to a medium heat-safe bowl.
- Microwave in 30 second intervals for about 1 minute (two 30-second bursts in the microwave). Slowly stir mixture until chocolate melts and forms a smooth, glossy ganache.
- If the chocolate doesn’t melt after awhile, just pop the bowl back into the microwave in 10 second intervals, stirring after each to make sure it’s melted.
- Once you have a smooth ganache, place bowl in the refrigerator and stir every 20 minutes until the ganache is a thick, spreadable consistency. This took me around an hour, but it really depends on the coldness of your refrigerator.
- Once you’ve reached the right, thick consistency, scrape ganache into a large mixing bowl.
- Using a hand mixer, beat the ganache on medium speed until it fluffs up like frosting!
- Remove chilled cheesecake from the refrigerator and remove springform pan ring.
- Transfer whipped ganache to a piping bag fitted with a large tip. Pipe swirls around the top of the cheesecake. Slice and serve with the optional caramel peanut sauce!
For the Caramel Peanut Topping:
- Prepare a batch of my homemade salted caramel sauce. When it’s done, immediately stir in the peanuts. You can leave the peanuts whole or roughly chop them.
- Pour the peanut caramel onto a slice before serving.
Notes
- Tools I Used: Wilton 8B Tip | Food Processor | Mixing Bowl Set | Stand Mixer | Hand Mixer | Measuring Cups | Rubber Spatula | Cooling Rack | Saucepan | Piping Bag
- What I Put My Cheesecake in For the Water Bath: 9-inch Springform Pan | 10-inch Round Cake Pan | 11x15-inch Rectangular Cake Pan
- Snickers: I chopped 26 fun-sized snickers bars, but you can buy full-sized bars and chop up enough to make 2 cups. About 4 mini snickers makes up a full bar, so you’ll need about 6-7 full-sized snickers.
- Peanut Butter: only use creamy peanut butter for the best results.
- Caramel Peanut Topping: Be careful, after a while this caramel sauce can harden. If this happens while it’s in the saucepan, just turn the heat back on and wait for the caramel to melt back down.
- Make Ahead: The only thing that I recommend making ahead of time is the cheesecake and caramel. The whipped ganache will solidify in the refrigerator, and may not be the same if you try to rewhip it. For the caramel, I recommend just making a batch of the caramel sauce by itself. Then, when you’re ready to serve, heat it up in the microwave for about 30 seconds, then stir in the peanuts.
- Storage: Store the cheesecake in the refrigerator for up to 5 days. Do not store a slice with the caramel peanut topping on top, as it solidifies, it’ll make the cheesecake hard to eat.
Nutrition Information:
Yield: 10 Serving Size: 1Amount Per Serving: Calories: 868Total Fat: 60gSaturated Fat: 26gTrans Fat: 1gUnsaturated Fat: 28gCholesterol: 158mgSodium: 270mgCarbohydrates: 77gFiber: 5gSugar: 62gProtein: 17g
BON APPÉTIT!
Love, Dedra
©QUEENSLEE APPÉTIT. All images & content are copyright protected. Please do not use my images without prior permission. If you want to republish this recipe, please re-write the recipe in your own words, or link back to this post for the recipe.


Leave a Reply