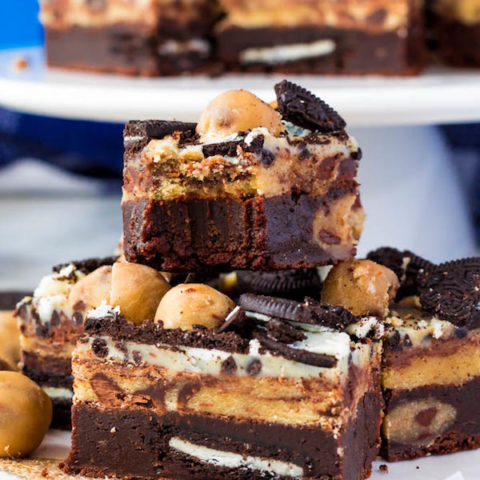
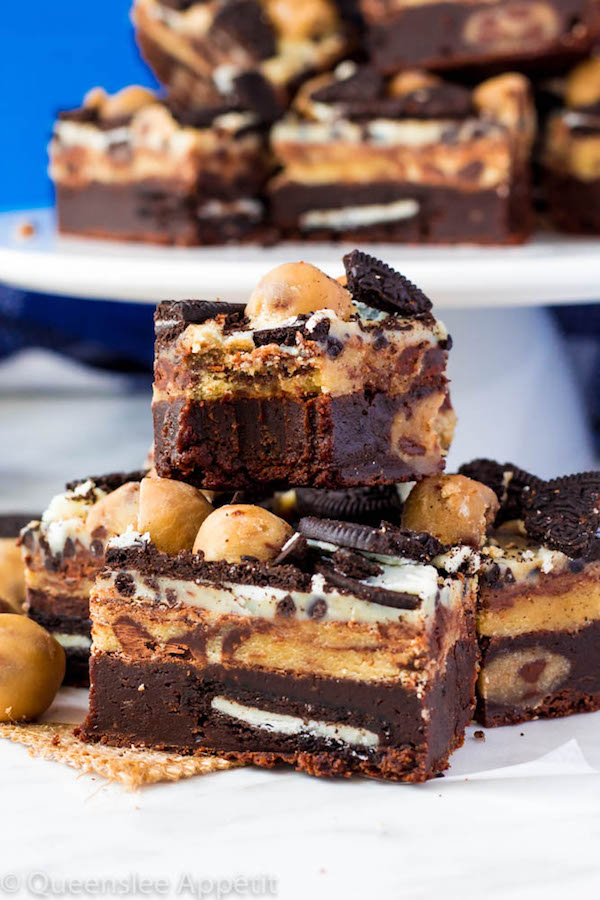
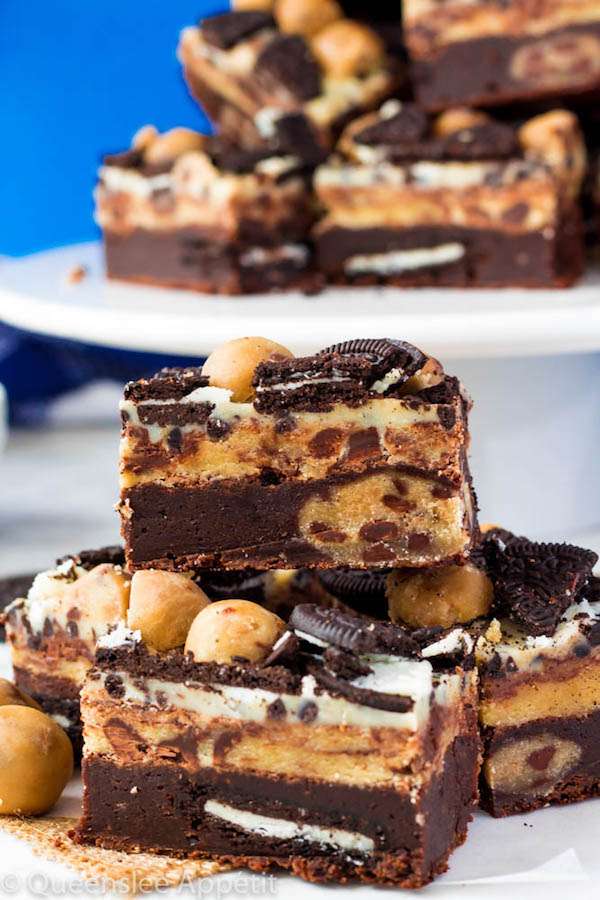
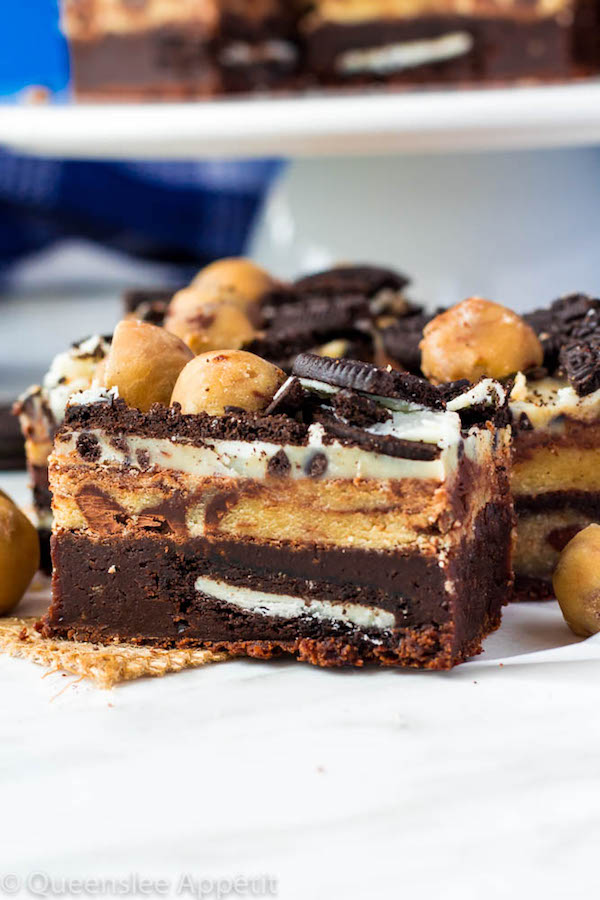
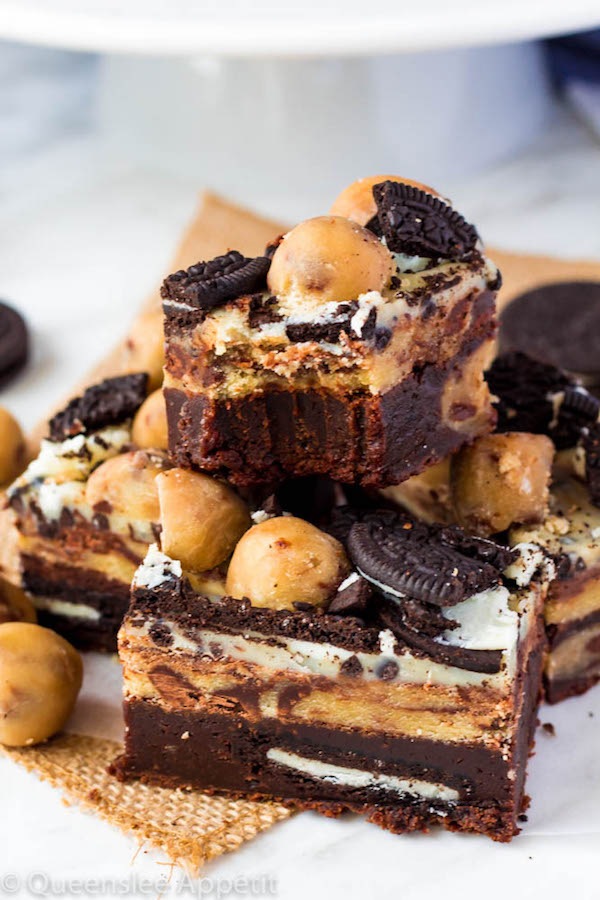
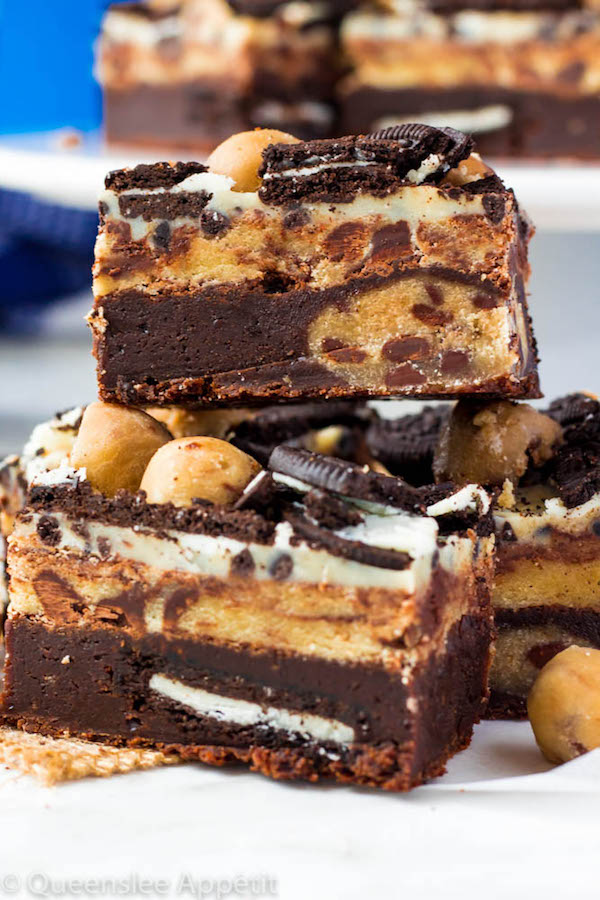
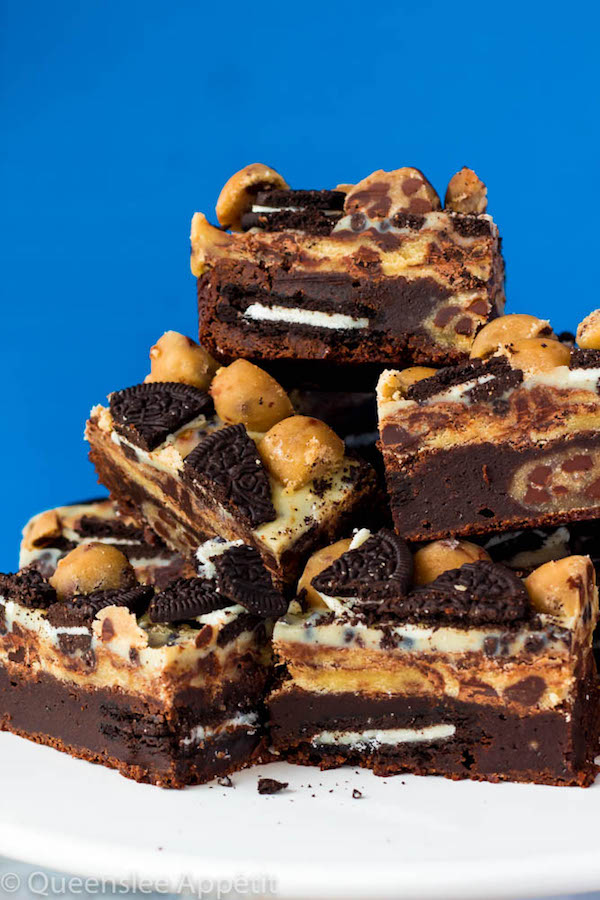
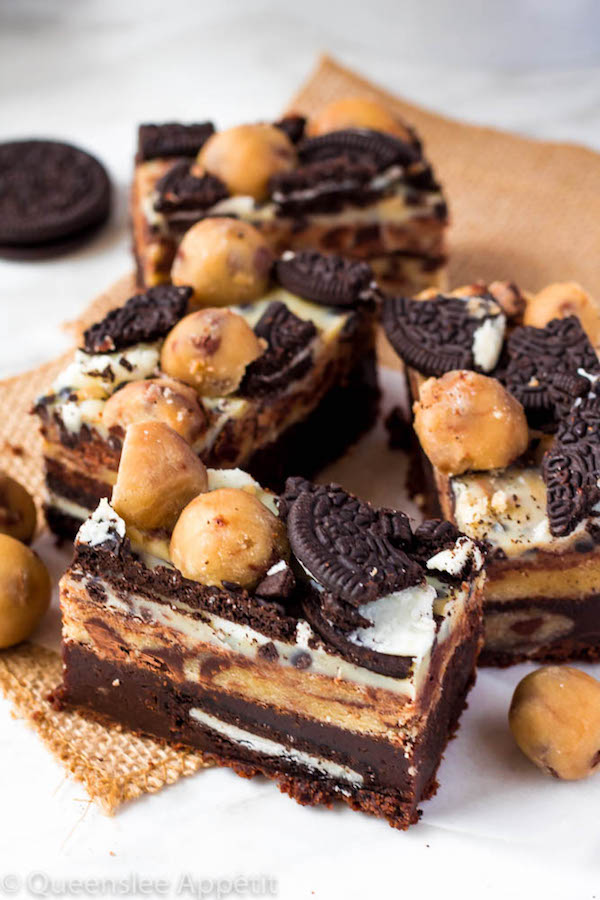
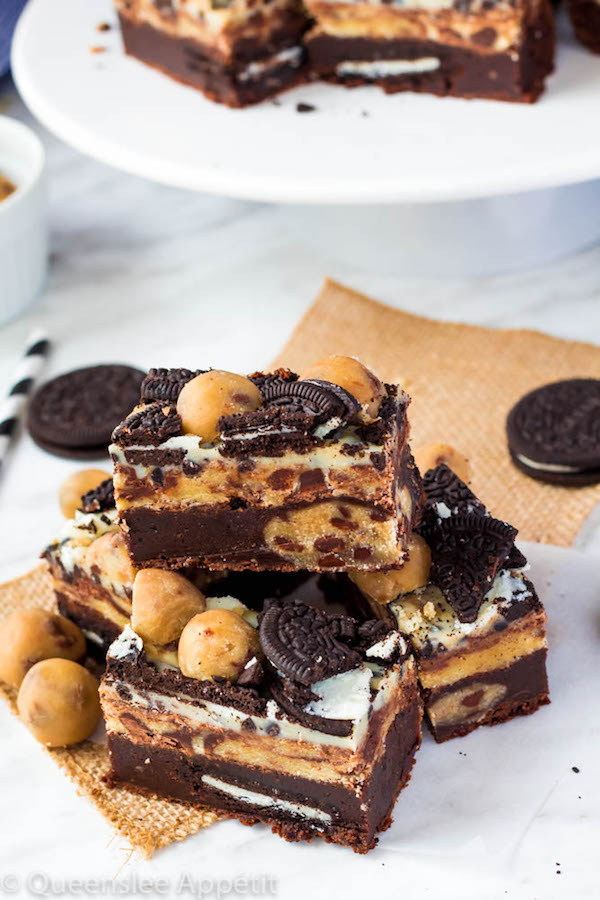
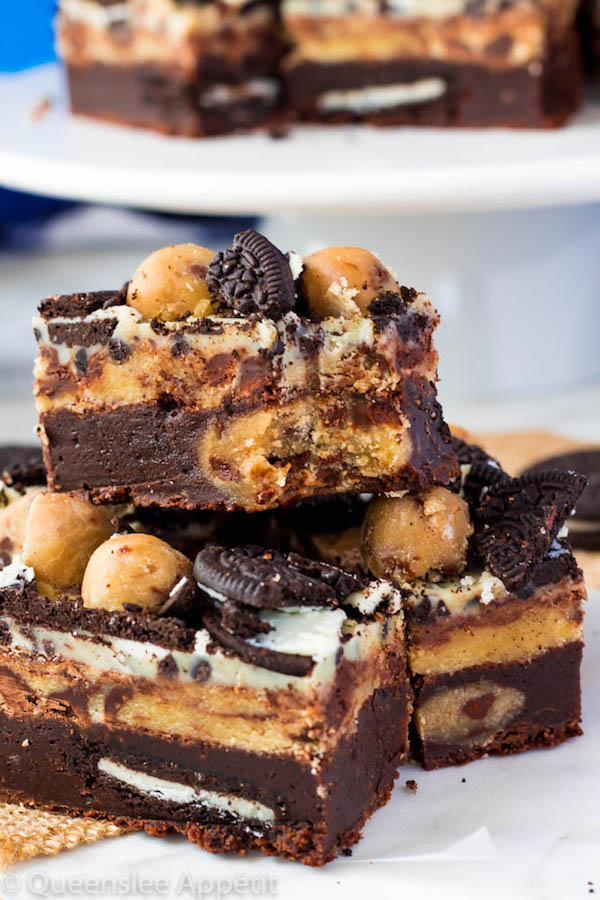
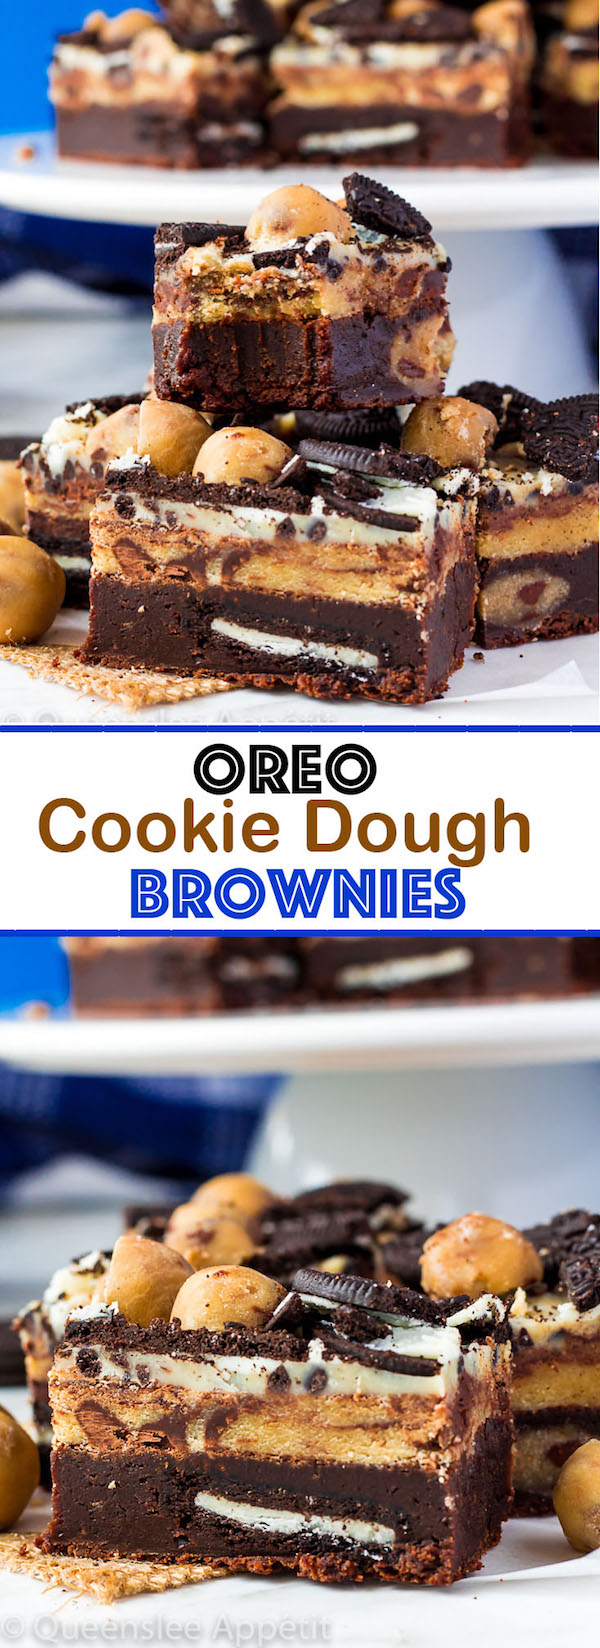
These Oreo Cookie Dough Brownies are the most deliciously decadent and rich little bars! These bad boys have a layer of thick, chewy and fudgy brownies stuffed with Oreos AND cookie dough on the bottom. In the middle you’ve got a layer of yummy cookie dough that’s topped off with cookies and cream ganache and more Oreos and cookie dough!
Today I’m sharing my second recipe as part of Cookie Dough Week here on Queenslee Appétit. I am a huge fan of cookie dough. I love eating it straight up with a spoon, but I love it way more in other desserts. I’ve stuffed cookie dough in red velvet cupcakes and in ice cream — now I’m stuffing it inside brownies!
These brownies are my new addiction and once you make them, they’ll be yours too. All of the most delicious treats are wrapped up into one ultimate dessert!
We’ve got four incredible layers of pure deliciousness:
- A thick and fudgy brownie with Oreos and cookie dough stuffed inside
- Another layer of cookie dough stuffed with chocolate chips
- A cookies and cream ganache
- Crushed Oreos and chopped cookie dough
Doesn’t that sound tempting?
Let’s start with the brownies. If you’re a regular reader of this blog, you’ve definitely seen this brownie recipe before. That’s because it’s my #1 go-to brownie recipe! These brownies are super fudgy and chewy and loaded with rich chocolate flavour — the way a brownie should be! I’m not a fan of cakey brownies at all. If you want cake, make cake, but brownies should be perfectly dense and chewy.
I made the edible cookie dough first and rolled it into balls, then froze them while I prepared the brownie batter. I then poured half of the batter into the pan and lined it with both Oreos and the frozen cookie dough balls, alternating between one and another. To cover the treats, I poured the batter directly on top of each Oreo and cookie dough to make sure they were all completely covered. Since I didn’t want to move around the cookie dough balls, I couldn’t spread the batter into an even layer like I usually do.
Brownie Baking Tip
I highly recommend you line your pan with parchment paper or aluminum foil with about 2 inches hanging off the side. This makes lifting the brownies out of the pan 100 times easier.
Bake for 25-30 minutes. To test if the brownies are done, insert a toothpick into the centre of the brownie. If moist crumbs attach to the toothpick when you pull it out, it’s done. If wet batter comes out, continue to bake for another 3-5 minutes or so until it’s done. If your toothpick comes out completely clean, there’s a chance that the brownie was a bit overbaked, which will result in dry brownies and no one wants that.
Once the brownies are done, set them aside to cool completely while you make the cookie dough layer.
Onto the next layer: Cookie Dough! This cookie dough is completely edible, and that doesn’t just mean eggless. Although edible cookie dough doesn’t contain eggs, that doesn’t mean it’s 100% safe to eat. Raw flour contains dangerous bacteria that shouldn’t be consumed, so it needs to be heat treated before you add it to the cookie dough. Simply bake the flour in the oven at 350°F for 5-10 minutes to kill any of that bacteria and it’ll be safe to use.
I made the cookie dough balls and the cookie dough layer in two separate batches because the cookie dough balls require mini chocolate chips to make them easier to roll in a smooth ball. The process of making the cookie dough layer is extremely easy, and comes together in minutes! Once you’re done, spread it over the cooled brownies. I actually had to use my hands to press it down into an even layer, which unfortunately made my chocolate melt and spread.
Next up is the cookies and cream ganache! You heard me. This ganache is insanely easy to make and only requires 2 ingredients: Hershey’s cookies and cream bars + heavy cream.
This layer was meant to simply be melted Hershey’s cookies and cream bars, but I was so afraid of the chocolate burning or not melting right, so I added a few tablespoons of cream to help thin it out. And the best thing about adding heavy cream to chocolate is that it makes a ganache!
I finished these brownie bars off with some chopped Oreos and some mini cookie dough balls that I chopped in half. Allow the brownies to chill in the refrigerator for at least 30 minutes so the ganache layer can set up before slicing. Chilling your brownies will also give you neat and clean slices, so don’t skip this step. I like to run my knife under hot water, then wipe it off with a paper towel before slicing.
If you’re a lover of brownies, Oreos or cookie dough, you’re gonna fall hard for these decadent brownie bars! Layer after layer of pure irresistible deliciousness. An explosion of flavour worth every last calorie!
More Cookie Dough Recipes
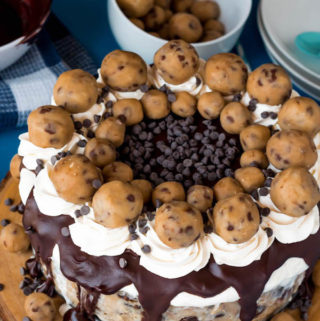
Chocolate Chip Cookie Dough Ice Cream Cake
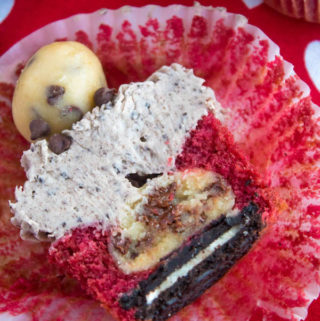
Oreo Cookie Dough Stuffed Red Velvet Cupcakes
>>PIN ME FOR LATER<<
SHOP THE RECIPE
Here are some of the tools I used to create today’s recipe:
9x9-inch square pan | Stand Mixer | Hand Mixer | Cookie Scoop |
FOLLOW QUEENSLEE APPÉTIT
Like what you see? Make sure you‘re following Queenslee Appétit for more tasty recipes!
Pinterest | Instagram | Facebook | Twitter |
Did you make a recipe? I’d love to see how it turned out! Follow me on Instagram and use the hashtag #queensleeappetit so I can see all of the Queenslee Appétit recipes you’ve made!
Never miss a recipe, SUBSCRIBE at the bottom of this post!
Have any questions about the recipe? Contact me here, and I’ll be happy to help!
Let’s get baking!
Oreo Cookie Dough Brownies
These Oreo Cookie Dough Brownies are the most deliciously decadent and rich little bars!
Ingredients
Edible Cookie Dough Balls:
- ⅔ cups all purpose flour
- ¼ cup unsalted butter, melted and cooled
- ¼ cup light brown sugar, packed
- ¼ cup granulated sugar
- ½ teaspoon pure vanilla extract
- ¼ teaspoon salt
- 1-2 tablespoon milk (optional)
- ½ cup mini chocolate chips
Oreo Cookie Dough Brownies:
- 6 oz dark chocolate, chopped
- ¾ cup unsalted butter, cubed
- ¾ cup granulated sugar
- ½ cup light brown sugar, packed
- 2 large eggs
- 1 large egg yolk
- 1 teaspoon pure vanilla extract
- ¾ cup all-purpose flour
- 2 tablespoon unsweetened cocoa powder
- ¼ teaspoon salt
- 6 whole Oreos
- 6 cookie dough balls, frozen (recipe above)
Cookie Dough Layer:
- 1 and ¼ cups all purpose flour
- ½ cup unsalted butter, melted and cooled
- ½ cup light brown sugar, packed
- ½ cup granulated sugar
- 1 teaspoon pure vanilla extract
- ½ teaspoon salt
- 2-4 tablespoon milk (optional)
- 1 cup semisweet chocolate chips
Cookies and Cream Layer:
- 3-4 Hershey’s Cookies and Cream Bars, melted
- 3-4 tablespoon heavy cream
Topping:
- Extra cookie dough balls, cut into pieces
- 8 Oreos, chopped
Instructions
For the Edible Cookie Dough Balls:
- Pour the flour onto the cookie sheet you used before and spread into an even layer. Bake for 5 minutes. Set aside.
- In the bowl of a stand mixer fitted with a paddle attachment, or in a large mixing bowl using a hand mixer, add the melted butter and both sugars. Beat on medium speed until fully combined, about 1-2 minutes. Mix in vanilla, flour and salt.
- If the cookie dough is crumbly, add milk one tablespoon at a time and beat until dough comes together in large clumps. Stir in the mini chocolate chips with a rubber spatula.
- Scoop out 6-8 1 tablespoon sized portions of cookie dough and roll into a smooth ball. Place onto a prepared baking sheet. Roll the rest of the cookie dough out into 1 teaspoon sized balls for the topping.
- Chill the 6 larger cookie dough balls in the freezer while you prepare the brownie batter. Refrigerate the smaller cookie dough balls in an airtight container in the refrigerator.
For the Oreo Cookie Dough Brownies:
- Preheat the oven to 350°F (325°F for dark pans) (180°C). Line a 9x9-inch square baking pan with aluminum foil or parchment paper, leaving about 2-inches hanging over the sides and spray with non-stick spray. Set aside.
- Place chopped chocolate and cubed butter in a large bowl over a saucepan of simmering water. Stir constantly until the butter and chocolate are both melted and combined, about 3-4 minutes.
- Remove bowl from heat and immediately add both sugars, whisk until sugar is dissolved and mixture is smooth.
- Add eggs, egg yolk and vanilla and slowly whisk until combined. Do not overmix. Add flour, cocoa, and salt and stir with a rubber spatula until well blended.
- Pour half of the batter into the prepared pan and place Oreos and the 6 frozen cookie dough balls in an even layer, alternate with one Oreo, then a cookie dough ball next to it. Pour the rest of the batter on top to cover the Oreos and cookie dough.
- Bake for 25-30 minutes or until a toothpick inserted into the brownie comes out with a few moist crumbs. Allow to cool completely in the pan on a wire rack.
For the Cookie Dough Layer:
- Pour the flour onto the cookie sheet you used before and spread into an even layer. Bake for 5 minutes. Set aside.
- In the bowl of a stand mixer fitted with a paddle attachment, or in a large mixing bowl using a hand mixer, add the melted butter and both sugars. Beat on medium speed until fully combined, about 1-2 minutes. Mix in vanilla, flour and salt.
- If the cookie dough is crumbly, add milk one tablespoon at a time and beat until dough comes together in large clumps. Stir in the chocolate chips with a rubber spatula.
- Spread the cookie dough over the cooled brownies and press into an even layer. Set aside.
For the Cookies and Cream Layer:
- Break up each cookies and cream bar into a small heat safe bowl. Add 3 tablespoons of heavy cream and microwave in 20 second intervals, stirring after each until melted and smooth. If the chocolate is too thick, add more cream 1 tablespoon at a time.
- Spread over the cookie dough layer. Top with the chopped Oreos, then cut the smaller cookie dough balls in half and place them on top.
- Cover the pan with plastic wrap and refrigerate for at least 30 minutes to set all the layers.
- Once the layers are set, lift the bars out of the pan and slice into 18 even portions. Enjoy!
Notes
- Store brownies in the refrigerator for up to 1 week or at room temperature for up to 3 days.
©QUEENSLEE APPÉTIT. All images & content are copyright protected. Please do not use my images without prior permission. If you want to republish this recipe, please re-write the recipe in your own words, or link back to this post for the recipe.
BON APPÉTIT!
Love, Dedra
This post may contain affiliate links. Please see my full disclosure policy for details.



Leave a Reply