These Mini Easter Cheesecakes are a colourful, fun, festive Easter and Spring treat! Creamy, pastel layered mini cheesecakes topped with yummy Easter candy!
What's your favourite thing about Easter? Mine is the delicious Jamaican Bun and Cheese my family eats once a year, our Easter dinner, and most importantly, the candy. Basically, everything food related is the best part about Easter to me, especially the dessert! I had a billion Easter dessert recipes planned, but this year I settled on sharing 2 and saving the rest for the Easters to come.
I already shared a recipe for Cadbury Creme Egg Cupcakes (YUM!), but I wanted to give you guys one more festive dessert to make this Easter. Since these Mini Chocolate Covered Strawberry Cheesecakes are one of my most popular recipes on the blog, I decided to create an Easter version.
My new favourite way to make/eat cheesecake is in mini form. It is so much easier to make than a full-sized cheesecake and there’s no need for a water bath. And the best part is…they’re SNACK SIZED! The recipe makes 12 mini cheesecakes, but you could easily double the recipe to make 24. And the individual portions makes it easier to gift to your friends and family.
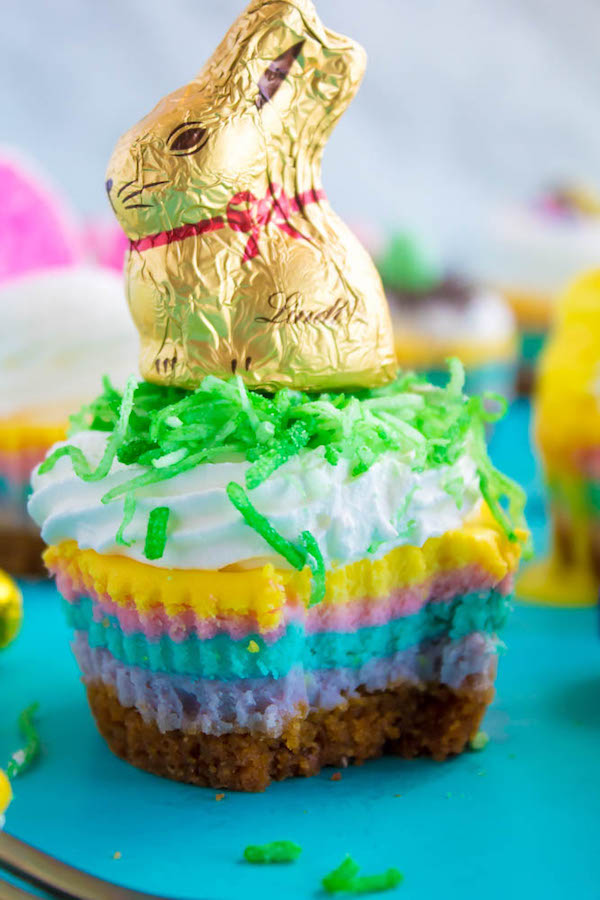
The cheesecake itself is a simple vanilla cheesecake tinted purple, blue, yellow and pink to make it Easter themed. To make it, simply beat the cream cheese, sugar and cornstarch together with a hand mixer (or if you’re strong enough you can blend it with a whisk). Then we add some sour cream and heavy cream to give the cheesecake that extra smooth, rich and creamy texture. Next, mix in the vanilla and eggs.
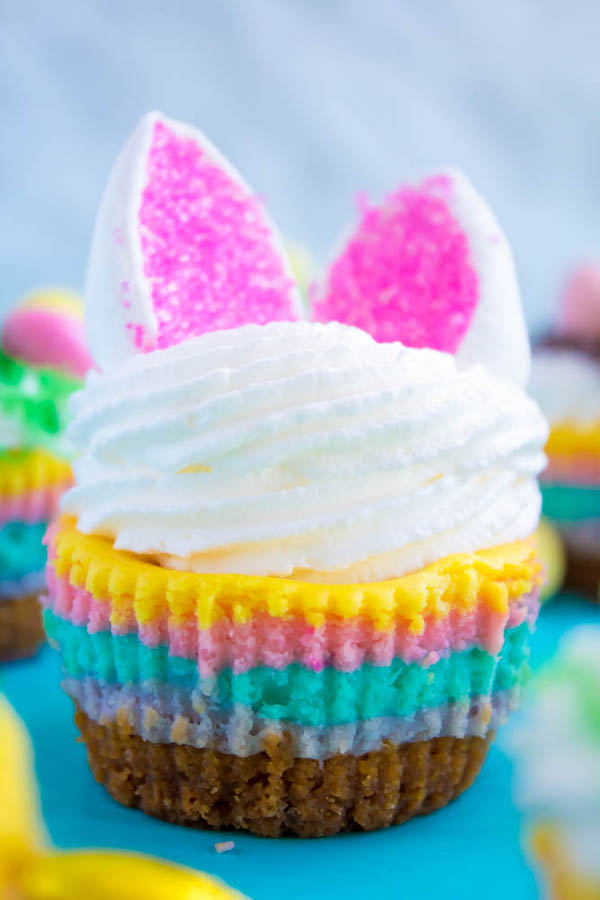
To create the colourful layers, I divide the batter evenly between 4 bowls and tinted each bowl with GEL food colouring. Liquid food colouring may effect the texture of the cheesecake. Since I usually add ¼ cup of batter to each liner, I added 1 tablespoon of each colour to the liners. Thankfully, the colours didn't completely blend together when baking.
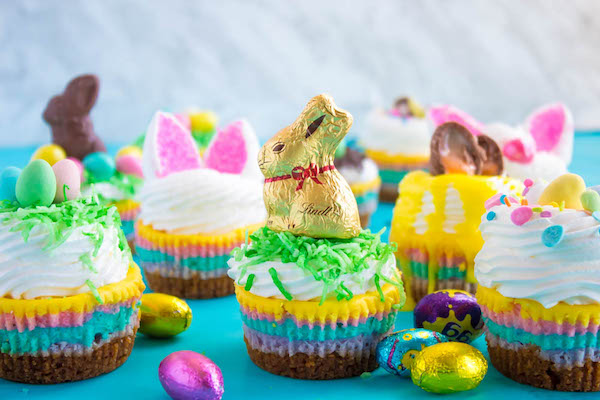
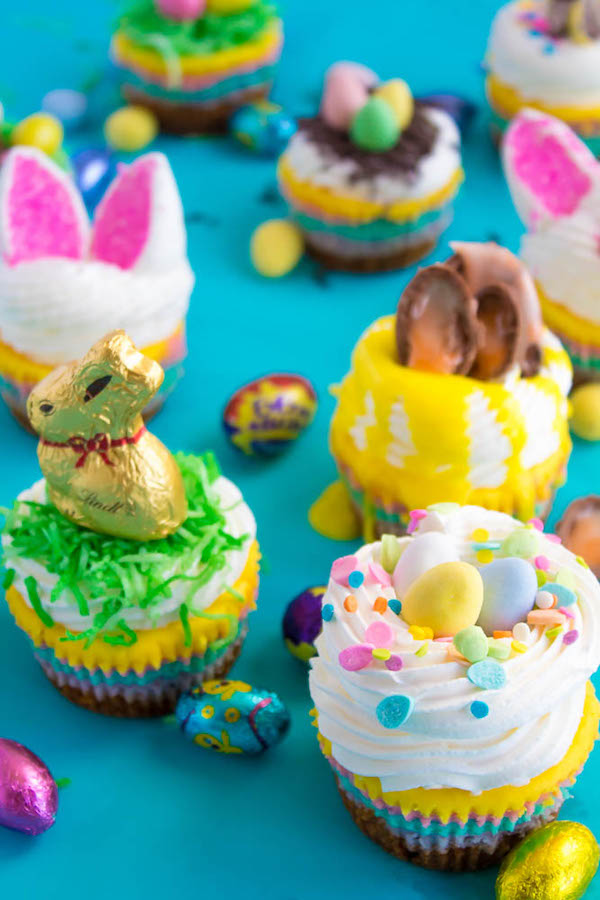
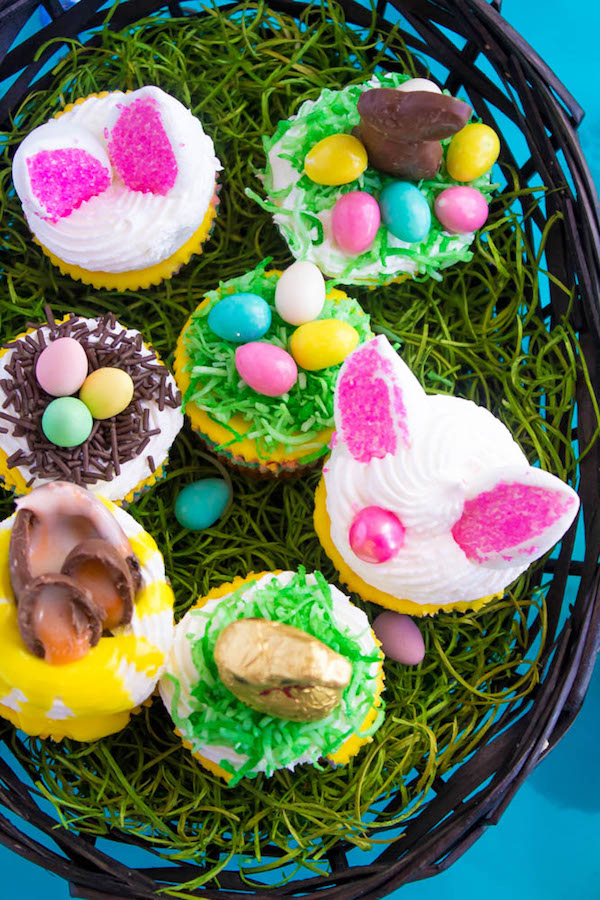
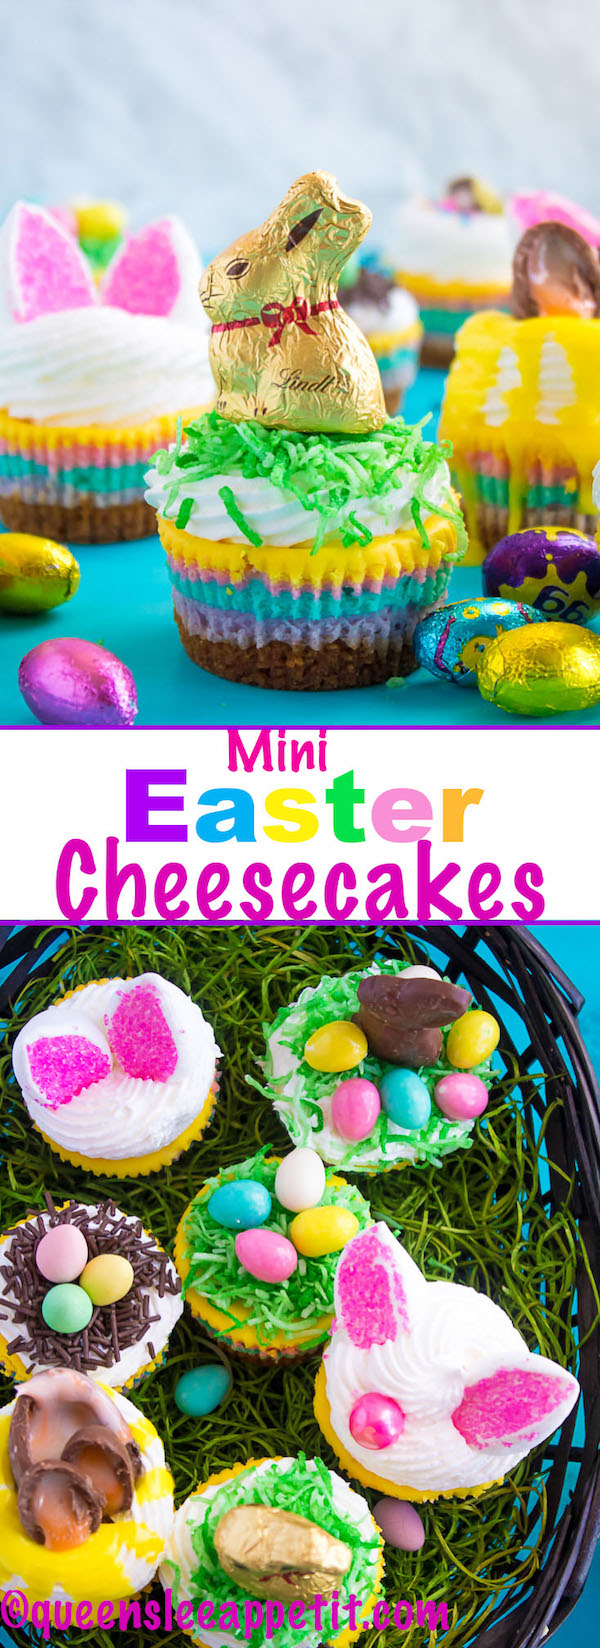
Once the cheesecakes are chilled, it's time for the fun part: decorating! I came up with 10 adorable Easter-themed designs for these cheesecakes. As I mentioned above, one of my favourite things about Easter is the candy, so I bought a few bags of candy to top these babies!
I should also mention that you can decorate them anyway you wish. Get creative! You can also get the kids involved and make a fun little activity where everyone can make their own custom cheesecake!
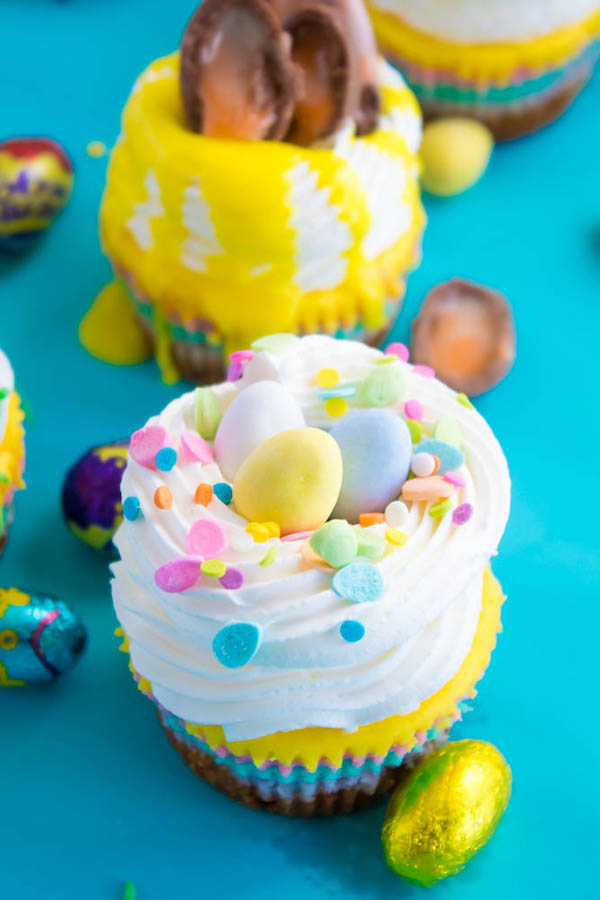
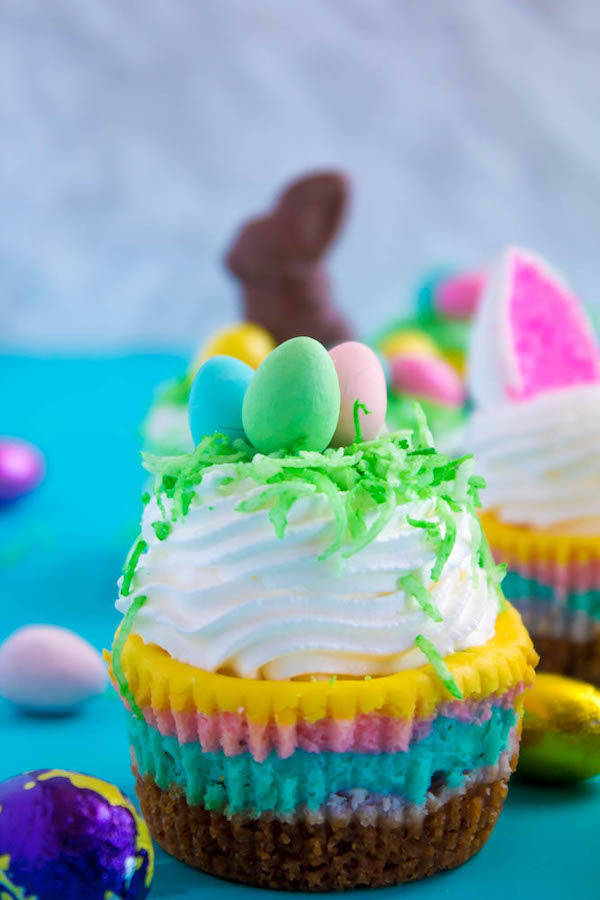
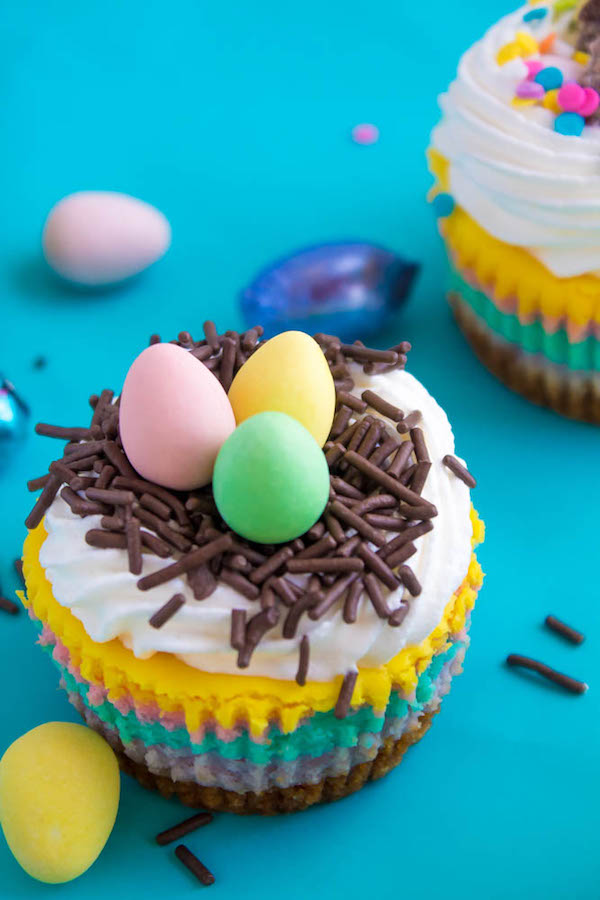
For the first decoration, I decided to go with a basic "eggs in a nest" design. To do this, I simply piped a nest using cool whip and a Wilton 6B tip. Then I garnished it with Easter coloured confetti sprinkles and some mini Easter eggs. For the eggs, I used Hershey's Eggies, but you can use Cadbury if you desire.
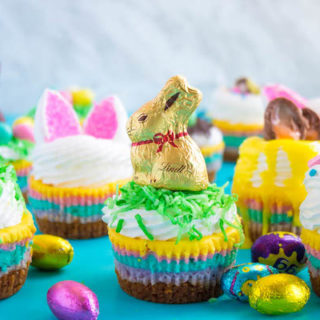
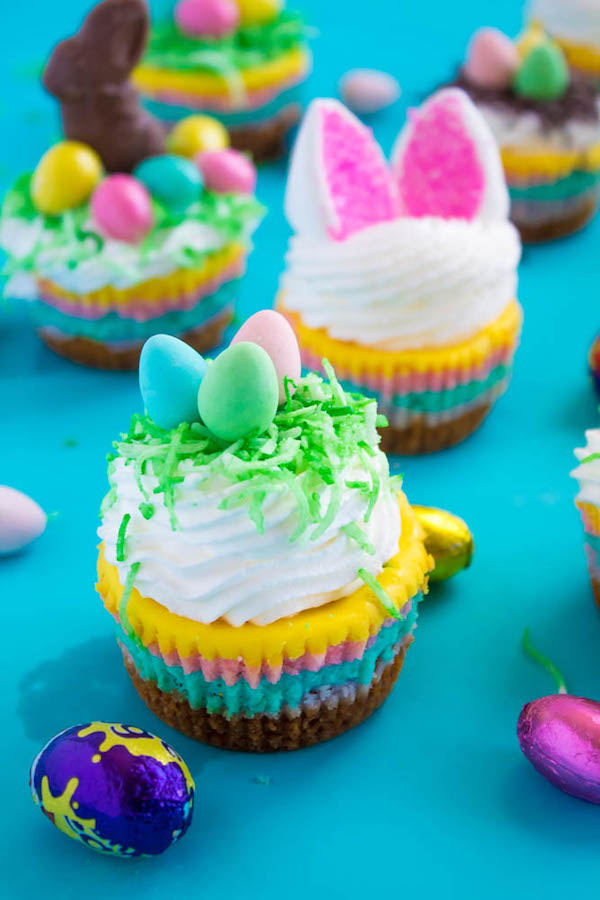
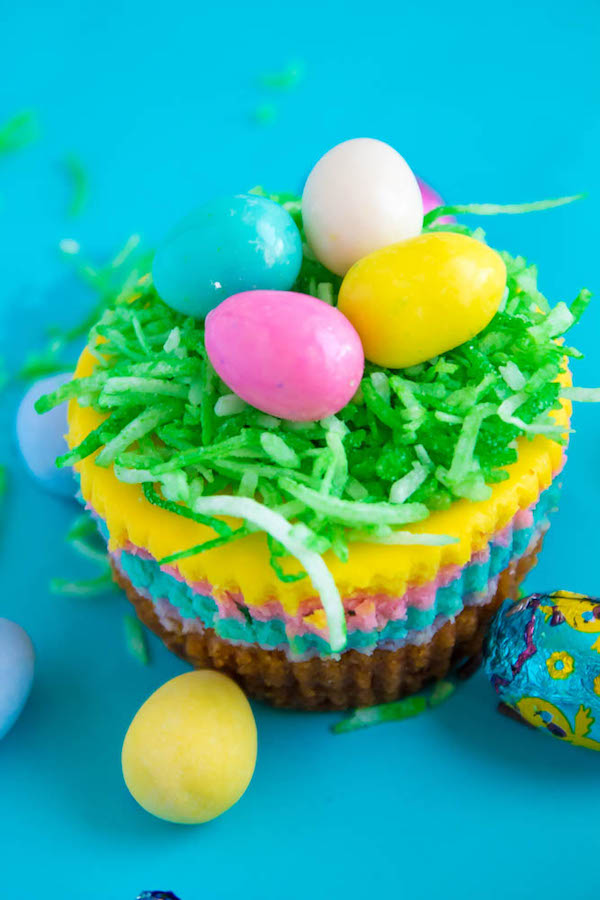
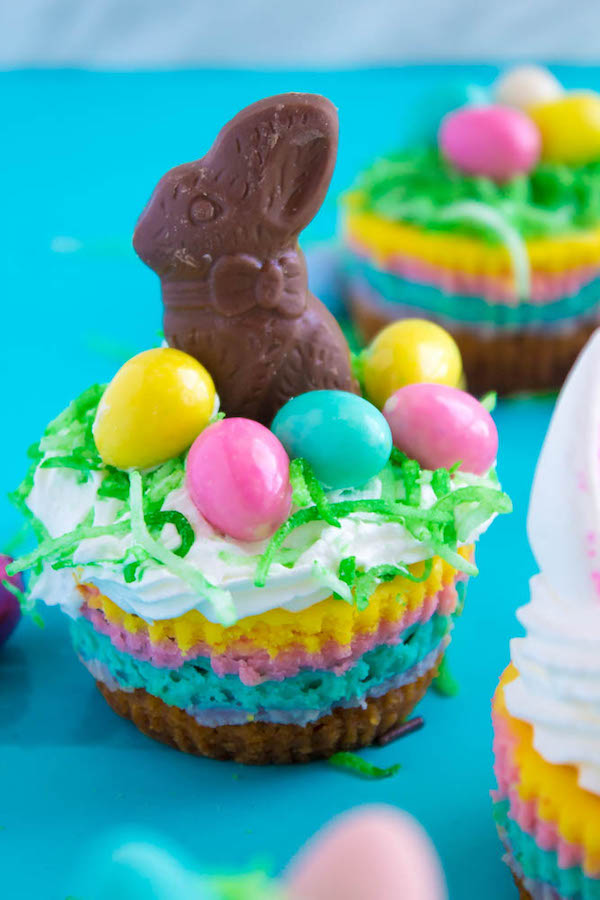
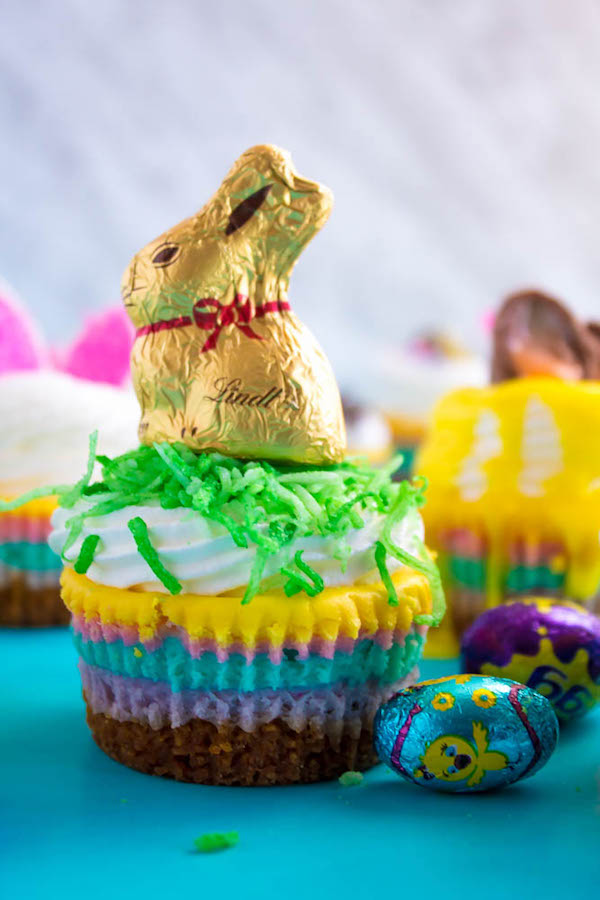
For the next few decorations, I decided to throw in some edible grass which is simply shredded coconut tinted green. I then topped the grass with mini chocolate bunnies, mini Easter eggs (I used Cadbury, Hershey's and some Eater egg gumballs I found at the dollar store).
I also did a nest and egg decoration using chocolate sprinkles to resemble a twiggy birds nest.
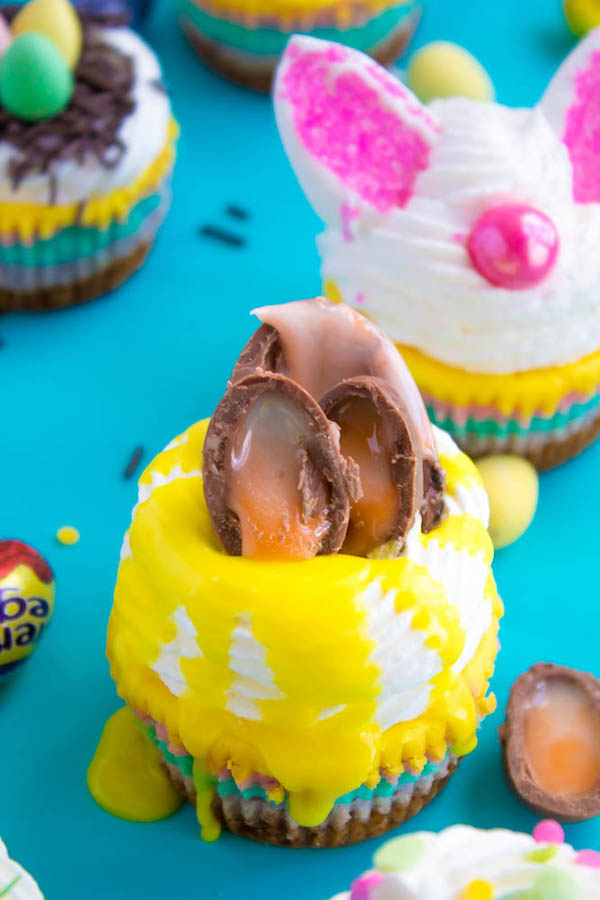
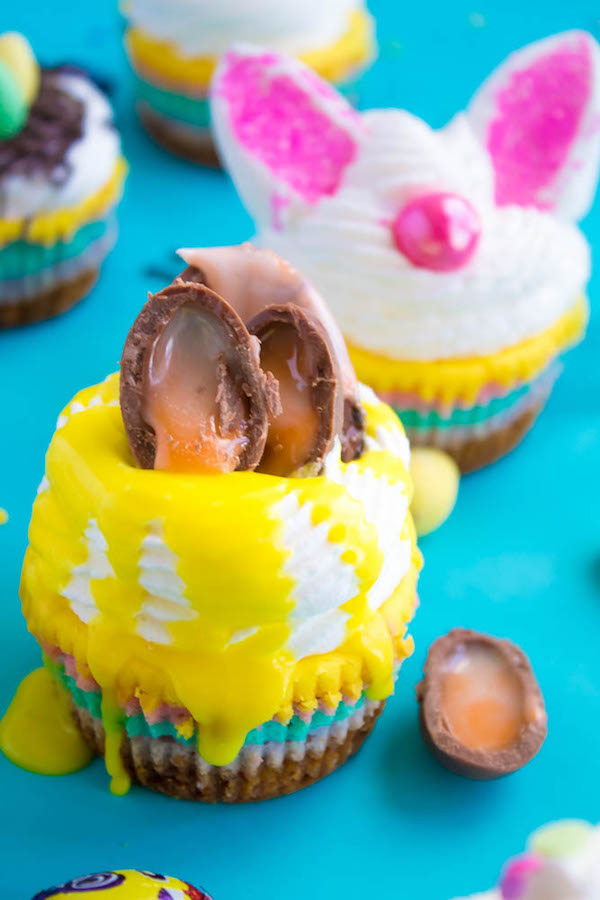
I had a few Cadbury Creme Eggs left from the cupcakes I mentioned earlier, so I just knew I had to make a Creme Egg cheesecake. To do this, I piped a swirl of whipped cream on top of the cheesecake and drizzled on some of the remaining yellow glaze I had left from my Creme Egg Cupcakes. I then cut some Cadbury Creme Eggs in half and placed it on top and voila! Look how gorgeous!
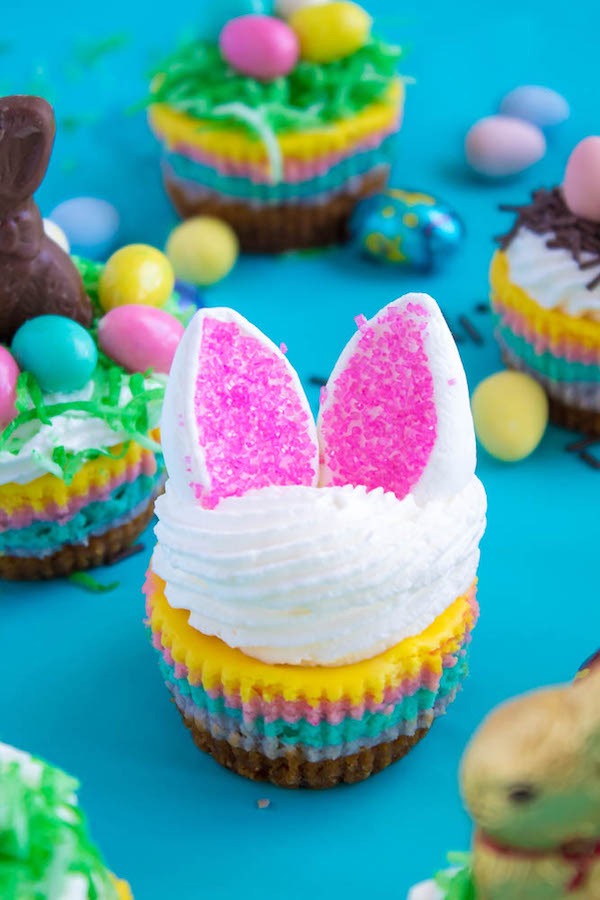
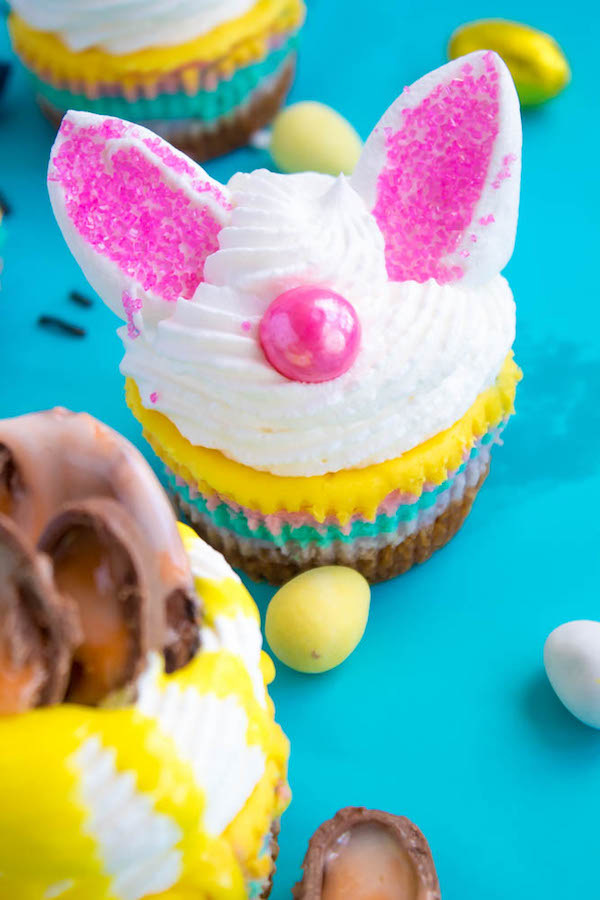
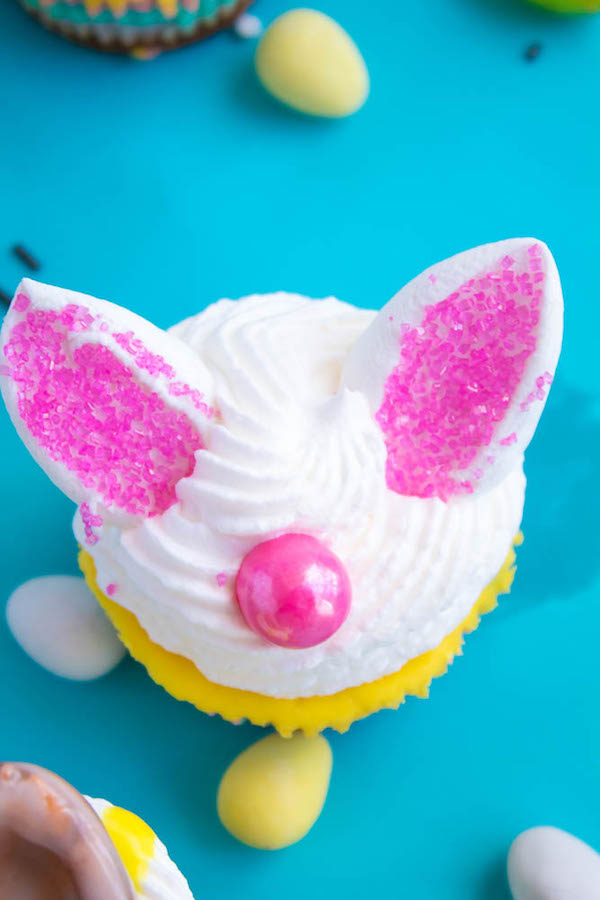
I've been seeing a lot of Easter bunny cupcakes online, so for the final decorations, I just had to make my own. It is super easy to create the bunny ears, all you need is a bag of large marshmallows, pink sparkling sugar and a pair of kitchen scissors. To make them, take a large marshmallow and cut it diagonally to create 2 bunny ears. Immediately dip the sticky half into the sparkling sugar. That's all! It's unbelievable how simple it is to make such an adorable Easter topping!
I made one with and without a cute little button nose in the middle. For the nose, I used Pink Pearlized Gumballs I got at my local bulk store, but you can use sixlets or jelly beans.
How precious are these Mini Easter Cheesecakes? If you're looking for a simple and perfect dessert to add to your Easter dessert table this year, give these mini cheesecakes a try. They're guaranteed to be a hit!
>>PIN ME FOR LATER<<
SHOP THE RECIPE
Cupcake Liners | Muffin Pan | Hand Mixer | Violet get food colouring | Sky Blue gel food colouring | Lemon yellow gel food colouring | Light Pink gel food colouring | Wilton 6B Tip | Pink Sparkling/Sanding Sugar | Pink Pearlized Gumballs |
Follow Queenslee Appétit
Pinterest | Instagram | Facebook | Twitter |
Did you make a recipe? I'd love to see how it turned out! Follow me on Instagram and use the hashtag #queensleeappetit so I can see all of the Queenslee Appétit recipes you've made!
Let's get baking!
Mini Easter Cheesecakes
These Mini Easter Cheesecakes are a colourful, fun, festive Easter and Spring treat! Creamy, pastel layered mini cheesecakes topped with yummy Easter candy!
Ingredients
Crust:
- 1 cup graham cracker crumbs (about 7 rectangular sheets)
- 2 tablespoon granulated sugar
- ¼ cup salted butter, melted
Colourful Cheesecake Layers:
- 1 and ½ packages (12 oz) cream cheese, room temperature
- ½ cup granulated sugar
- 1 tablespoon cornstarch
- ¼ cup sour cream, room temperature
- ¼ cup heavy cream, room temperature
- ½ teaspoon lemon juice
- 1 and ½ teaspoon pure vanilla extract
- 2 large eggs, room temperature
- Violet get food colouring
- Sky Blue gel food colouring
- yellow gel food colouring
- Light Pink gel food colouring
Optional Toppings:
- Cool whip
- Pastel Confetti Sprinkles
- Mini Easter eggs (like Hershey's Eggies or Cadbury mini eggs)
- Shredded Coconut
- Liquid Green food colouring
- Mini chocolate bunnies
- Cadbury Creme Eggs (large and small)
- Large marshmallows
- Pink sanding sugar
- Small pink gumball
- Chocolate sprinkles
Yellow Drizzle (for Cadbury Cheesecake):
- 6 tablespoon powdered sugar
- 1 and ¼ teaspoon milk, plus more as needed
- ⅛ teaspoon vanilla extract
- Few drops yellow food colouring
Instructions
For the Crust:
- Preheat oven to 350°F and Line a 12-cup muffin pan with liners. Set aside.
- Add graham cracker crumbs and sugar to a mixing bowl and mix together using a fork. Mix in melted butter. Place about 2 tablespoons of crumbs into each liner and flatten using the back of the tablespoon or a small glass. Bake in preheated oven for 4-6 minutes. Allow to cool on a wire rack. Lower oven temperature to 325F.
For the Colourful Cheesecake Layers:
- In a large bowl using a handheld mixer, beat the cream cheese, sugar and cornstarch on medium-low speed until creamy, about 1 minute.
- Scrape down the sides of the bowl and add sour cream, heavy cream, lemon juice and vanilla and continue beating until smooth.
- Add eggs one at a time, beating slowly until just combined, do not overbeat.
- Divide batter between 4 bowls, about ¾ cup per bowl. Tint with pink, blue, yellow and purple gel food colouring.
- Forcefully tap each bowl on the counter a few times to release any air bubbles.
- Fill each liner with 1 tablespoon of purple batter and spread into an even layer. Repeat with 1 tablespoon of blue, then pink, then yellow. Spreading each colour into an even layer. Bake in preheated oven for 20-25 minutes until centers are slightly jiggly, like Jello.
- Remove from oven and allow to cool completely on a cooling rack.
- Cover with plastic wrap and refrigerate until firm and chilled, about 4 hours or overnight.
Decoration Ideas:
- Transfer cool whip to a piping bag fitted with a large star tip (I used Wilton 6B). Remove cheesecakes from the refrigerator and their liners.
- Decoration #1: pipe a nest of whipped cream onto one cheesecake, decorate with pastel confetti sprinkles and mini Easter eggs in the centre.
- Decoration #2: pipe a nest of whipped cream onto a cheesecake, pile some green coconut (see notes) on top and decorate with mini Easter eggs.
- Decoration #3: pipe a nest of whipped cream onto a cheesecake, pile some green coconut on top and decorate with a mini chocolate bunny.
- Decoration #4: pipe a nest of whipped cream onto a cheesecake, pile some green coconut on top and decorate with a mini chocolate bunny and mini eggs.
- Decoration #5: pipe a nest of whipped cream onto a cheesecake and garnish with chopped mini eggs.
- Decoration #6: pipe a nest of whipped cream onto a cheesecake, drizzle the yellow glaze on top (see notes), garnish with halved large and small Cadbury creme eggs.
- Decoration #7: pipe a nest of whipped cream onto a cheesecake. Use a clean pair of kitchen scissors to cut a large marshmallow in half, lengthwise. Dip the sticky sides into pink sanding sugar, and carefully place on top of the whipped cream, pointy end on top.
- Decoration #8: pipe a swirl of whipped cream onto a cheesecake. Repeat the step above to create the bunny ears. Place onto the whipped cream and place a pink gumball in the middle to make a cute little button nose.
- Decoration #9: pipe a nest of whipped cream onto a cheesecake, garnish with chocolate sprinkles and decorate with mini eggs.
- Decoration #10: Pile some green coconut on top of a cheesecake and decorate with mini eggs. Enjoy!
Notes
- For the yellow drizzle: Add powdered sugar, milk and vanilla to a small bowl and stir until combined and smooth. Tint with yellow food colouring.
- To make the coconut grass: Pour coconut into a small resealable bag and add a few drops of green liquid food colouring. Massage the bag until all the colour is incorporated. Pour coconut onto wax paper and let it dry for a few minutes until ready to use.
©QUEENSLEE APPÉTIT. All images & content are copyright protected. Please do not use my images without prior permission. If you want to republish this recipe, please re-write the recipe in your own words, or link back to this post for the recipe.
BON APPÉTIT!
Love, Dedra ❤
This post may contain affiliate links. Please see my full disclosure policy for details.



Leave a Reply