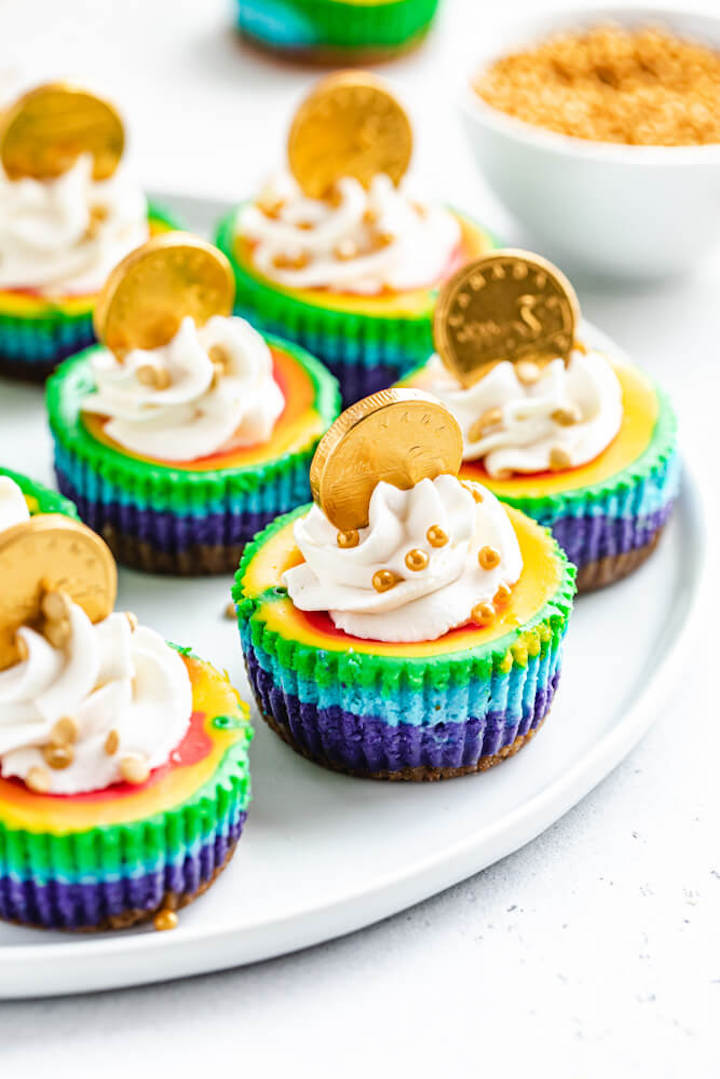
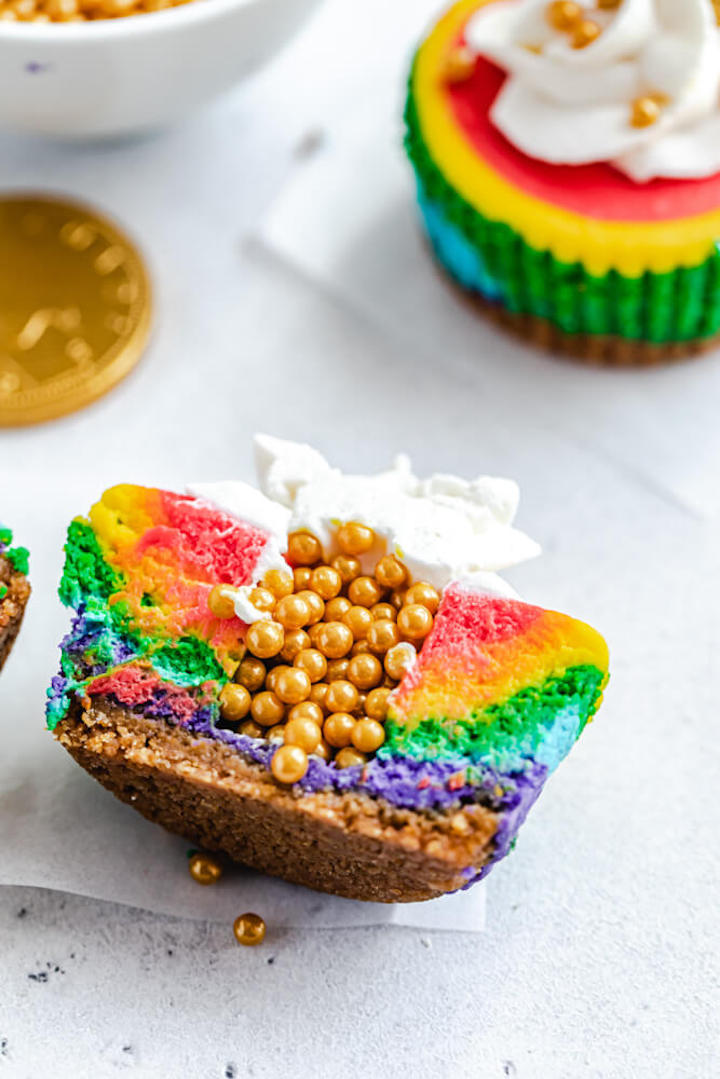
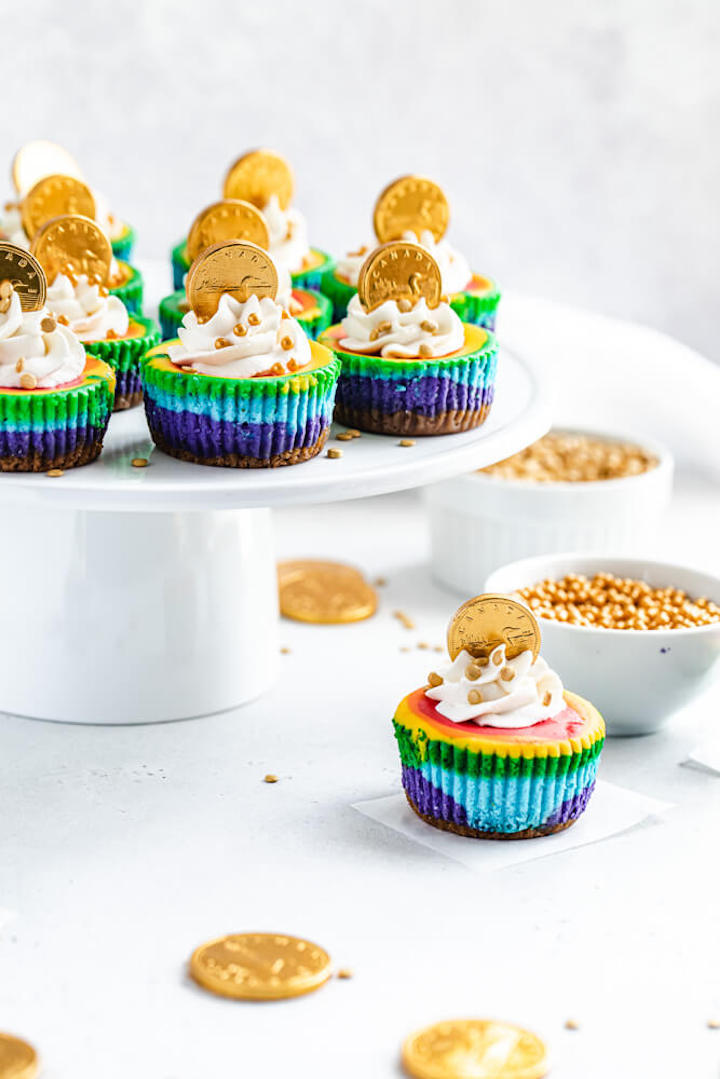
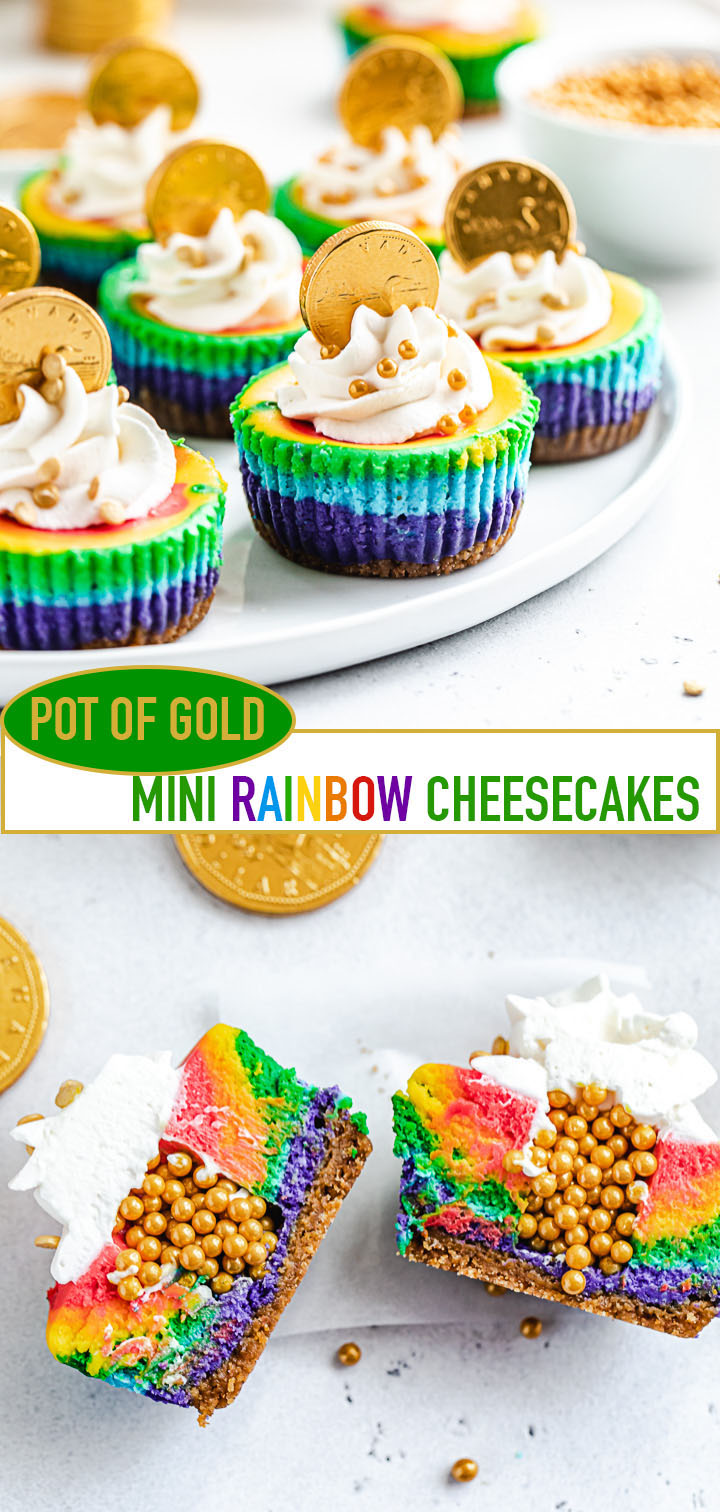
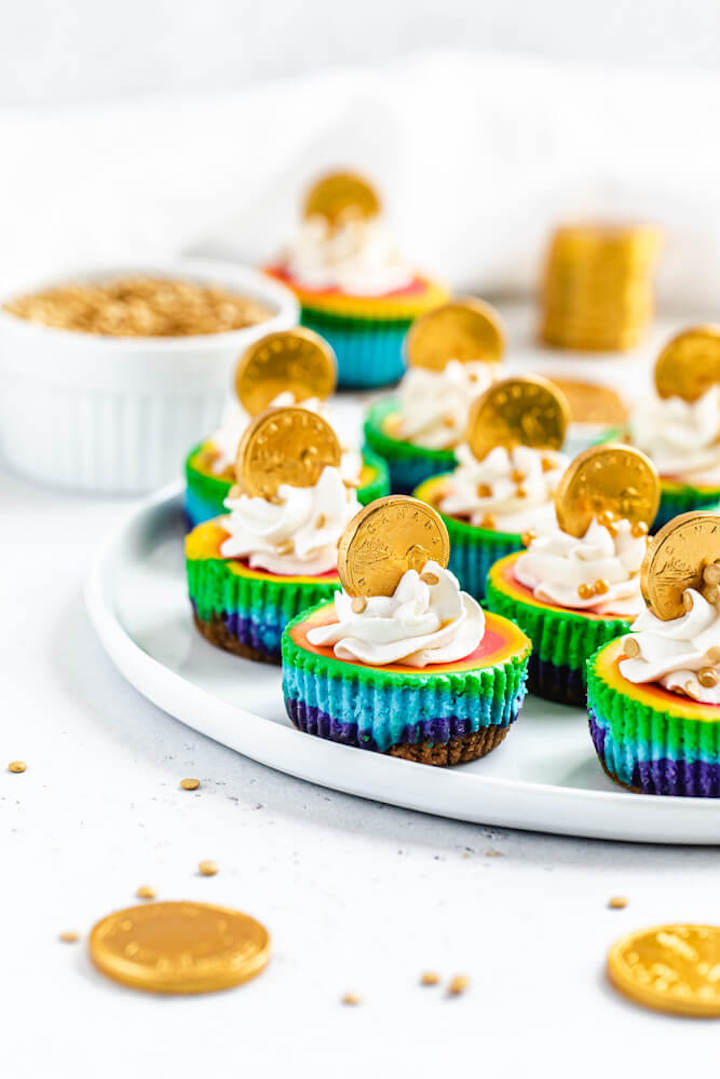
These Pot of Gold Mini Rainbow Cheesecakes are the perfect fun and colourful treat for St. Patrick’s Day! The creamiest vanilla cheesecake is dyed the colours of the rainbow and filled with beautiful gold sprinkles!
This post may contain affiliate links. As an Amazon Associate I earn from qualifying purchases. Please see my full disclosure policy for details.
Pot of Gold Mini Rainbow Cheesecakes
St. Patrick’s Day is coming soon which means rainbow everything! More specifically, “pot of gold” everything. Back in 2017 I shared this crazy Pot of Gold Rainbow Cake. I was going to make a cupcake version, but I’ve always wanted to see if I could put a surprise filling in mini cheesecakes and whaddya know? It worked!
Rainbow Cheesecake Filling
The rainbow cheesecake filling is actually a simple vanilla cheesecake! I actually made a recipe for the perfect mini vanilla cheesecakes that I haven’t shared yet. That recipe is the base for these cheesecakes, so you can totally cut out the colourings if you want a simple vanilla cheesecake recipe now!
Now once you’ve made the easy vanilla cheesecake batter, you’re gonna divide it between 6 bowls. I like to use a medium cookie scoop to ensure there’s an even amount of batter between each bowl.
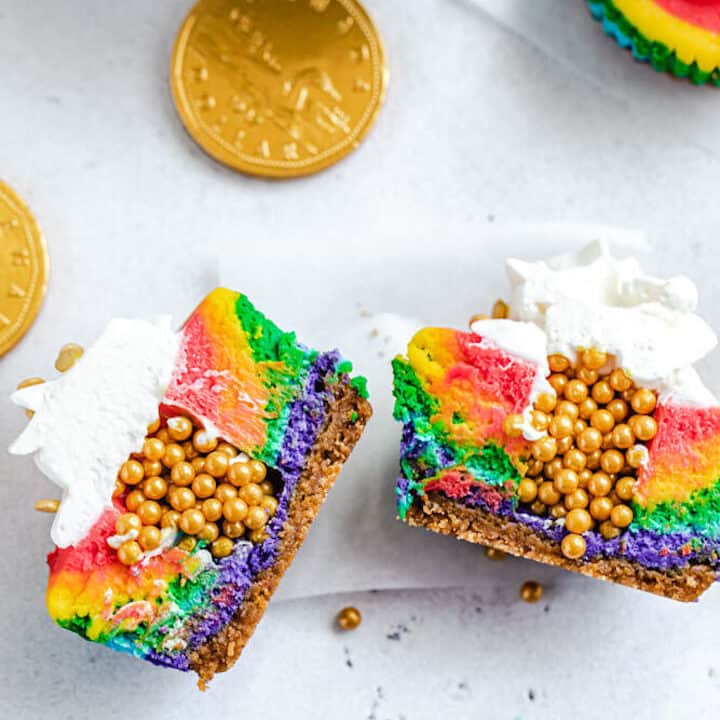
Tint each bowl with gel food colourings until you get the six colours of the rainbow: red, orange, yellow, purple, blue and green. I recommend starting with a little bit of colour, then gradually adding more depending on how dark and bold you want your colours to be.
How to Properly Layer The Rainbow Colours
SUPER IMPORTANT! For my first attempt at these cheesecakes, I used a small cookie scoop to evenly divide each colour into the liners. Or at least, I thought it would be even.
I made the mistake of adding a full scoop of a colour to some liners and ended up running out of colour before I was able to fill them all. Then as I began to layer on every other colour, I noticed that some liners were overflowing while others were barely halfway full.
For this first failed attempt, I only ended up with 6 out of 12 cheesecakes. And some of the cheesecakes were as tall as a cupcake while others had the same amount of thickness as an Oreo.
I quickly realized my mistake and nailed the second attempt. Let me tell you how to properly layer the colours.
First, we’ll start with the purple. To make sure I had enough purple for all 12 liners, I only filled half of my cookie scoop. If you don’t have a small cookie scoop, I suggest starting with ½ teaspoon per cup. If there’s still some purple left, add a little bit more to each cup until it’s done.
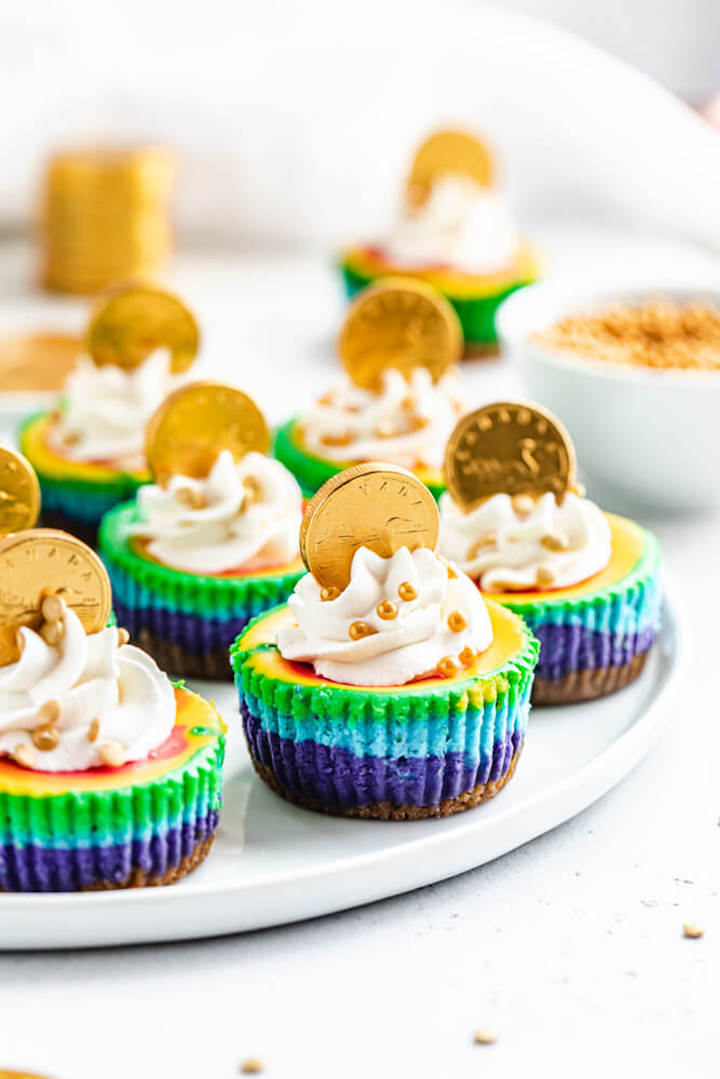
Now you want to take a teaspoon and use the back to carefully spread the purple into an even layer. Next, scoop the blue into the centre of the purple layer. Repeat with the green, yellow, orange and red. You won’t need to spread out each colour, just scoop them into the centre of the last colour and the batter will spread out on its own.
Gold Sprinkle Filling
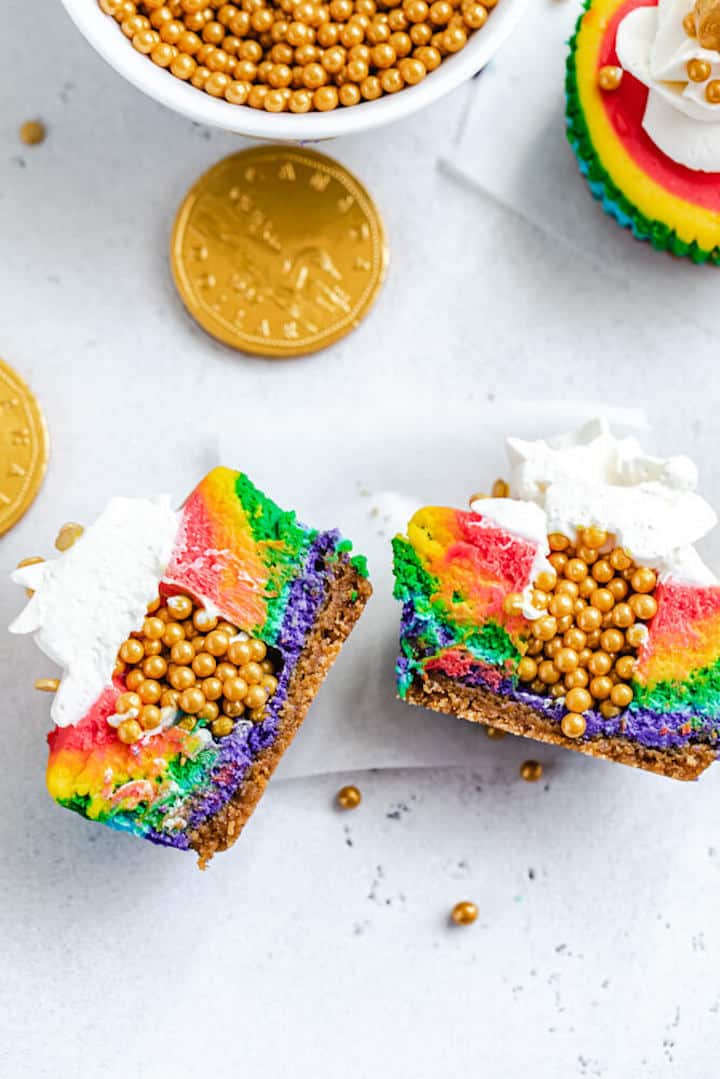
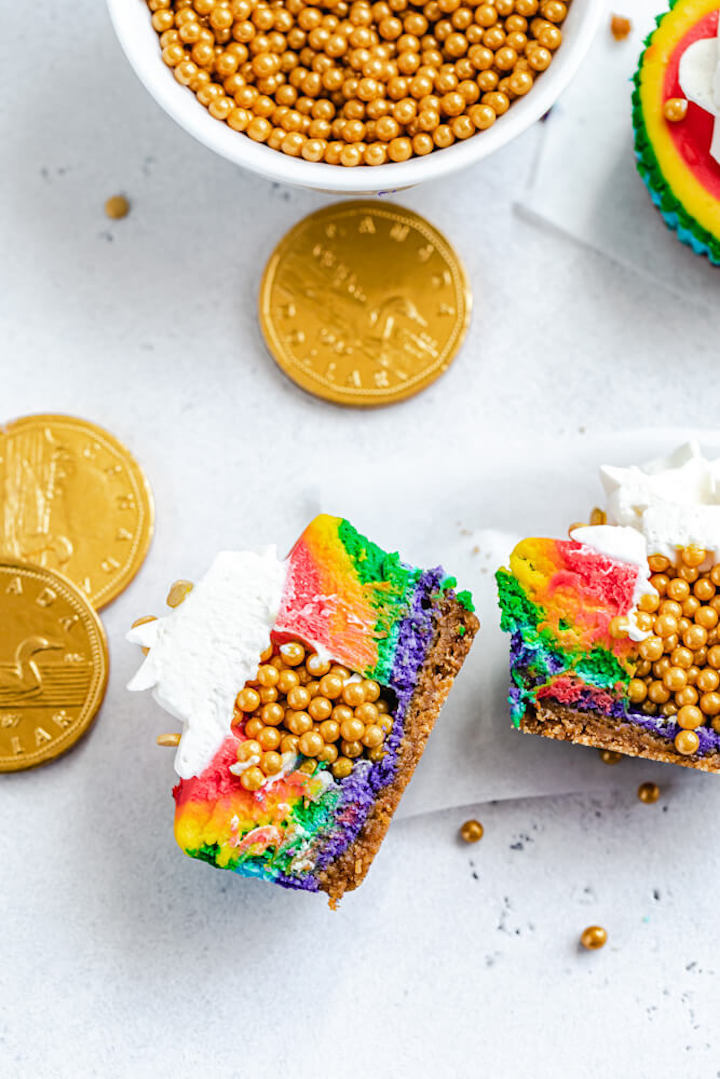
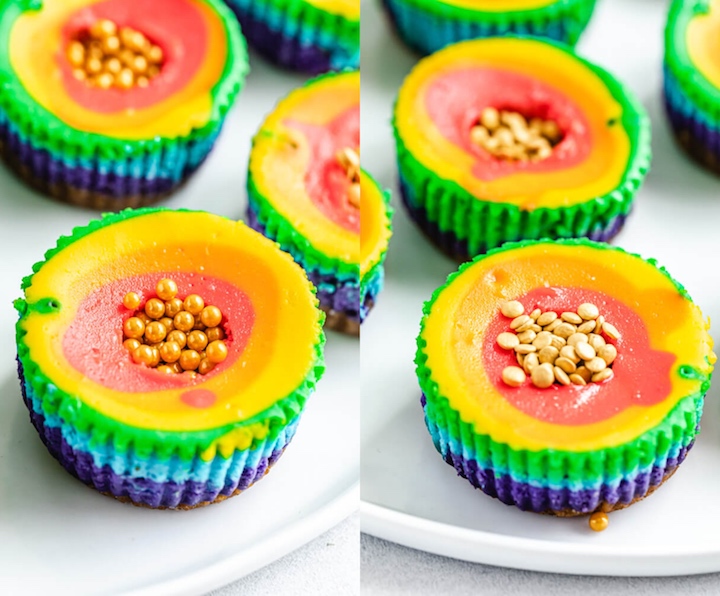
Bake the cheesecakes, then let them cool and chill completely before moving on to the fun part — filling them with gold!
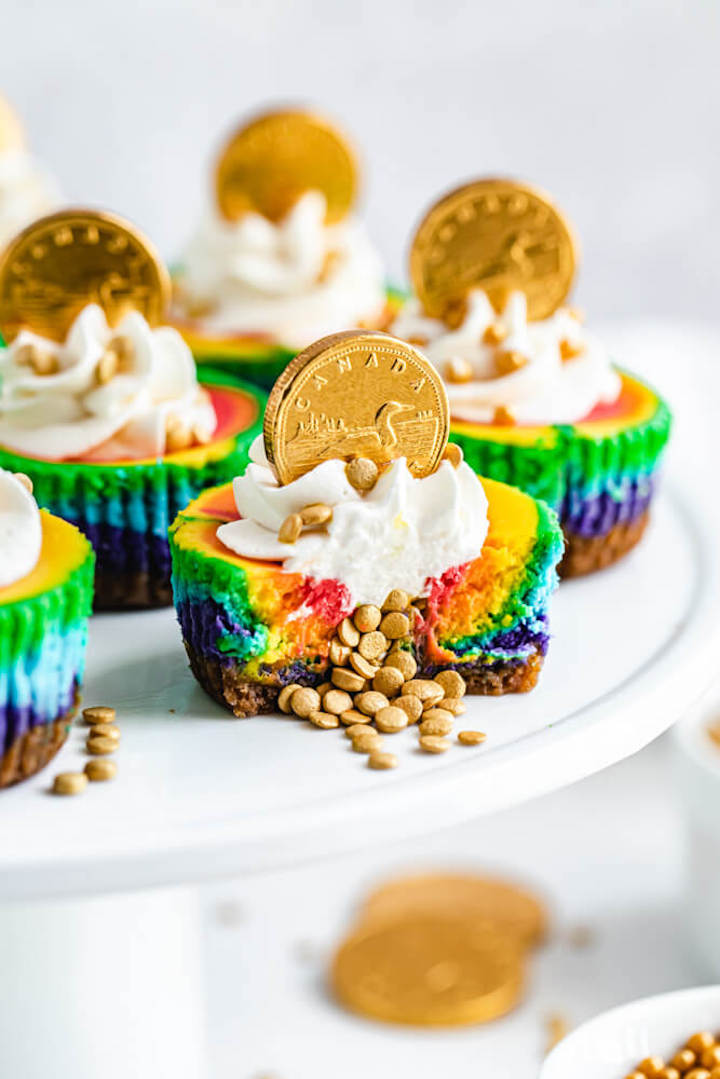
I honestly think I’m the first person who’s ever cut a hole out of a mini cheesecake and filled it with something. I even checked and I couldn’t find any other recipe that’s done this, which made me hesitant to try in the first place.
I had so many fears! What if the cheesecakes split in half, what if I accidentally cored a hole right through the crust? All valid concerns that, as I was coring the cheesecakes, realized could’ve easily happened.
Tips & Tricks for Coring Mini Cheesecakes
- Use an apple or cupcake corer: when coring cupcakes, you can use a corer, the bottom of a piping tip or a pairing knife. When coring a mini cheesecake, you pretty much have to use a corer. You can probably get away with using a pairings knife if your gentle, but my technique requires a corer.
- Gently push down the corer and twist slowly: the best technique I found for coring the cheesecakes is to gently push the corer into the cheesecake. You wanna be extra careful so you don’t push it through the crust. Now twist it slowly while lifting to take out the centre.
- Use a toothpick or butterknife to scoop out remaining bits: with some of the cheesecakes, the centre just popped out. However, with others the centre part wouldn’t budge or only half came out. To fix this, simply use a toothpick or butterknife to clean up and scoop out any bits in the centre so we have more space to put our sprinkles.
How adorable are these colourful cheesecakes? Fill them with the gold sprinkles of your choice (make sure they’re small enough to fit!) and decorate with a cloud of fluffy whipped cream and a mini gold coin!
More St. Patrick’s Day Treats:
>>PIN FOR LATER<<
FOLLOW QUEENSLEE APPÉTIT
Like what you see? Make sure you‘re following Queenslee Appétit for more tasty recipes!
Pinterest | Instagram | Facebook | Twitter |
Have any questions about the recipe? Contact me here, and I’ll be happy to help!
SHARE YOUR PICS!
Tag me on Instagram @queensleeappetit or use the hashtag #queensleeappetit so I could see your gorgeous creations!
SWEETEN UP YOUR INBOX!
SUBSCRIBE to the Queenslee Appétit Newsletter to recieve new recipe notifications, monthly baking tips, sneak peeks to upcoming recipes, exclusive recipes and more!
Let’s get baking!
Tip: always read through the entire recipe before beginning.
Pot of Gold Mini Rainbow Cheesecakes
These Pot of Gold Mini Rainbow Cheesecakes are the perfect fun and colourful treat for St. Patrick’s Day! The creamiest vanilla cheesecake is dyed the colours of the rainbow and filled with beautiful gold sprinkles!
Ingredients
Crust:
- 1 cup graham cracker crumbs
- 2 tablespoon granulated sugar
- ¼ cup Salted Butter, melted
Rainbow Cheesecake:
- 1 and ½ (8-ounce) packages (12 oz) full-fat cream cheese, room temperature
- ½ cup granulated sugar
- 1 Tbsp. cornstarch
- ½ cup sour cream, room temperature
- 1 and ½ tablespoon fresh lemon juice
- 1 and ½ teaspoon pure vanilla extract
- 2 large eggs, room temperature
- Purple gel food colouring
- Blue gel food colouring
- Green gel food colouring
- Yellow gel food colouring
- Orange gel food colouring
- Red gel food colouring
Gold Sprinkle Filling:
- Gold confetti sprinkles (see notes)
- Gold pearls
Sweetened Whipped Cream:
- ½ cup heavy cream, chilled
- ⅓ cup powdered sugar
- ½ teaspoon pure vanilla extract
Topping:
- Gold Sprinkles
- Chocolate Gold Coins
Instructions
For the Crust:
- Preheat oven to 350°F and Line a 12-cup muffin pan with liners. Set aside.
- Add graham cracker crumbs and sugar to a mixing bowl and mix together using a fork. Stir in melted butter until crumbs are completely coated.
- Place 1 heaping tablespoon of crumbs into each liner and flatten using the back of the tablespoon or a small glass.
- Bake in preheated oven for 5 minutes. Allow to cool on a wire rack. Lower oven temperature to 325°F.
For the Rainbow Cheesecake:
- In a large bowl using a handheld mixer, beat the cream cheese on low speed until smooth and creamy, about 1-2 minutes.
- Add the granulated sugar and cornstarch and continue to beat on low until combined.
- Scrape down the sides of the bowl and add sour cream, lemon juice and vanilla extract and continue beating until smooth.
- Add eggs one at a time, beating slowly until just combined, do not overbeat.
- Scrape sides and bottom of the bowl with a rubber spatula to make sure everything is fully combined. Forcefully tap bowl on the counter a few times to release any air bubbles.
- Using a medium cookie scoop, divide batter equally between 6 bowls. Tint the portions purple, blue, green, yellow, orange and red.
- To Layer the Colours: Starting with the purple, add about ½ teaspoon to each liner. If there’s more purple batter left, continue adding a little to each liner until you run out of purple.
- Use the back of a small spoon to spread the purple into an even layer. Repeat step 7 with the blue batter, scooping the blue into the centre of the purple layer. You won’t need to spread it out, just jiggle the pan a bit.
- Repeat with the green, yellow, orange and red. Scoop each colour into the centre of the last colour.
- Bake in preheated oven for 18-20 minutes until the tops are puffed and look dry.
- Remove from oven and allow to cool completely on a cooling rack.
- Once cooled, cover with plastic wrap and refrigerate until firm and chilled, about 2-3 hours or overnight.
Core and Fill the Cheesecakes:
- Once cheesecakes are chilled, remove from refrigerator and wrapper. Gently push an apple or cupcake corer into the centre of the cheesecake. You wanna be extra careful so you don’t push it through the crust. Now twist it slowly while lifting to take out the centre.
- If there’s still too much cheesecake in the centre, simply use a toothpick or butterknife to clean up and scoop out any bits in the hole so we have more space to put our sprinkles.
- Use a small spoon to pour the sprinkles into the hole. Set aside.
Sweetened Whipped Cream:
- In a chilled stainless steel or glass bowl, whip the chilled cream, powdered sugar, and vanilla until it reaches stiff peaks, about 3-4 minutes.
- Pipe the whipped cream in the middle of the cheesecakes, just to cover the hole. Decorate with more gold sprinkles and a mini chocolate gold coin on top! Serve and enjoy!
Notes
- Storage: These mini cheesecakes can be stored covered in the refrigerator for up to 5 days.
- Tools Used: Hand Mixer | Cupcake Corer | Cupcake Pan | Cupcake Liners | Wilton 1M Tip | Medium Cookie Scoop | Small Cookie Scoop | Chocolate Gold Coins
- For the Rainbow Colours: Red Gel Food Colouring | Orange Gel Food Colouring | Yellow Gel Food Colouring | Green Gel Food Colouring | Blue Gel Food Colouring | Purple Gel Food Colouring
- For the gold sprinkles, I used these gold confetti sprinkles and these gold pearls. You can even use gold sugar.
Nutrition Information:
Yield: 12 Serving Size: 1Amount Per Serving: Calories: 205Total Fat: 12gSaturated Fat: 7gTrans Fat: 0gUnsaturated Fat: 4gCholesterol: 61mgSodium: 88mgCarbohydrates: 23gFiber: 1gSugar: 18gProtein: 2g
BON APPÉTIT!
Love, Dedra
©QUEENSLEE APPÉTIT. All images & content are copyright protected. Please do not use my images without prior permission. If you want to republish this recipe, please re-write the recipe in your own words, or link back to this post for the recipe.


